If you are a user of at least one Apple product, then in any case you are required to have a registered Apple ID account, which is your personal account and a repository for all your purchases.
How this account is created in various ways will be discussed in the article. Apple ID is a single account that allows you to store information about your existing devices, purchase and access media content, work with services such as iCloud, iMessage, FaceTime, etc. In a word, no account means no ability to use Apple products.
What services can I use with my Apple ID?
You should only use one account - the one you created, including the password. Enter this data when you want to enter a particular program. With an Apple ID account you are allowed to:
- Log in to the iCloud service in order to sort your personal data stored there;
- Log in to various store areas, for example, the iTunes Store, iBooks Store, App Store, to purchase something or see what you have purchased;
- Log in to iMessage and FaceTime with an account in order to simply chat with colleagues or family;
- Log in to Apple if you are setting up another device on the iOS platform.
Where can I see the identifier in the device parameters?
If you don’t know how to find out your Apple phone ID, then synchronizing with one of the company’s services will help you. If you do this, you can find the identifier in the device parameters:
- The iCloud column is under the user name.
- The App Store section is the top area.
- “Messages” or iMessage – open the “Sending, Receiving” tab and your ID will be there.
- FaceTime is in the second line.
- “Music” – you need to go to the “Home Collection” tab.
- “Video” is the same as in the “Music” section.
- Game Center - at the beginning.
As you can see, looking up the ID is easy. Using one of these methods, you can see the ID of the previous owner of the device if you bought the device used and he did not log out of his account.
How to create an account in the App Store (Apple ID)
Many new iPhone and iPad users face difficulties registering an Apple ID, an account required to download applications from the App Store and various media content from the iTunes Store. In this manual, we described in more detail the process of creating an account in the App Store (Apple ID) from a computer or directly from mobile devices.
How to create an account in the App Store (Apple ID) from an iPhone or iPad
Step 1. Launch the App Store application and at the very bottom of the page “ Selection”
» Click “Login”.
Step 2. In the menu that opens, select “Create an Apple ID”.
Step 3: Select your country and click Next.
Step 4. Accept the user agreement.
Step 5: Provide the following information:
- E-mail - the email address will be the login of your Apple ID account.
- Password - it must contain at least 8 characters, including numbers, uppercase and lowercase letters. The same character cannot be repeated three times in a row.
- Security questions and answers to them.
- Date of birth.
After correctly specifying all the information, click “Next”.
Note: On this page you can unsubscribe from Apple mailings by unchecking the appropriate switches.
Step 6. Select a payment method. In the case of a bank card, you must indicate the card number, security code and expiration date. If you choose a mobile phone as a payment method (Beeline and MegaFon only), then you only need to indicate the mobile phone number.
Advice! You can learn how to create an Apple ID without a credit card in these instructions.
Step 7: Enter your billing address with your salutation, last name, first name, address, zip code, city and mobile phone number. Click "Next".
Ready! You've created an Apple ID account and can download or purchase apps from the App Store.
How to create an account in the App Store (Apple ID) from a computer
Step 2: Provide the following information:
- E-mail - the email address will be the login of your Apple ID account.
- Password - it must contain at least 8 characters, including numbers, uppercase and lowercase letters. The same character cannot be repeated three times in a row.
- Security questions and answers to them.
- Date of birth.
After specifying all the information, click “Continue”.
Step 3. An email with a verification code will be sent to the email address specified during registration. Enter the code in the window that opens and click “Continue”.
Ready! You've created an Apple ID and can sign in with it on your iPhone, iPad, or iPod touch
Important! The first time you sign in with your new Apple ID, you'll be required to provide your payment method, billing address, and mobile phone number.
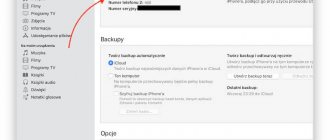
How to view devices linked to Apple ID and unlink them?
There are three main ways to perform this action - on the device itself, through iTunes and through the service.
1
.
Open the Settings
and go to the
iCloud
.
3
. Scroll the page that opens to the list of devices.
4
. Select the required device from the list associated with this Apple ID. You may be required to enter a password.
5
.
To unlink your device from Apple ID (iCloud), click the Remove from account
.
1
. Launch iTunes.
2
.
From the menu bar, open Account
→
View…
3
. Enter your Apple ID login and password.
4
.
In the iTunes in
the Cloud field, click the
Manage Devices
.
The date or number of days after binding is immediately displayed.
Apple ID is a unique identifier that is automatically assigned to each user in the system. When registering, each new buyer simply cannot avoid the procedure of assigning such a unique name.
Each user of Apple products must have their own personal code
However, many do not pay due attention or simply forget the data that was entered. And when any service requires entering an Apple ID, the user asks the question: “Where can I get it?” Let's take a closer look at how to get information about your Apple ID if it is: forgotten or simply reset along with all device parameters.
Next, the system will prompt you to reset your access password. Apple ID is not possible, but you can change it. Protection from intruders is simple - you not only need to indicate the date of birth of the ID owner, but also go through an additional authorization procedure. This can be either a confirmation by email specified in the registration data, or an answer to the security question that was entered when the identifier was first created.
If everything is done correctly, the user receives his Apple ID and access to it. Of course, it is better to change the new password immediately for security reasons.
Account security comes first!
The most important task is the security and secrecy of the personal data contained in the account. But not only manufacturers must protect the device, its owner also has the responsibility to maintain this security. Therefore, there are recommendations on how to ensure maximum protection for your device:
- If you wish, you can read the instructions on how to provide maximum security to your account and the device as a whole from unwanted guests.
- You definitely need to delete security questions and choose ones that are easy for you to remember, but for which it will not be easy for strangers to find the answer.
- It is important to create a backup copy of your email account; you will need it if you forget your password or answers to questions. In such a situation, this address will help restore access to the account through it.
- A very useful item has appeared in the new firmware - this is a two-factor verification or, in other words, two-step verification. It will greatly enhance the security of your device. On later firmware and newest devices, this function is enabled automatically. If you configure it manually, you should go to the phone settings, then to the iCloud service, then you will see the “Password and Security” subsection - this is where this function is located. You can activate it with one click of your finger.
- Finally, you should read the section in the manual or on the website about security and corporate ethics, as well as the responsibility that Apple employees bear for the data you entrust to them. Thus, Apple is currently the best company in data security, but the organizers will not stop there, they will try to further strengthen the protection of user data in order to give a 100% guarantee to people that they do not have to worry about their information.
Do not forget that users themselves must take precautions and should not, under any circumstances, give their account password to third parties, even if it is the person closest to them, so that that information does not go beyond the Apple service. This is the only way Apple product manufacturers can guarantee the safety of their users.
Attackers never sleep
Often, attackers try to gain access to user profiles of Apple devices by sending people letters from fake organizations. The letter will be similar to the original one, but always check the sender's address. For example, letters from Apple come from only one address
If you see the slightest difference in the address, then close the letter without hesitation and never click on links from a “suspicious” e-mail - these are scammers who are trying to gain access to your device. Also, never tell anyone your ID, don't store passwords in accessible places, and always lock your devices. If you block the device, the attacker will not be able to do anything with it - at most, they will sell it for parts.
Create an Apple ID account on your Mac or PC
But there is one important feature
— creating an account today is already possible, unfortunately, not on all versions of iTunes. Starting with version 12.7, the program no longer has the App Store and therefore, before starting, you must check the version you have installed:
- for macOS
- in the menu bar, click “iTunes” → “About iTunes” - for Windows
- select Help → About iTunes
If you have iTunes 12.7 or higher, there are several solutions:
- Register an Apple ID on iPhone or iPad
Registering an Apple ID in iTunes
Step 1 Launch iTunes
Step 2 Go to the Programs section by selecting it in the drop-down list, which is located in the left corner of the panel near the navigation arrows
Step 3 In the same panel (top of the window) click on App Store, then find any free application in the store and click the Download button
Step 4 In the window that appears, click the Create a new Apple ID button
Password requirements:
- at least 8 characters;
- at least one capital letter and one number are required;
- you cannot use several identical characters in a row (111, aaa);
- the password must not match the Apple ID account name;
- it shouldn't be easy (qwerty, password, 1234567890).
Step 6 Now indicate your personal data: first name, last name and date of birth. Among the available questions, choose those that are suitable for you and give answers to them; it is better to write them down somewhere so as not to forget. Confirm the entered information by clicking Continue.
Attention! An important condition for registration is the mandatory use of security questions and answers to them; they are needed to confirm that the Apple ID belongs to you. For example, if you forget your Apple ID password or want to change some information in your account
So take this very seriously!
Step 7 Select “Payment Method” - NO, in the future you can always link your payment card to your Apple ID
We indicate your home address and telephone number. If you are registering not in the Ukrainian App Store, but, for example, in the Russian, American or other one, then you must indicate the address and zip code of the country in which you are registering: for Russia - Russian, for America - American, etc.! You can specify absolutely any address, Apple does not check this
That's all! You can now sign in to iTunes using your Apple ID account.
How to unlink a card from Apple ID: tips, tricks, instructions
Often, owners of Apple gadgets think about how to unlink the card from the Apple ID. In fact, the answer to this question should not be difficult. Every person is capable of coping with the task. The main problems are related to the lack of an option in the settings of mobile phones to unlink bank cards. But this does not mean that payments cannot be refused. What to do under such circumstances? How can I change or delete my Apple ID payment information?
Unbinding methods
It all depends on the user's preferences. Wondering how to unlink a card from Apple ID? There are several ways to solve this problem.
Today, it is proposed to unlink or change payment information in Apple ID:
- using a mobile device;
- via iTunes.
Both solutions are equally effective. They are recognized as official and do not require any special knowledge or skills from the user. How to act in this or that case?
Using a device
How to unlink a bank card from Apple ID? To do this, you need to follow simple recommendations. They will help you both unlink your bank account and remove it from your profile settings.
How to unlink a card number from Apple ID? To do this you need:
- Turn on your Apple device. Wait until it is fully loaded and ready for further work.
- Open the main menu of the device. Go to the “Settings” section.
- Scroll through the list that appears and find the line “iTunesStore and AppStore”. Click on the corresponding inscription.
- Click on your Apple ID. Select “View Apple ID” in the window that appears. Sometimes you will have to log in to do this.
- Click on “Payment Information”. With family sharing, only the organizer can update data.
- Edit information. To unlink the card, you need to select the “No” option in the “Payment method” section.
- Click on the “Done” button.
That's all. Now it’s clear how to unlink a card from Apple ID. To do this, as you can see, is not so difficult. But sometimes users say that sometimes they do not have the “None” option in the corresponding settings section. What to do in this case? Is there any way to solve the problem?
If there is no “No”
Quite. The main thing is to find out why the item responsible for unlinking a bank card is not in the required section. There are several reasons for this.
Namely:
- You have logged into the iTunes Store or App Store for the first time. In this case, you need to log into the application several times.
- The user has automatic subscription activated. “No” will appear in your payment information after you decline this option.
- The user is in debt or in arrears. Until it is repaid, the card cannot be unlinked.
- The region or country in the Apple ID has changed. When editing such data, you will have to provide payment information. After confirmation, deletion of the card will be available.
- The person is in a Family Sharing group. As already mentioned, only the organizer can edit payment information. It will display the “No” item in the corresponding section of the “Apple ID” settings.
If all these cases do not apply to the situation of a particular person, it is recommended to contact Apple ID technical support or take the gadget to a service center. They will help you understand the situation.
Via PC
How to unlink a card from Apple ID? The next method is working with a computer. To accomplish this task, you need to install iTunes. Without this application, you will not be able to work with an Apple smartphone.
How to unlink a credit card from Apple ID? After paying off the debt, you need to:
- Install the latest version of iTunes on your computer.
- Launch the appropriate application.
- Using a USB cable, connect your smartphone/tablet to your PC.
- Log in using your Apple ID in iTunes.
- In the menu located at the top of the window, select “Account” - View.”
- Enter your password to log in. Confirm the action by pressing the Enter button on the keyboard or “View” on the screen.
- Go to the “Account Information” section. Click on the “Edit” button.
- In the “Payment Method” section, set the “None” option. Click on “Done” to confirm the changes.
At this stage, the data will be saved. From now on, it is clear how to unlink the card number from Apple ID in one case or another. This process will not cause any difficulties. After completing the unbinding of the plastic via the PC, you can disconnect the mobile phone from the computer and continue working with it.
How to create an Apple ID on iPhone without a credit card
The main difficulty for iPhone owners is this: how to create an Apple ID on iPhone
without a credit card. Let's assume that you don't have the necessary plastic, or you want to use the capabilities of your account for the first time without linking a card.
So, the algorithm for registering an Apple ID account without a card:
- Open the App Store on your gadget (iPhone or iPad).
- Find the "Free Apps" tab and then look for the "Top Free Apps" section.
- Click on one of the free apps and start installing it on your iPhone.
- Click on the “Create Apple ID” window that pops up.
- Enter the exact data in the “Country” column.
- Read the user agreement and only then accept it.
- Try to fill out all fields as much as possible.
Password. Create a password. It should be complex and contain numbers and Latin letters. Of course, there should be no repetitions or gaps.
Safety. Don't neglect additional questions to establish safety.
Date of Birth. Set your real age, but keep in mind that users under thirteen years old cannot log in. Device owners under the age of majority will be able to use limited features.
Next, follow this:
- after entering your data, click on the “Next” button;
- after the “Payment method” offer, refuse it;
- Next, enter your coordinates. They may not be accurate;
- Click “Next”. Immediately after this, a letter will be sent to your email. Click "Confirm Now" and provide your Apple ID.
Difficulties with resale
It happens that a person does not buy a new gadget. In such a situation, you may have some difficulties if the codes were not created by you, but by the previous owner. You can find out your Apple ID by its serial number. How exactly?
- If a similar situation arises and you do not have an ID, please contact support. Everything can be done online by simply writing an application. You can also use the services of authorized services.
- Your employees will ask you to provide the serial number, which is indicated on the packaging of the gadget, and a receipt confirming the first purchase.
A little advice: when purchasing a device from someone else, ask for the purchase receipt and the box with the device; only with these items will you be able to restore access to your profile if something happens.
How to properly manage your Apple ID account?
An Apple ID account has the right to be used on all devices of this brand and has permission to a variety of programs, so you should always update your individual data. To do this, you simply need to go to your ID web page and change or update your details:
- It is advisable to update your email to show that the email is valid;
- You should periodically change your password to avoid hacking and secure your device;
- You can add various secondary email accounts so that people around you can find you using the following programs: FaceTime, iMessage and Find My Friends;
- Surprisingly, you can view and manage different devices if you're signed in with your Apple ID.
Search service
The official Apple portal has a service that makes it possible to remember the client ID. To do this, you will need to do the following:
- Go to https://iforgot.apple.com/password/verify/appleid#!§ion=appleid.
- Please indicate your first name, last name and e-mail.
- Enter the verification code and go to your mailbox, follow further instructions.
Create a separate account to monitor family gadgets
Of course, you shouldn’t forget about safety, because your gadget can simply be forgotten in a cafe or simply lost. This is precisely why the Find My iPhone service was created, which is tied to iCloud, and we wrote about this above.
But in order not to share personal data from the cloud, but to know the whereabouts of your household, it is better to use the “Find Friends” service, which was developed by Apple specifically for these purposes. It allows you to easily share your location.
Let's look at the situation with Apple ID accounts using an example
For example, there is a family that consists of a mother, father and son/daughter. And everyone has apple technology. All devices are linked to a common App Store account from which programs and games are installed. At the same time, the son/daughter doesn’t really want to share photos of the next get-together, so he synchronizes the photos, documents and notebook in iCloud under a different ID.
In addition, the Find My iPhone function is enabled on the same iCloud account so that, if necessary, you can find the owner of the phone and send him a message. And to share location between interested people, the “Find Friends” program is connected.
Well, individual programs: FaceTime, GameCenter, Messaging, HomeSharing, App Store can be configured to any other ID. This can also include an additional App Store account, for example, a purchased general account (the App Store ID can only be used to install programs/games).
You can specify any other account in the App Store application and install programs from it that you do not have on your iPhone.
The device can simultaneously contain applications installed under different IDs from the App Store application. They get along well with each other until they synchronize with iTunes.
Checking Activation Lock Status
The status of an iPhone or any other iOS device can be found using the official Apple website. If you want to check your iPhone by IMEI for activation lock, then follow these steps:
- Sign in to iCloud and go to the Activation Lock page.
- Enter the serial number or IMEI of the device you want to check.
- Additionally, enter the code from the picture to confirm the action.
After this, the tab will automatically update, and the activation lock status (enabled, disabled) will appear on the page. It is recommended to use the service before purchasing an iPhone from your own hands.
What is Apple ID
Having such a bundle, you can buy applications in the AppStore, buy media content in iTunes, use the Find my iPhone service, synchronize mail, contacts, notes, etc. in iCloud cloud storage.
And in general, wherever you go with your iPhone, you will be asked for your Apple ID (even in the Apple Store, imagine).
There are several ways to create an Apple ID. It all depends on the type of device in your hands. In this article we will look at two main ways to create an Apple ID:
- on an iOS device (iPhone, iPad, etc.)
- on a computer with iTunes installed (MAC or PC)
Very often, new iPhone users find themselves in a situation where the store (where they sold the iPhone) provides an Apple ID registration service for 500 rubles. At the same time, they do not always provide the password, which is blasphemy. I hope you haven't found yourself in this situation? And thank God!
YOU CAN REGISTER AN ACCOUNT YOURSELF COMPLETELY FREE OF CHARGE.
Now let's go! You will succeed!
How to register an Apple ID without linking a bank card
The user does not always want or can indicate his credit card during registration, however, if, for example, you decide to register from your device, then the screenshot above shows that it is impossible to refuse to indicate the payment method. Fortunately, there are secrets that will still allow you to create an account without a credit card.
Method 1: registration through the website
In the opinion of the author of this article, this is the simplest and most optimal way to register without a bank card.
- Register your account as described in the first method.
- When you sign in, for example, on your Apple gadget, the system will report that this account has not yet been used by the iTunes Store. Click on the “View” button.
A window will appear on the screen to fill in the information, where you will need to indicate your country and then proceed further.
Accept Apple's fundamentals.
You will then be asked to indicate your payment method. As you can see, there is a “No” item here, which needs to be checked. Below, fill in other personal information that includes your name, address (optional), and mobile phone number.
When you proceed further, the system will notify you that your account registration has been successfully completed.
Method 2: Register via iTunes
Registration can easily be done through the iTunes program installed on your computer, and, if necessary, you can avoid linking a bank card.
This process has also already been discussed in detail on our website in the same article on registration through iTunes (look at the second part of the article).
Method 3: Register via Apple device
For example, you have an iPhone and you want to register an account without specifying a payment method from it.
- Launch the Apple Store on your device, and then open any free application in it. Click the “Download” button next to it.
Since the installation of the application can only be performed after authorization in the system, you will need to click on the “Create Apple ID” button.
The usual registration page will open, in which you will need to perform all the same steps as in the third method of the article, but exactly until the window for selecting a payment method appears on the screen.
As you can see, this time a “No” button has appeared on the screen, which allows you to refuse to indicate the source of payment, which means you can safely complete registration.
Once registration is completed, the selected application will begin downloading to your device.
How to set up a recording
After creating your account, you can safely proceed to setting it up.
This is not a mandatory step, but the setup makes it possible to select a special image - an avatar for recording and secure the information located there by setting a security password.
The first thing you will need to do is go to the Start menu.
At the very top of the left column, in the menu that opens, you can see a large square icon; the default image may be set there or it will not be translucent.
What the account menu looks like is shown in the image below.
Move the mouse cursor to this square and click on it using the left mouse button.
As a result of these actions, a folder will be opened in which the accounts are displayed.
See how it looks in the picture.
Changing the account
This is where you will see your account created with your name.
Under the account name, the type of the record itself is displayed, it can be Administrator, Normal Access or Guest, and the type of security of the record is also indicated, for example, password.
To increase the security of your personal data, it is recommended to create account protection using a password.
Only the account owner and administrator should know it, since all changes to parameters and settings are made directly from an account with administrator rights.
On the left side of your account display there is a list of options you can use to change your account settings, one of which offers “Change your picture.”
Select this item and click the mouse.
Changing the drawing
After these steps, a window will appear on the desktop where all available system images for the entry’s avatar are collected.
Select the image you like and click the “Change picture” button. Ready.
The image is set, the window with pictures will be closed automatically.
Choose your favorite avatar
You can also change the name for your account.
To do this, left-click on the account, after which a window will open with an input field for the new account name.
Specify a new name and click the Rename button.
Enter your account name
Be sure to set a password to protect your account.
To do this, go to the appropriate section: “Account Management”.
To select it, click the Start button, click on the account icon at the top and select manage another account.
In the window that opens, select the account for which a password will be created.
Click on it with the left mouse button.
Select the “Create a password” section and click on it.
The selected password must be entered twice to confirm.
Come up with a strong password; if you have difficulty with this, you can use a password generator.
It is very important to remember the password. Also, to restore, you must provide a hint (this could be a phone number, the last name of your mother, friend, etc.)
Also, to restore, you must provide a hint (this could be a phone number, the last name of your mother, friend, etc.).
Create a password
That's the whole procedure, the password has been created.
You can safely use your account and not worry that any other user will gain access to your workspace.
How can I remember my password in the future?
Never select prime numbers; this is what an attacker will use when trying to obtain data on your device. If you want to protect your profile, but don’t want to remember long combinations, you can use one trick. Associate the password with something close to you, or you can simply store the password in a safe place. Which one exactly?
- cloud storage from other developers;
- password manager with fingerprint access.
Don't forget that if a person receives data from your device, he will be able to conduct banking transactions, find personal photos, and use confidential information. Nobody wants such a risk.
Activate a common account for purchases on all gadgets
It is recommended to use one Apple ID with a valid credit card, through which all purchases will be made.
This account must be activated on all iPhones and iPads, which will allow you to access all purchased applications from any family gadget. In addition, do not forget about services such as iTunes Match, which everyone in your household may also want access to, so be sure to activate it in advance.
I would like to remind you that you can use as many devices as you like with one Apple ID.
“Settings” – “iTunes and App Store” – “Apple ID”
If you have an identifier, but no access to the profile
It happens that you roughly remember your ID, you need it at a certain time, but you don’t have an Apple device at hand. What to do in this case? Are you wondering how to find out your Apple ID by phone number? Then do the following:
- Go to the recovery page – https://iforgot.apple.com/password/verify/appleid
- Enter your ID, then the verification code from the image.
- Now you will need to enter the phone number to which your account is linked. This is how you will restore access to your profile.
- If there is no access to the phone, then you can simply select the item where it says that there is no access to testing devices.
- Then simply click on “Request recovery”.
- Confirm your bank card and follow the instructions.
- If the card option is not suitable, then choose the answer option that says that you cannot use a credit card.
- Then you will be offered to receive instructions via SMS or phone call.
How to register an account in another country
Sometimes users may encounter the fact that some applications are more expensive in their native store than in the Store of another country, or are not available at all. It is in such situations that you may need to register an Apple ID of another country.
- Street – street;
- City – city;
- State – state;
- ZIP Code – index;
- Area Code – city code;
- Phone – telephone number (the last 7 digits must be entered).
For example, we opened Google maps through a browser and made a request for hotels in New York. We open any hotel we like and see its address.
So, in our case, the filled address will look like this:
- Street – 27 Barclay St;
- City – New York;
- State - NY;
- ZIP Code – 10007;
- Area Code – 646;
- Phone – 8801999.
After filling out all the data, click on the “Create Apple ID” button in the lower right corner.
The system will notify you that a confirmation email has been sent to the specified email address.
The letter will contain a “Verify now” button, clicking which will complete the creation of an American account. This completes the registration process.
This is all I would like to tell you about the nuances of creating a new Apple ID account.
Describe what didn't work for you. Our specialists will try to answer as quickly as possible.
Method No. 2. iTunes
After the program is downloaded and installed, you need to do the following:
Launch the iTunes program and in the iTunes Store (you can select this in the panel on the left), select any free application and click on the “Free” button next to it (such buttons are shown in red lines in Figure No. 16). In the window that opens, click on the “Create Apple ID” button.
In the window that opens, click the “Continue” button. This is the Apple ID presentation page.
Next we will be asked to read a large license agreement. It is advisable to do this, and then click the “I Agree” button, that is, “I agree.”
On the next page you will need to provide your payment information. Most likely, you are not located in the USA, so you will need to indicate this by clicking on the “click here” inscription at the top of the page (highlighted with a red line in Figure No. 20). The payment information page itself will look exactly the same as shown in this figure, only instead of lines for states, there will be lines for country and region. After filling out this information, you need to click the “Create Apple ID” button.
On the next page, enter your address and click the “Create Apple ID” button again.
After this, the program will display a message stating that an email should be sent with a link to confirm your registration. We go to the mail, find the link there and confirm.
In the video below you can clearly see how an Apple ID is created in iTunes on a computer.
The most common mistakes when creating an Apple ID
In fact, there are not many of them, because the process of registering an ID is quite simple, but the most common are these:
- Many people do not want to make purchases in the App Store using a credit card or mobile phone account, but only use free content. However, for some reason they are unable to create an Apple ID without a card. If this is your case, then carefully read these simple instructions.
- There are age restrictions. You can register an account from the age of 13 (no less) and then, in this case, only with parental consent. A full-fledged Apple ID is created only when you reach 18 years of age. It is interesting that if an incorrect age was initially specified, and then, in response to a system warning, the date of birth was changed to another, “later” one, it will still not be possible to register. The system will stubbornly repeat: “you have not yet reached the established minimum age.” You will either have to delete everything from the gadget and start over, or use a computer to create an account. Therefore, here you need to be careful and indicate an age of over 18 years from the very beginning, so that there are no unnecessary problems.
- The following email addresses cannot be used as an Apple ID login: @iCloud.com, @me.com. Create any other mail.
- You can also see a similar message - “the name contains invalid characters.” In this case, carefully review what you enter in the appropriate fields. For example, a mailbox cannot contain Russian letters in the name, and numbers, dots, etc. cannot be indicated in the first and last names.
- Be sure to take into account the password requirements; it should not be too simple, otherwise registration will not take place. More details about this, plus examples of correct and valid passwords, are here.
- It is possible that Apple ID creation is not successful due to a failure of the activation servers. This doesn't happen often, but it does happen. How can I find out if everything is fine with the services at the moment?
As you can see, almost all errors are associated with ordinary inattention. Although there is one more and it is worth talking about in more detail.
How to register an Apple ID without linking a bank card
The user does not always want or can indicate his credit card during registration, however, if, for example, you decide to register from your device, then the screenshot above shows that it is impossible to refuse to indicate the payment method. Fortunately, there are secrets that will still allow you to create an account without a credit card.
In the opinion of the author of this article, this is the simplest and most optimal way to register without a bank card.