Preparation
Before you begin the software installation process, have all the necessary tools ready. Having everything you need at hand, you can quickly and easily carry out the firmware, as well as correct the situation if any failure occurs during the manipulations.
Necessary
Depending on the chosen method of installing the software and the desired result, the operations may require the following:
- A laptop or PC running Windows of any current version;
- A high-quality patch cord through which the TV Box is connected to the PC network card;
- USB storage device with a capacity not exceeding 4 GB. If such a flash drive is not available, you can take any one - in the description of methods for installing the system in MAG250, which will require this tool, it is described how to prepare it before use.
Types of firmware, download
The popularity of the MAG250 is due to the large number of available firmware for the device. In general, the functionality of different solutions is very similar and therefore the user can choose any version of the system, but shells modified by third-party developers have much more options. The methods for installing official and modified operating systems in MAG250 are completely the same. When downloading packages, you should take into account the fact that in order to fully flash the device firmware, in all cases you will need two files - the “Bootstrap***” loader and the “imageupdate” system image.
Official software from the manufacturer
The examples below use the official version of the shell from Infomir. You can download the latest version of the official firmware from the manufacturer's FTP server.
Download official firmware for MAG 250
Modified software shell
As an alternative solution, the firmware from the Dnkbox team is used, as a modification characterized by the presence of many additional options, as well as the shell that has received the largest number of positive user reviews.
Unlike the official version of the system installed in the set-top box by the manufacturer, the solution from DNA is equipped with the following capabilities:
- TV program from yandex.ru and tv.mail.ru.
- Integrated Torrent and Samba clients.
- Support for user-created menus.
- Automatic start of IP-TV.
- Sleep function.
- Recording the media stream received by the set-top box to a network drive.
- Access to the software part of the device via the SSH protocol.
There are several versions of the shell from DNK, designed for installation in different hardware revisions of the device. You can download one of the solutions from the link below:
- Archive "2142". Designed for devices that have the STI7105-DUD processor installed.
- The files from the “2162” package are used for installation in set-top boxes with an STI7105-BUD processor and AC3 support.
Determining the hardware version of MAG250 is very simple. It is enough to check the presence of an optical connector for audio output on the back panel of the device.
- If the connector is present, it is a set-top box with a BUD processor.
- If missing, the DUD hardware platform.
Determine the revision and download the appropriate package:
Download DNK firmware for MAG 250
To install alternative firmware in the MAG 250, you must first install the official version of the system “cleanly”. Otherwise, errors may occur during operation!
Modernization of the MAG TV set-top box - Sky Bridge: accessible communication for everyone!
We will describe a simple way to make a budget multimedia center from a regular MAG-250 (Aura_HD) TV set-top box and their compatible copies and models.
The problem with standard solutions like Smart-TV and all other standard tools is that, for a number of reasons, they do not allow us to create a truly real multimedia service, fully using the capabilities of the device we purchased. And the capabilities of this hardware are much more extensive than what a manufacturer can offer us, constrained by copyright agreements and contracts with large holders of multimedia content.
Standard applications
You can view content from popular social networks such as VKontakte. You can also access television services and content from popular entertainment resources.
To get additional functions using standard tools, you can simply download additional applications to the set-top box. To do this, go to the “internal portal” of the set-top box through the “Settings” menu, and then to the “Applications” section.
But if this is not enough, you can turn the set-top box into a full-fledged multimedia center with a torrent client and the function of automatically downloading files to the set-top box for later viewing.
Attention! The operations described below may damage your device and void your warranty.
Modernization of the set-top box
Since we plan to load the device somewhat more than designed by the manufacturer, we recommend adding cooling for the set-top box’s CPU. We installed a radiator measuring 26x26x14 mm. Such a radiator and hot-melt adhesive for attaching it to the processor can be purchased at any radio electronics store.
The firmware from “DNA” was chosen as an alternative software for the set-top box, but it can be any so-called. "custom" firmware. Due to the popularity of this console, the choice of firmware is quite extensive.
A resource where you can discuss the operation of the firmware: https://www.pristaa.de/
Resource where you can download the latest firmware versions from DNA: https://cloud.mail.ru/public/MzBX/qbaLX9gWS/
Please note that before updating the firmware you need to check the model of your set-top box. Our example involves the MAG250 prefix. Next, follow the instructions from the author of this firmware:
- The flash drive must be formatted in FAT32 and no more than 8 gigabytes , unpack the contents of the flash drive to get the disk name\ mag250 \*.*
- We insert the flash drive into the USB at the back of the console.
- We restart the set-top box and hold down the button on the remote control (R/C) and go into the BIOS of the set-top box
- (Reset all settings) - in the BIOS menu select Def. Setting click OK
- Next, go to Upgrade Tools
- We select USB Bootstrap - we agree with everything by pressing the OK button - the firmware is ready (once the firmware is completed, the set-top box will reboot)
Note that after downloading the firmware files, they need to be renamed to Bootstrap and imageupdate, respectively.
After updating and downloading, the set-top box, in addition to standard functions, will receive a number of additional applications
Torrent client
The “Transmission” torrent client and the “shared files” server are already installed on the set-top box. However, these extensions are not activated yet. You can enable them in the Set-top box Settings in the Extensions menu.
If you want to access files or use the media center as also a file storage, then both extensions must be enabled.
Now, you need to insert a USB flash drive or removable hard drive into the rear connector.
The set-top box supports popular file systems such as NTFS, FAT32/64, EXTx, and also supports large disks, so you can easily use modern external hard drives with a capacity of more than 1TB as a storage device. This already adds to your set-top box the role of a NAS drive with multimedia functionality.
Our example involves a ready-made solution - this is an external hard drive from the manufacturer Western Digital, My Passport Ultra Metal Edition line, with a capacity of 2 TB.
The choice of device is due to the fact that the disks of this manufacturer are durable, subject to operation in 24/365 mode.
It has an aluminum body, which means it is less susceptible to overheating when used around the clock, and is also equipped with a built-in energy saving mechanism.
Therefore, at a time when you are not using it and there are no active file sharing tasks, your drive stops spindle rotation, which significantly saves hard drive resource.
Now you need to get to the set-top box through a regular Internet browser, having found out its IP address on your network using this path: https://set-top box ip-address:9091/
Also, there is an even more convenient way to add files to the download list using programs for Android devices that allow you to manage Transmission .
For example:
- Remote Transmission GUI
- Remote Transmission
- Torrnado
- Transdrone
The example shows the interface of the Torrnado program. It seemed to us the most convenient to use, but they are practically no different from each other either fundamentally or functionally.
Just open the link in your browser using this program and the download will be added automatically.
All the files that you add for downloading to this program will automatically appear on your set-top box and all you have to do is start viewing them.
Viewing multimedia files is carried out through the internal portal in the Home Media
That's all! With relatively simple manipulations, it turns out that you can get a budget version of a multimedia center at home, which can also be equipped with a NAS function, where you can not only store your library of photos, videos, documents, etc., but view it all from the same device.
Enjoy watching!
Source: https://fiberbridge.ru/ru/modernizatciia-tv-pristavki-mag/setup-connect/modernizatciia-tv-pristavki-mag
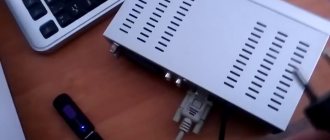
Preparation for firmware MAG-250 and IPTV RT-STB-HD
To flash TV set-top boxes with Rostelecom software (Smartlabs) to Infomir software, you will need: - a computer or laptop with an Ethernet network card. — network cable (patch cord) for connecting the set-top box to the computer. - programs - mcast.exe and dhcp server (for example, dualserver). - latest version of official firmware - link. You need to download the Bootstrap file (bootstrap) and imageupdate (firmware). It is best to flash your MAG-250 with alternative firmware after you have flashed it with the official one. Otherwise, you risk fiddling around for a long time with zero results.
MAG 250/245: setting basic parameters
Once all the necessary cords have been connected and a suitable place has been found for the set-top box, you can begin turning it on, which will most likely begin with updating the MAG 245/250 firmware from Rostelecom. The first download of the software may take up to 10-15 minutes. This is normal, since the provider quite often releases small system updates, the installation of which will take time upon first launch. The frequency of releases of new firmware for MAG 245/250 from Rostelecom usually depends on the device model used. The updates are designed to improve the quality of operation and functionality of the equipment. Since they are required, you will not be able to download without skipping this process.
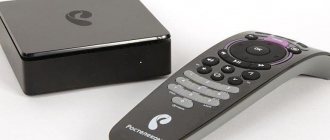
Introduction. What is MAG-250?
If you are not familiar with this set of letters and numbers, then you might think that this is a magician numbered 250. In fact, this has nothing to do with the world of magic and wizardry. MAG-250 is a set-top box that makes it easy to launch a project over IP networks. This is also a kind of magic of modern technology, because before there were no such devices on the market. They began to gain popularity quite recently, as a relatively new product in Russia. Now you can see similar gadgets in almost every home.
There is nothing complicated in the MAG-250 firmware if you follow the instructions and do everything correctly
These set-top boxes are most often used by Internet service providers, content aggregators and other services providing IPTV, VoD and OTT based services. That is, such devices are designed to open digital TV channels, play streaming video and other similar things.
Firmware for TV set-top box MAG 250
TV set-top boxes are one of the few available means of expanding the functionality of outdated and many modern televisions, as well as monitors.
One of the most popular such products can be considered the MAG-250 TV Box from the manufacturer Infomir. Let's figure out how to equip the set-top box with a new firmware version and bring a non-working device back to life. The main function of MAG-250 is to provide the ability to watch IP-TV channels on any TV or monitor with an HDMI interface. Depending on the firmware version, this option and additional functionality can be performed by the set-top box in different ways.
Therefore, below are options for installing both official versions of the software and software shells modified by third-party developers.
All responsibility for the results of manipulations with the TV-Box software lies solely with the user! The resource administration is not responsible for possible negative consequences of following the instructions below.
Features of consoles
Digital television is supplied based on technical solutions from SmartLabs. This is a leading manufacturer of equipment for interactive TV in our country. The consoles have a good reputation. They are bought in many countries around the world under different brands.
Today there are about a dozen models of the Rostelecom set-top box. The company reserves the right to decide what equipment to use in different regions of the country. Usually clients don't have to choose. But that's not scary. No matter where you live, ITV will work consistently. The only condition for this is good bandwidth and a stable Internet connection.
Modern Rostelecom iptv set-top boxes are high-performance devices with which customers have the opportunity to use all the latest developments in the field of interactive TV.
As a rule, the company supplies equipment from the STB Mini series. Four models are current: SML-5010, SML-5050, SML-5041, SML-5010CT.
Most often, the junior model 5010 is supplied to the market, the capabilities of which are more than enough for all services of a digital TV provider.
There are other SmartLabs devices on the market under the Rostelecom brand. They were produced earlier and are still actively used in many Russian homes. In some regions, these slightly outdated but still functional set-top boxes are being delivered to customers. Some of them: SML-482 HD, SML-282 HD Base, SML-292 HD Premium.
Expert opinion
Telekom Telekomych
Telecommunications expert and just a nice guy
It is better to avoid the following models: Infomir MAG-250, Infomir MAG-200, IPTV RT STB HD Standart, IPTV HD 101 (103), Yuxing YX-6916A, Motorolla VIP1003. They are hopelessly outdated. The technical characteristics of the “old guys” are not good enough to “pull” modern content and services.
The main connectors of the set-top box
The front panel of the set-top box is equipped with an equipment status indicator, one USB port for connecting devices and an infrared signal receiver for the remote control.
The back panel of the set-top box has more functions than the front. It contains connectors for:
- power supply (12V);
- composite audio/video (3.5 mm);
- digital audio/video (HDMI);
- Internet (Ethernet 10/100).
Comparison table of technical characteristics for some models
| Model | CPU | RAM | Flash memory | Dimensions, mm | Weight, g. |
| SML-5010 | Broadcom BCM7230 | DDR3 512 MB | 256 MB | 110x107x33 | 130 |
| SML-5050 | Quad-Core ARM Cortex A7 clocked at 1.5GHz | DDR3 512 MB | NAND 256 MB | 110x107x33 | 130 |
| SML-5041 | 64-bit Quad-core ARM Cortex-A53 clocked at 2.0GHz | DDR3 2GB | eMMC 8GB | 110x107x33 | 130 |
| SML-5010CT | Broadcom BCM7230 | DDR3 512 MB | 256 MB | 110x107x33 | 130 |
| SML-482 HD | BCM7230750MHz dual-core | DDR3 512 MB | 256 MB | 100x100x32 | 140 |
| SML-282 HD Base | STi7105 | 256 MB | 128 MB | 150x150x55 | 470 |
| SML-292 HD Premium | STi7105 | 256 MB | 128 MB | 150x150x55 | 470 |
| Infomir MAG-250 | STi7105 | 256 MB | 256 MB | 125x86x28 | 156 |
| IPTV RT STB HD Standard | STi7105 | 256 MB | 256 MB | 125x86x28 | 156 |
| Yuxing YX-6916A | Broadcom BCM7413(800Mhz) | 512 MB DDR | 200x160x38 | ||
| Motorola VIP1003 | STi705 | 256 MB | 64 MB | 160x130x35 | 300 |
Update via HTTP protocol (WEB)
'Settings' menu in the built-in portal
- Login to Settings ;
- Select Software Update ;
- In the window that opens, select Manual update ( F2 );
- In the Software Update , in the Available version , select the required software version (the latest software version is displayed first in the list at the top);
- To update, select Update ( F1 );
- Wait for the update process to complete. The software update status is displayed as a filling progress bar and comments. Once the software download is complete, the set-top box will automatically reboot .
Example. “Settings” in the built-in portal.
Menu 'System settings' in the built-in portal
If a standard software image (manufacturer's software image) is used, the update will occur from the manufacturer's server to the current stable software version. The standard version (image) of the software contains the following update address: https://update.infomir.com/mag//imageupdate ( – base model number: 250, 254 or 270). Note. The line is available for editing using a virtual keyboard (called by the KB on the remote control) or a computer keyboard connected to USB.
The update is carried out as follows:
- Enter System Settings ;
- Enter the Software Update ;
- In the window that opens, in the Update method select HTTP ;
- Select Check (OK);
- In the Software Update , a description of the current version and the version of the software available for updating is provided - to analyze the need for an update;
- To update, select Update ( F1 );
- Wait for the update process to complete. The software update status is displayed as a filling progress bar and comments. Once the software download is complete, the set-top box will automatically reboot .
Example. Software update from the “System Settings” menu in the built-in portal
What do you need to know before installing the firmware?
First, you will need to determine the version of the installed software, since this will determine which firmware file you download in the future. Therefore, your procedure is as follows:
- Open the settings of the set-top box and find the “Firmware” item.
- Now look at the version. Now we will compare it with the data that is presented and conditionally divided below. This is done for convenience, which you will appreciate later.
So, our three conditional divisions by firmware:
- Your version is 2248.
- Your version is lower than 2248.
- And the last option is 2281.
If with version 2281 everything is extremely clear and understandable (you have the latest version of the operating system installed, and you do not need to reflash anything), then in the other two cases we will tell you in detail what you need to do.
IPTVPORTAL Middleware
The MAC address of the ethernet interface is used as the set-top box identifier, regardless of which interface the set-top box is connected through.
For a set-top box with factory firmware
To work with the iptvportal
it is necessary to replace the factory firmware. Firmware update procedure:
- Installation of intermediate firmware.
- Performed from a flash drive. It is better that the flash drive is no more than 4 GB. Formatted in FAT32.
- Place the following files on the flash drive in the mag250 folder:
- imageupdate_trans -> rename to imageupdate
- Bootstrap_250 -> rename to Bootstrap
- The flash drive must be inserted into the console into the rear USB
- Install the intermediate firmware through the BIOS of the set-top box (when turning on the power, hold down the MENU button on the remote control). USB Bootstrap
- Installation of final firmware.
- Place the imageupdate file on the flash drive in the mag250 folder
- Update the firmware through the set-top box settings menu. [SETUP] Settings-Update-USB)
For a set-top box with firmware from Mediaoperator (MOOVI)
For a set-top box with other versions of Mediaoperator (MOOVI) firmware, the update from a flash drive is carried out according to point 2 of the previous section. Accordingly, only one firmware file is required (Final). If you have Internet access, you can check for new versions on the update server from the set-top box menu.
Firmware files:
- Version 001
(based on 0.2.18r7a5) imageupdate_trans https://cloud.moovi-iptv.ru/index.php/s/Bill1atLlPVW00K - Bootstrap_250 https://cloud.moovi-iptv.ru/index.php/s/f5zt3OXwkbQYJCl
- imageupdate https://cloud.moovi-iptv.ru/index.php/s/NQHzeVaO9vjMWSC
(based on 0.2.18r12a5)
- 3 files https://cloud.moovi-iptv.ru/index.php/s/sXrCjLU1m3hHfor
Version 2248
- First of all, download the firmware files (there are only two) to your computer or laptop. Owners of MAG-250 set-top boxes with version 2248 can update their devices to version 2281. Therefore, the files will contain bootstrap_2281 and imageupdate documents
(https://www.lanta-net.ru/files/Bootstrap_250_2281)
(https://www.lanta-net.ru/files/imageupdate_250_2281)
- Now you will need to change the name of the downloaded documentation. Right-click on the file and select “Rename”. We remove all numbers, dashes, underscores and other attributes, leaving only the words bootstrap and imageupdate.
- Now we will need to format the flash drive in FAT format. To do this, in the “My Computer” menu, right-click on our drive and select “Format”. Here, in the tabs, find the FAT32 system type and agree on it (check mark or other marking element).
- Next, go into the flash drive itself and create a new folder, which you must name mag. Strictly this way, nothing else. There is no need to write capital letters, spaces or commas. Because this will affect the firmware process. And since we don’t want any troubles to arise, we strictly follow the instructions. Transfer the firmware files from step two to the created mag250 folder.
- So, the flash drive is ready, and you can connect it to the set-top box. We unplug it from the outlet, then turn it on again and at the same time hold down the menu key on the remote control.
- Now a whole dialog box has opened before your eyes, where you need to select the Upgrade Menu. This can be done by moving the white selection bar using the up and down navigation buttons on the remote control, then pressing the right arrow key. If you don’t have such an item in the menu, then select Upgrade Tools in the same way, and then USB Bootstrap.
- So, all that remains is to wait for the flashing process to complete, as a result of which you will receive a notification on the screen about a successful operation. Next, the device will reboot.
MAG 245/250 Rostelecom
MAG245 and 250 Micro set-top boxes allow you to access TV and movies through digital television services from Rostelecom. You can interact with all functions of the equipment using the remote control to navigate through the menu screen. The player is customized for each provider using firmware provided by the service provider.
Before you start using set-top boxes, you need to familiarize yourself with how to install and connect the MAG245 Micro and MAG250 Micro models in question.
Find out how to set up a D-Link DSL 2760u wireless router for services from Rostelecom.
You can read about how to change the password on the D-Link DIR 620 Wi-Fi router yourself here.
The device provided by Rostelecom does not require complex configuration, since all the main options for working with IPTV from the provider are already built into the software. The user will only have to connect all the necessary cables and follow the installation recommendations.
Connectors and indicators of the set-top box
The front panel of the set-top box has only one port used to connect USB devices. On the right here you can find an indicator that will inform you about the status of the equipment. Not far from it, behind the plastic, there is an infrared signal receiver for the remote control.
The back panel is more functional. Here are the connectors:
- power supply (12V);
- composite audio/video (3.5 mm);
- digital audio/video (HDMI);
- Internet (Ethernet 10/100).
MAG 250/245 from Rostelecom: connection instructions
To successfully connect MAG 245/250 from Rostelecom, you need to check the package, which must include: instructions; power unit; audio/video cable RCA 3.5; set-top box, remote control, batteries (x2).
Rostelecom, as the official provider of digital television services, has already configured the basic parameters of the MAG 245 and 250 set-top boxes. Therefore, all we have to do is connect the necessary cables. First of all, connect the Ethernet cable and power supply to the appropriate ports.
Next, we will need to choose a connection method to the TV. For this, the following options are provided: HDMI and RCA 3.5.
The first, namely HDMI, will be optimal, as it will be able to provide not only a high-quality picture in 1080p, but also transmit surround sound to the speaker system connected to the TV. Connecting using a composite cable may only become relevant if there is no HDMI cord or digital connector on your video equipment. To use the second option, a special cable is already provided in the kit. The image quality in this case will be 480p.
The manufacturer also recommends paying attention to the conditions required for installing the set-top box. The product should not be placed on slippery surfaces, in places where it may be subject to vibration or falling hazards, or other possible hazards. After removing the console from the package, do not shake it, as this may affect the performance of the internal components. Installing the device on a soft surface, such as a carpet or sofa, may cause the equipment to overheat, as such a covering will prevent proper ventilation. It is also not recommended to place the set-top box on other equipment that will heat up during use.
The IPTV player is designed to be placed horizontally on a flat surface. It is recommended to place the device on a television stand with a shelf height of at least 20 cm, which will ensure proper ventilation of the equipment.
Attention! If the device is damaged due to incorrect operation or incorrect installation, the product warranty becomes invalid. Do not forget to comply with all terms of use of the console.
Update using Multicast broadcasting method
Updating using the Multicast broadcasting method is performed from the Bootloader menu. This method can only be used to install a public1 version of the software of the required STB model, located in the software release or prepared by the user independently according to the instructions of the STB manufacturer. The following can be used as a utility for broadcasting update files on a local network:
- for Linux OS – mcsend utility. This utility is part of the Operator utilities for building a software image. A description of the utility is given in the document Operator's Manual MAG200.pdf
- for Windows OS – Mcast . Below is an update using the Mcast .
OS requirements: Any version of Microsoft Windows OS with .NET Framework support. version 2.0 and higher.
Preparation
- Download the imageupdate and Bootstrap files to the PC from the software release of the required STB model and software version, similar to what was described when preparing the update from a USB drive.
- Download, unzip and run the MCAST-V2.0 application on your PC. (zip).
- To ensure smooth passage of IGMP and multicast traffic, it is necessary that the PC and STB be in the same broadcast domain (otherwise, it is necessary to provide routing for multicast flows on the required section of the network). In home environments, as a rule, it is sufficient to use a direct cable network connection between the STB and the PC, or both devices (STB and PC) must be connected to the same switch/router (in the latter case, the STB and PC must be connected to the switch/router via a cable connection ).
Update procedure
- On STB, go to the Bootloader menu;
- On STB select Upgrade Tools ⇒ MC Upgrade. In this case, STB switches to the mode of receiving and activating the bootstrap file. The TV screen will display a multicast address at which the set-top box expects to receive data and a progress bar, the movement of which informs about the receipt of a multicast stream;
- On a PC, using the Mcast , start broadcasting two streams: stream 1 – Bootstrap file, stream 2 – imageupdate file;
- Upon successful receipt of the Bootstrap file, the set-top box automatically switches to the mode of receiving and activating the imageupdate file;
- If both files are successfully received, the update procedure will be completed successfully and the updated software will launch.
Starting Multicast broadcasting on a PC using the Mcast utility
- Launch the MCAST-V2.0 application on your PC. (zip). This activates the form for selecting the network interface (network card) through which the broadcast will be performed.
- Select the required network interface;
- On the main form of the application for each of the two streams (Bootstrap, imageupdate) you must specify: File name – the path to the file on the PC (files must be downloaded to a specific folder on the PC at the Preparation stage);
- IP-adress, port – IP address and port for broadcasting streams. The specified values depend on the STB model. For more information, see the section Addresses of multicast streams.
- Start broadcasting two streams – Start for each stream.
Multicast update takes no more than 15 minutes. A successful update is accompanied by a reboot of the STB. If the update does not complete (due to setting incorrect parameters, network interference, etc.), STB does not exit the Multicast update mode on its own. To exit the Multicast update mode, you must reboot (on/off) the STB.
Addresses of multicast streams in the Mcast utility
The choice of address for multicasting Bootstrap and imageupdate streams in the Mcast depends on the STB model. To use the correct multicast address value in the Mcast , you must:
1. Check the value of the multicast address (IP address and port) in the information message displayed on the TV screen after running the MC Upgrade command Bootloader . For example, for MAG254 the information message looks like:
Loading image from multicast
Loading image from multicast channel: 224.50.0.100:9000 is started...
2. The value of the multicast address from step 1 must match the value entered in the IP-address, port field the Mcast utility for stream No. 1 (Bootstrap). For example, for STB MAG254 the value is: 224.50.0.100:9000.3. The IP-address, port for stream No. 2 (imageupdate) should contain the value indicated in the table below, in the imageupdate stream address :
| Model STB | Bootstrap stream address | imageupdate stream address |
| MAG250 | 224.50.0.50:9000 or 224.50.0.70:9000 | 224.50.0.51:9001 |
| MAG254 | 224.50.0.100:9000 | 224.50.0.101:9001 |
| MAG270 | 224.50.0.90:9000 | 224.50.0.91:9001 |
Example of update in Multicast mode
Below is an example of an update in Multicast mode for STB MAG250.
Example of an update using the MCAST utility
Video example
Your browser does not support the HTML5 video element
Possible problems when updating using the Multicast broadcast method
- Incorrect interface (network card) selected: It is necessary to take a more careful approach to the procedure for selecting the interface through which broadcasting will be carried out. If you have any difficulty in this matter, contact your network/system administrator for help.
- If the PC and set-top box are connected via external network equipment, you need to make sure that there are no barriers to multicast and IGMP traffic in the network being used.
- try to reduce the data rate to 500,000 byte/s and start the update process again.
Official firmware
- We move the downloaded files from Informir to the Mag250 folder created on the flash drive (to work with the corresponding set-top box model).
- We insert this flash drive into the console.
- Go to the receiver menu in the settings and find “Update software”.
- Select USB update and click “start update”.
- Check the integrity of the files on the flash drive and click OK.
It happens that errors occur during the flashing process. Nothing bad happened, just follow the instructions below:
- We delete all data from the media and write it again (there should be no broken files).
- We check the folder name, if there is an error, we correct it.
- We start the flashing process in a different way.
The second option includes the following points:
- Insert the flash drive into the set-top box/receiver.
- Press Menu on the remote control until the BIOS parameters are displayed.
- Select Upgrade Tools in it.
- Enable USB Bootstrap.
Immediately after flashing, the device will automatically reboot. If you are flashing via a computer (multicast), then you need to do the following:
- Copy all files to a previously prepared folder.
- Turn on the set-top box and in the BIOS (after holding down “Menu”) click on Upgrade Tools.
- Connect the device to the computer's LAN using a network cable.
- On the computer, open connection properties and select IPv parameters
- Set the IP of the connected device with a subnet mask
- Launch the dualserver utility
- Select the connection type and click on “SELECT”.
- We drive two streams into the window. The first is 224.50.0.70:9000, the second stream is 224.50.0.51:9001.
- We start both threads and wait for the process to complete.
- Next, in the BIOS of the TV set-top box, select MC Upgrade.
- After notification of the start of the firmware process and its completion, we reboot the set-top box.
This was the process of flashing the official program. Now you need to install alternative firmware, which removes the restrictions.
Firmware version lower than 2248
In fact, there is nothing wrong with this, except that you will have to follow the above instructions twice: the first time you will update the device to 2248, and the second time to a more current one. You just need to download additional files from firmware 2248. These will be Bootstrap_250_2248 from the link (https://www.lanta-net.ru/files/Bootstrap_250_2248 and imageupdate_250_2248) from the link (https://www.lanta-net.ru/files/ imageupdate_250_2248). And the process itself is the same, we repeat it again as described above. Therefore, friends, we carefully study the material to avoid trouble.