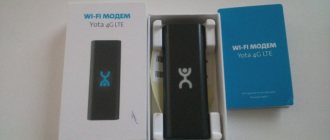
Yota offers its customers technologies that can connect them to 3G/4G LTE networks. The connection speed here is quite high and surfing the network is comfortable. Moreover, routers from a mobile operator are portable and do not require a constant connection to the power supply. There are also some negative aspects: devices from Yota are configured like their counterparts, as there are some nuances. This article will discuss how to connect a Yota router, what status yota ru is, and setting up a Yota router.
Computer connection
The new standard that Iota supports is 4G networks. They are capable of receiving speeds of 178 Mbit/s and upload speeds of 58 Mbit/s. Routers from Yota are capable of high speeds thanks to the power of LTE networks. Testing has shown that the devices can achieve a throughput of 326 Mbit/s per input and 172 Mbit/s per output.
The operator's network equipment allows five users to simultaneously use the Internet while at home or on the road. As practice shows, even a sixth person can be connected without compromising speed. Such offers are tempting for large families who actively use the Internet and need to exchange large amounts of data.
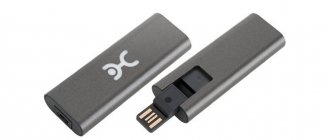
To achieve maximum speeds and ease of operation, the device must first be configured. To do this, they are connected to personal computers and laptops. This is done using a regular USB cable, which comes with the kit:
- Connect the USB port of the router and the computer with a USB cord;
- If autoboot is disabled on the computer, the router opens as a physical removable drive and the autoinstall.exe file is launched in the folder;
- If autorun works, then wait for the window with settings and step-by-step instructions to appear;
- Follow the instructions until setup is complete.
It is also possible to connect over the air using a wireless connection. This is only possible if a network card supporting WiFi b and g standards is installed on the personal computer. This method will eliminate unnecessary wires and free up space on the table or under it.
Important! Typically, Yota routers use something like this “YOTARouterXXXXX” as the name of the network, where instead of the X’s there is the physical address of the router.
Three steps to fully use your personal account
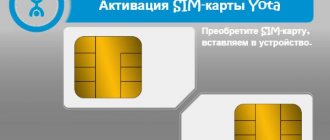
Step 1. Install SIM card
- After that. once the SIM card is installed, the user is automatically taken to the welcome page hello.yota.ru/welcome;
- From the welcome page, follow the link to continue;
- We read the contract and seal it with an automatically generated digital signature;
- After agreeing to the agreement, a registration form will appear;
- We create a new profile if this is your first time, connect an existing one if you are already a subscriber;
- We fill out the fields in the form and receive input data for your personal account.
Registration can be done in the same way through applications for all popular OS. Registration is available to individuals and legal entities; to register from a company, you need to go to the “For Business” tab.
Step 2. Login to your account
Now, to log into your account, you need to go to my.yota.ru; if you log in through the application, the page will open automatically. We enter the received login information. If suddenly you do not have time to remember or write down your password, you can always use the special password recovery or reminder function. This uses either your phone number or your email address. Just follow the “Forgot your password” link, and they will send you instructions and a temporary code that will give you access to your personal account to change your password to a more memorable one.
Step 3. Linking a card and payment
In order to pay for the service quickly and without commissions, the operator offers to link your payment bank card to your personal account. The procedure for attaching a card is quick and simple; you need to go to the balance replenishment section and enter your card details in the form that opens:
- Number (16 digits);
- Expiration date (month and year);
- Secret code or CVV.
After linking a bank card, the subscriber no longer has to worry that at the most inopportune moment the account balance will be reset to zero and Internet access will be interrupted.
10.0.0.1 and status.yota.ru: access to settings
To access the configurations of the router or modem itself, you must be connected to it. There are two options: either the Wi-Fi modem is connected to the USB port of the computer, or the user connects to the Wi-Fi network of the router called “YOTAROUTER”.
How to pay for Internet Yota without commission
Next, on any home device (PC, laptop or smartphone), you need to open any browser (even a standard one) and enter the address status.yota.ru in the address bar. After that, press Enter and wait for the page with configurations to navigate and load. It happens that you can’t log in or it gives you some kind of error. Then you need to use a numerical address instead of a letter address - 10.0.0.1. A panel will open with information about the connected device, network speed and status.
Important! You can change some parameters in the section that opens by clicking the “Device Settings” button.
Login to your Yota account
You can log in to your personal Yota account through the operator’s official website. Open any browser on your computer. In the address bar we write https://www.yota.ru. We go to this web page by pressing the Enter key.
Next, the system will prompt you to enter the data:
- E-mail address.
- Your account number.
- Login password.
Check that the information you entered is correct and confirm your actions. Now you have access to all the features of your Yota personal account. Check your balance, connected devices, change tariffs.
Why can’t I go to status.yota.ru?
As already mentioned, sometimes when trying to access the web interface of the router configurator, problems of various kinds appear. In most cases, the page simply does not want to open at any of the addresses. There is a chance that the error “Cannot access the site” or “Page is unavailable” may appear. There are a couple of tips to solve such problems:
- Disconnect the Wi-Fi modem or router from the PC and connect it again. If it is a USB device, then you can disconnect the cord, but if there is a Yota Many device, then simply disconnect and connect the power;
- If the device is connected via a cord, then you can try to organize a wireless connection, if possible, and check the availability of settings by address;
- Try going to the web configurator from another browser or device. You can even do this from your phone. To do this, you need to connect it to the wireless network that the router created;
- If the router is still unavailable, then you need to understand the settings of the PC’s network card.
How to install a Yota 4G LTE modem on a computer: step-by-step instructions
Restarting the device
Sometimes the problem lies in the fact that you simply need to restart the device due to some critical errors in operation or to save the necessary parameters. Restarting is done as follows: the device is disconnected from the PC connector and reconnected. If this does not help, then you can try reconnecting it to another free USB port. Perhaps the reason is a non-working cord connector or a broken port on the PC.
Configuring and checking network settings
A common mistake due to which the site in the web settings is not opened by any of the links is incorrect network parameters. Out of habit, people use the standard input combinations for most routers: 192.168.1.1 or 192.168.0.1. This does not work with Yota devices and you need to check the connection parameters. For this:
- Go to the network connections of the operating system through the Control Panel or simply by running the command “ncpa.cpl” in the window on Win + R;
- Select the required network connection and right-click on it by selecting “Properties”;
- In the menu, find the item “IP version 4 (IPv4)” and select it;
- In the settings, set the parameters manually: IP address - 10.0.0.2, Mask - 255.255.255.0, Default gateway - 10.0.0.1, DNS servers 10.0.0.1 and 8.8.8.8;
- Apply and save changes;
- Restart the computer and try to access the site again;
- If this does not work, then go back there and change the values to automatic installation;
- Ping the address via the command line with the command “ping 10.0.0.1 -t” and check the result.
Important! If the requests receive answers, then everything is fine. If it says “Waiting time exceeded,” then the problem is definitely in the device: either the firmware is old and crookedly installed, or the hardware of the device has completely failed.
Browser
If the server successfully pings, but you cannot access the web interface, then perhaps the problem is in the browser you are using. Any application should be suitable for these purposes, but it happens that due to some internal setting it does not allow access to the site. You can log in to https://10.0.0.1 from Chrome, Opera or Mozilla, or you can also try standard Internet Explorer. This will help eliminate the possibility that some Internet browser has failed or contains connected proxies that block entry to the site with the settings.
Firewall
Rarely, a firewall can also cause you to be unable to access a site because it blocks a site that it deems to be malicious. If Windows Defender is enabled, then you should turn it off and check the availability of the settings. This can be done by typing the firewall.cpl command in the Run window (Win + R).
Simple problem solving
If you can’t log into the management page of your Yota device, then we will try to figure out what caused this.
First, check whether you made a mistake in typing the network address. We advise you to go through the ready-made samples highlighted at the beginning of the article.
Secondly, view your connections by going to Control Panel\Network and Internet\Network Connections (Windows 7) or by typing the command ncpa.cpl (by clicking on the Start icon in the lower left corner of the screen or by pressing the Win + R keys.
If you have selected your network connection, click on its properties. Select Internet Protocol Version 4(TCP/IPv4). Check that it is installed - Obtain DNS server address automatically.
Attention is important. If after these manipulations the Network does not work, you should try to configure it manually. To do this, instead of automatically selecting Yota servers, you need to configure them yourself.
You will have to fill in the network connection data in the columns - IP address, Mask, Gateway and Primary server. To make this task easier, simply enter the data from the snapshot below:
Access to the admin panel
Description of mobile Internet from Yota - advantages and disadvantages
If you succeed, you can configure your router according to all parameters. Once again, briefly about how to enter the settings:
- Log in from a browser that does not block the settings site and enter 192.168.1.1 or 10.0.0.1 in the address bar;
- Enter your username and password for authorization. By default they are admin:admin or admin:1234. Later you can enter your login information;
- Wait for the settings menu to appear with many tabs for advanced configuration of the router.
Apple has invented a smart watch with a flexible display
Judging by the number of leaks related to Apple patents, over the past few months (or even years) the Cupertino people have been working very hard on new technologies in their devices. For example, it became known that the Apple watch has a flexible display.
Photo: Ferra.ru The new product will most likely be released under the Apple Watch line. As Gizmochina writes, the devices will have a more rounded design, as well as an increased screen area due to the flexibility of the display. At the same time, it is noted that the touch panel will extend, in principle, to the entire surface of the device - the straps will no longer be replaceable, since they will not be needed at all. Note that earlier it also became known about the company’s plans to release its own augmented and virtual reality helmets. And if it is known about the release of the latter that this could happen as early as 2022 or 2023, then there is no information about the appearance of the first flexible Apple smartwatch.
Yota apn router settings
When a modem or router is connected to a personal computer, the second one should automatically launch the setup and driver installer. This is convenient because the PC will do everything and the chance of error will be minimal. However, you can also participate in the process yourself:
- Launch the modem icon from the tray;
- Enter parameters in the pop-up window.
This method allows ordinary users to do all the actions in a clear and friendly interface. If the options seem few, you can always find advanced settings in the web configurator.
How to return to basic settings?
The question of how to restore Yota Many to factory settings arises quite often. The router is designed in such a way that a reset to factory settings is possible only from the web interface:
- To get to the desired section, go to advanced settings (type https://10.0.0.1/advanced in the address bar);
- At the bottom, click the “Return to factory settings” button.
After about 40 minutes, the router will reboot with the original configuration. In Yota Many, resetting to factory settings is performed automatically, without user intervention.
The need to reset Yota Many settings arises in cases when you changed your login and password and forgot them. Sometimes access is blocked when you try to log in with incorrect data. Also reset if you want to set everything up from scratch.
Sometimes it is useful to simply reboot the router. In this case, use the Reset button on the device body. It is visible only when the switch is set to the far left position. Clicking this little blue button will reboot the router without losing the configuration.
Setting up a wireless connection
If the connection is made wirelessly, then Wi-Fi settings are necessary. The process itself is not complicated and requires just a couple of steps:
- In the web configurator settings, select the Wifi tab. It will be possible to change the network name (SSID) so that it is easily recognized in the future;
- Here you can hide the network if it is important that it is invisible to other people. In this case, the name and password will need to be entered manually;
- Set a strong password in the appropriate field;
- You should not touch the sleep mode, as it will put the device into standby when idle and in some other cases;
- Save all settings by clicking on the appropriate button and restart the device.
USB connection
If you select the connection option via a USB cable, the OS itself will begin installing the drivers. You should not abandon this and wait for the final installation. After this, the device will be detected and ready for operation and configuration. For the yota 4g router, the instructions are as follows:
- Select the tray icon;
- Enter all the necessary parameters for normal operation (network name, password and parameters for turning Wi-Fi on and off).
Important! Such a menu is much easier to set up than configuring through a browser. For most people, this will be enough.
Firmware update via manualupdate
Below are detailed instructions that will allow you to perform the update yourself:
- download the latest version of drivers for modem;
- connect the device to the computer and wait for the initialization process to begin;
- in the address bar set https://status.yota.ru/manualupdate;
- when a new window appears, click “Browse” and select the downloaded file;
- Now you need to click “Update” to install the software;
- We reboot the modem.
Reset to factory settings
Often, after incorrect configuration, it becomes necessary to return the factory settings. Unexpected errors in the operation of a wireless or wired network may also occur. You can return the router to its initial state in the web interface in the advanced settings section (status.yota.ru/advanced.). Here you should select the “Ports” section and scroll down the window, finding and activating the “Restore default settings” function. After this, you should wait a while to complete the procedure.
Important! You can press and hold the Reset button on your device for 15 seconds to accept the reset.
What opportunities does your personal account provide?
An individual profile is a multifunctional interface for Iota subscribers. Here they themselves control the costs of calls and Internet, connect and disconnect services.
List of cabinet features:
- checking the balance and replenishing it;
- connecting a payment card to an account;
- viewing and changing the tariff plan;
- enabling automatic payment for uninterrupted replenishment of your Yota account;
- Internet speed management and testing;
- extension or limitation of the minutes limit;
- contact technical support online;
- receiving details of Yota calls.
New options are regularly added. You need to look at them in the sidebar menu.
Updates
In the Yota settings service, the router firmware is updated simply:
- Select a network connection method.
- Go to eta status;
- Through the “Personalization” section, go to the software page;
- Click Install Software.
Important! At the bottom of the section there is a “Help” tab, where you can find out how to resolve errors during reinstallation.
Advanced settings
These parameters (at https://10.0.0.1.) adjust the operation of the modem. They allow:
- allow third party connections;
- replace local IP address;
- reconfigure the port;
- change DHCP settings.
To access one of the profile menus, you need to enter identifiers in the URL after the slash:
- advanced – open DHCP for manual configuration;
- network – change the modem’s network parameters;
- manualupdate – update the firmware manually;
- dir – access the extended functionality of the system.
Reference! Additional equipment settings are also available to subscribers at status.yota.ru/advanced.
Adjusting the DHCP Range
Step-by-step instruction:
- Connect your computer to the router in any way: via a network cable or via WiFi.
- Log in to the Yota Status interface.
- On the horizontal panel at the top is the “Management” tab. There, select the “DHCP Server” section.
- Check the box next to “Start DHCP server”. Activate the changes with the “Apply” button.
- To change the range, enter the desired indicators in the first and final IP fields.