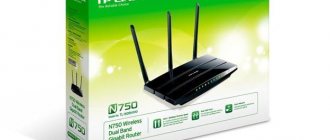
TP-Link TD-W8951ND is an ADSL modem that can distribute the Internet via Wi-Fi, or a wireless router with a built-in ADSL modem for connecting to the Internet via a telephone cable. I think both options are correct. This wireless modem from TP-Link is an ideal solution for all ADSL Internet subscribers. In Russia, it is most often purchased and installed by subscribers of the provider Rostelecom, and in Ukraine by subscribers of the provider OGO from Ukrtelecom.
No need to install a modem and Wi-Fi router. The telephone cable connects directly to the TP-Link TD-W8951ND. In the control panel, we set the parameters for connecting to the Internet (they are issued by the provider), configure the Wi-Fi network, IPTV (if available) and that’s it, use the Internet via a wireless network or cable. Since the settings page and the setup process itself are not the easiest and can raise many questions, I decided to prepare detailed instructions. These instructions are also suitable for other wireless routers with a built-in ADSL2+ modem from TP-Link.
First we will connect everything, then we will go into the ADSL modem settings and set the necessary parameters.
Setting up ADSL Wi-Fi modem TP-Link TD-W8951ND
TP-Link TD-W8951ND is an ADSL modem that can distribute the Internet via Wi-Fi, or a wireless router with a built-in ADSL modem for connecting to the Internet via a telephone cable. I think both options are correct. This wireless modem from TP-Link is an ideal solution for all ADSL Internet subscribers. In Russia, it is most often purchased and installed by subscribers of the provider Rostelecom, and in Ukraine by subscribers of the provider OGO from Ukrtelecom.
No need to install a modem and Wi-Fi router. The telephone cable connects directly to the TP-Link TD-W8951ND. In the control panel, we set the parameters for connecting to the Internet (they are issued by the provider), configure the Wi-Fi network, IPTV (if available) and that’s it, use the Internet via a wireless network or cable. Since the settings page and the setup process itself are not the easiest and can raise many questions, I decided to prepare detailed instructions. These instructions are also suitable for other wireless routers with a built-in ADSL2+ modem from TP-Link.
First we will connect everything, then we will go into the ADSL modem settings and set the necessary parameters.
Feedback on the model's work
Advantages: Cheap, nice, easy setup in 5 minutes (tried the web interface), supports SNMP, DDNS, UPnP, etc., etc. Disadvantages: It’s not clear why all 8PVCs are filled with unnecessary settings (I reset them before setting them up), I had to remove everything, although it was not necessary. The ports are not gigabit, but they don’t plan to cost any home networks based on it, so it doesn’t matter at all, and it’s a shame to ask for such a price. Comment: I set it up for a friend and changed my old prejudice that “TP Link is cheap, low-quality and buggy.” I was left with pleasant impressions of the device - yes, TP Link is no longer the same, it is better. My friend doesn't complain about him either.
Alexey K.
https://market.yandex.ru/product—wi-fi-router-tp-link-td-w8951nd/9345774/reviews
Pros: Not expensive, works better than d-link devices. Cute white design. Cons: Hot and goes offline once a month or less, you have to reboot to enter the admin panel. At this time, the Internet is distributed locally.
Malinin Anton
https://24review.ru/tp-link-td-w8951nd-otzyvy
Advantages: beautiful design, price, ability to turn off wi-fi, quick setup, disk with detailed description of setup and installation, Russian-language web interface, also holds ping well in online games Disadvantages: I don’t know how anyone can do it, but it doesn’t work for me wi-fi antenna. Comment: I took a DSL-2640U as a replacement, it’s heaven and earth in comparison, D-Link had a maximum speed of 9 MB. on TP-Link 15 MB. The ping in games dropped by about 25-30 ms, now I can use Wi-Fi not only from a laptop, but I can also connect. both phone and tablet without any glitches. I'm happy with the new modem.
Vitalya X
https://market.yandex.ru/product—wi-fi-router-tp-link-td-w8951nd/9345774/reviews
The TP-Link TD-W8951ND model is an economical option with fairly wide functionality. The main thing in setting it up is to specify the correct VPI and VCI values, connection type (PPPoE, dynamic or static IP), and also come up with and set a password for the access point. Setting up IPTV is more complicated than on a regular router. If you have problems connecting through this router, check that the entered data (VPI, VCI, connection type) is correct. You can also contact TP-Link manufacturer support for instructions.
Source
Connecting and entering settings TP-Link TD-W8951ND
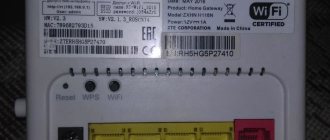
Connect power to the modem and turn it on with the button (if it is turned off). Connect the modem to your computer or laptop using a network cable. Or connect to the modem's Wi-Fi network. By default it is open. If a password request appears, look at the sticker on the bottom of the device. The factory password (PIN) must be indicated there.
Connect the telephone cable to the ADSL port of the TD-W8951ND.
Next you need to open the modem settings. To do this, on the device you connected, open any browser and go to 192.168.1.1 . Enter the address in the address bar. If you do not receive a login and password prompt, try going to 192.168.0.1 . The IP address is indicated on a sticker at the bottom of the modem itself (the address tplinkmodem.net may also be indicated there). If you can’t open the settings and an error appears, then see the article: Can’t enter the router settings.
In the authorization window you need to specify your login and password. Factory admin and admin. If you changed them and don’t remember, you will have to reset the settings to factory settings. Hold the Reset button for 10 seconds with something sharp.
The web interface of the wireless ADSL modem will open. There we need to set up the Internet and Wi-Fi network. And also change the factory password admin. Which you just entered.
Media server
Another interesting feature of the modem is the ability to organize access to files from a USB drive via Wi-Fi. You can, for example, open movies from a tablet or a modern TV, such as Smart TV.
Files on a USB flash drive connected to the modem
For the test, I used a Samsung Galaxy Tab 10.1 tablet. BS Player is great for viewing files over Wi-Fi. There is a LAN tab there.
BS Player – select a file to view via Wi-Fi
An excellent feature of BS Player is the search for suitable subtitles for a movie. Very cool.
The modem is excellent, keeps a stable connection, three antennas hit the signal powerfully - the difference is very noticeable after the previous modem. The print server and media server work fine. I recommend.
[linkedin_share style=”top”] [google_plusone size=”standard” annotation=”none” language=”English (UK)”]
source
Setting up a TP-Link ADSL modem to connect to the Internet
Before you start setting up:
Go to the “Interface Setup” – “Internet” section.
- From the “Virtual Circuit” drop-down menu, select the “PVC0” virtual circuit.
- Set the VPI and VCI values.
- Opposite “ATM QoS” select “UBR”.
- Next you need to select the connection type. For example: PPPoE.
- If you have PPPoE, then you need to specify a login and password (issued by your provider). "Encapsulation": "PPPoE LLC".
- And to ensure that the connection is always active, make sure that next to “Connection” the “Always On” item is selected.
- Save the settings by clicking the “Save” button.
If you have, for example, “Dynamic IP”, then it’s even simpler. There is no need to specify a login and password.
Setting up a Wi-Fi network on TP-Link TD-W8951ND
You can set up a wireless network in the “Interface Setup” – “Wireless” section.
- Select your country from the Channel drop-down menu.
- Change the Wi-Fi network name (SSID). You can leave the factory name, but it is not advisable.
- Security type (Authentication Type) is set to “WPA2-PSK”.
- "Encryption": AES.
- In the “Pre-Shared Key” field, enter a password that will protect your Wi-Fi network. The password must be entered in English letters. You can use numbers. Minimum 8 characters.
- Save your settings.
It is advisable to write down the password for the Wi-Fi network somewhere so as not to forget it.
Protecting the modem settings with a new password
By default, the login and password admin is used to enter the modem settings. This means that everyone who is connected to your wireless modem will be able to access its control panel. Therefore, I recommend changing the factory password.
Go to the “Maintenance” – “Administration” section. Enter the new password twice and save the settings.
Be sure to write down the password. If you forget and need to go into the modem settings, you will need to reset and configure everything again.
Safety
Be sure to change the default password “admin” to access the Web interface. Go to the Administration in the Maintenance and set your password.
By default, access to the Web interface is possible both from the local network and from an external network (from the Internet). You can block access to settings from outside on the Access Control Setup by creating an appropriate rule. In this example, a rule is activated that allows access to applications only from the LAN .
Setting up IPTV
These settings will be useful for those who have the digital television function connected and who plan to use it. TP-Link TD-W8951ND supports IPTV. Now I will demonstrate how to set up digital television. Let's look at the settings for two large providers: Rostelecom and OGO Ukrtelecom.
We return to the “Interface Setup” – “Interne” section.
- In “Virtual Circuit” select “PVC1”.
- Set the VPI/VCI values. For IPTV from Ukrtelecom it is: 1/33. For Rostelecom 0/50. You can check with your provider.
- "ATM QoS": UBR.
- Connection type (ISP) set to “Bridge Mode”.
- “Encapsulation”: 1483 Bridged IP LLC (most likely for TV from Ukrtelecom too).
- Save your settings.
Let's look at the screenshot (using the example of setting up digital television from Rostelecom).
Next you need to configure the LAN ports. This can be done in the “Advanced Setup” – “VLAN” – “Define VLAN Group” section.
Select "Vlan Index": 1 . We set the ports as in the screenshot below. Three LAN ports and Wi-Fi for the Internet. We leave one LAN port for IPTV. Save your settings.
Briefly about the model
I usually don't include this section, but here we don't have the most standard modem.
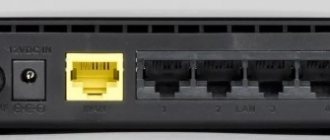
The most important thing before setting up the TP-Link TD-W8968 is to decide on the ports. What we have on the back panel (see the picture above, from left to right):
- DSL – for connecting a telephone cable (I will show the wiring diagram in more detail below)
- LAN – 4 ports for connecting local devices. It is better to connect your computer through them during initial setup.
- USB – can be used to connect a 3G modem.
- 4 buttons – Wi-Fi activation, factory reset, WPS activation, power button.
- Power port.
That's all I wanted to say, because... In the process of description I will repeatedly refer to these ports and buttons. Now you can start setting up.
How to configure PPPoE on a router with a built-in TP-Link ADSL modem
Step 1 Open your web browser and enter your device's IP address in the address bar (default 192.168.1.1), press Enter .
Step 2 Enter the username and password on the login page, the default username and password is admin , click OK to log into the device.
Step 3 Click Quick Start at the top.
Step 4 Click RUN WIZARD and click NEXT to configure the ADSL router.
Step 5 You can change the administrator account password if you provide a new password. If you do not want to change it, enter the default password and click NEXT .
Step 6 Select the correct Time Zone (
time zone) and press
NEXT .
Step 7 Select PPPoE / PPPoA and click NEXT .
Step 8 Enter the username and password provided by your Internet Service Provider. Enter the correct VPI and VCI , which are also provided by your Internet Service Provider. Click NEXT .
Step 9 If your ADSL router supports wireless function and you want to connect to it via wireless connection, please set Access Point Activated and security settings. Here we will look at WPA-PSK, TKIP/AES as an example. Enter the key and click NEXT .
Step 10 Click NEXT and Close to save the settings.
How to configure PPPoE on a router with a built-in ADSL modem TP - LINK
Source
Setting up an ADSL router
In order for the TP-LINK TD-W8151N router to start working from the Rostelecom telephone network, you will need to configure it in accordance with the information provided by the provider's employees when signing the contract. The settings are made in this order:
- Using a LAN cable (included with the router), we connect it to the PC. You can also connect via Wi-Fi - in this case, a laptop, tablet or any other gadget from which you can log into the browser will do;
- Enter the address 192.168.1.1 in the browser;
- If after pressing “Enter” the connection does not occur, you need to assign IP 192.168.1.X in the properties of your computer’s network card (X is any number from 2 to 254);
- If everything connected successfully, you will see an authorization request. The default username is admin, the password is the same;
- For the safety of subsequent use of the router, we recommend that you first change the login information on the web interface: go to the “Maintenance” menu, the “Administration” section, create and enter a password in the appropriate field that you can easily remember and no one else can guess. Save the information with the “Save” button.
Internet connection
In order for the TP-LINK TD-W8151N router to establish a connection with the switches of the Rostelecom provider, you need to enter the relevant information in its web interface:
- Go to the “Interface Setup” tab, “Internet” subsection. The first thing we will see at the top of the page is setting the VPI and VCI parameters. Enter the numbers 1 and 32 respectively;
- Here we select the connection technology. Rostelecom operates mostly using the PPPoE protocol, so to establish a connection you need to know your username and password. Look them up in the contract and rewrite them in the text fields asking for this information;
- After entering, save with the “Save” button. The router will restart and, provided the data is entered correctly, will go online, which means the setup was successful.
Wi-Fi setup
Before you start setting up wireless access on the TP-LINK TD-W8151N router, go to the “LAN” subsection of the “Interface Setup” menu item. Here about the “DHCP” function - this is the automatic assignment of Internet addresses for all devices that will subsequently connect to this local network. Click "Save".
Packaging, equipment and price of the TP-Link TD-W8951ND model
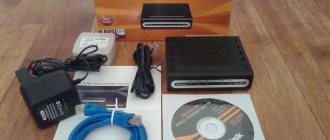
The box must contain the following:
- one wireless N series router with built-in ADSL2+ modem;
- one router power adapter;
- Quick Installation Guide;
- one RJ45 cable;
- two RJ11 cables;
- one ADSL splitter;
- one CD with user manual.
The average cost of a router according to Yandex.Market is 2,190 ₽.
ADSL router TP-Link TD-W8951ND can be purchased for about 2,200 rubles
A little background
I recently purchased a Canon MF-4400 printer from White Wind. After the purchase, the idea came to organize printing over Wi-Fi - somewhere out of the corner of my eye I read about wireless print servers. A Google search told me to buy an external USB adapter for wireless printing. I found such a device on eBay - TP-LINK TL-WPS510U. During my search, I was confused by the fact that all the devices were released several years ago. That is, the line of external print servers, by the standards of modern technologies, has not been updated for a long time. Instead of studying the reason for this, I placed an order on eBay and set out to wait for the purchase.
But apparently fate was hinting to me that there was no need to rush. The order was canceled by the seller, and the money was returned - the goods were out of stock, and he simply did not have time to update the data on the website. But I was stubborn and found another seller and made the purchase again. By the way, TP-LINK TL-WPS510U cost about $90 with delivery.
Buying a wireless adapter made me remember that I was going to buy a new modem. I started looking through the list of modems in the online store and in the description of one of the modems I saw the word Print Server and a USB output on the case. Then I realized that I had made a mistake in purchasing an external adapter. Apparently, new print servers are not being released because they have long been part of Wi-Fi modems. Moreover, for $90 you can buy almost a top-end modem. What I actually did was buy a TP-LINK TD-W8970 modem. And for a print server purchased on eBay, I issued a return citing the fact that this adapter does not support my printer. Luckily, they didn’t have time to send it due to the Christmas weekend and the money quickly returned to the card.
Appearance: material, color, indicators, ports
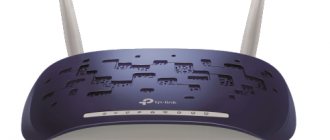
The model has a white plastic body. On the top panel there is a grid in the form of chaotic squares. The router has one antenna. Here along the edge there are several indicators corresponding to the outputs on the back of the router:
- Power - food. It always lights up if the router is turned on (using the button of the same name on the back).
- ADSL. If the indicator is lit, the LINE (ADSL) port is connected.
- Internet. If it lights up, there is an Internet connection.
There are 9 indicators on the front panel of the router that show the activity of ports and buttons on the device
On the rear panel there are all outputs, including for the provider's telephone cable
What other buttons are on the back of the router? RESET key - it allows you to quickly reset the router settings to factory settings. Using a pen shaft, a needle, or a toothpick, hold it down for 5 seconds - the settings will be rolled back immediately.
About the router itself: appearance, price, equipment, characteristics
There are 8 indicators on the top panel: power, Internet access, Wi-Fi enabled/disabled, operation of 4 local ports (if the port indicator is on, it means the device is successfully connected to it).
The TP-LINK TD-W8901N router is compact and has only one antenna
On the back is everything a router usually has:
- power adapter output;
- on/off button;
- Reset (reset settings) and “Wi-Fi” buttons (to disable/enable the network);
- 4 local outputs of 100 Mbit/s for connecting home devices, including PCs;
- DSL output for connecting to a telephone line;
- 5 dBi antenna.
The model has an impressive package. In addition to the device itself, the box also contains:
- external splitter;
- telephone cable;
- Ethernet cable;
- quick setup instructions;
- disk with materials;
- power adapter.
The price of the device is low - about 1150 rubles. For this money you get the following options:
- Supports 2.4 GHz band.
- Firewall NAT and SPI.
- Filtering by MAC address, IP address, packets, applications, URL.
- Protection against DoS attacks, SYN Flooding, Ping of Death.
- Supports PPP, PPTP, L2TP, IPoA protocols.
Table: technical specifications of TP-Link TD-W8951ND
| Parameter | Meaning |
| ADSL2+ support | There is |
| Incoming traffic speed | up to 24 Mbit/s |
| Outgoing traffic speed | up to 3.5 Mbit/s (with Annex M enabled) |
| Mode support | bridge and router mode |
| LAN ports | 4, 100 Mbit/s |
| ADSL industry standard support | all standards |
| PPPoE support | There is |
| Function to turn off the Internet when idle | There is |
| Surge protection | There is |
| Data protection | WPA-PSK/WPA2-PSK, |
| ACL (Access Control List) function for wireless LAN | There is |
| Filtering by IP/MAC address, application, URL | There is |
| Built-in firewall | There is |
| Virtual Server support | There is |
| Standards and protocols support | ANSI T1.413, ITU G.992.1, ITU G.992.2, ITU G.992.3, ITU G.992.5, IEEE 802.11b, IEEE 802.11g, IEEE 802.11n, IEEE 802.3, IEEE 802.3u, TCP/IP, PPPoA, PPPoE, SNTP, HTTP, DHCP, ICMP, NAT |
| System requirements | Internet Explorer 5.0 or higher, Netscape Navigator 6.0 or higher Win 9x/ ME/ 2000/ XP/ Vista/ Windows 7 |
Connecting a modem to a telephone line and a computer - a clear diagram
Before setting up, the ADSL router needs to be connected to a telephone line and a computer on which the setup itself will take place. Before connecting, make sure that the router and PC are turned off.
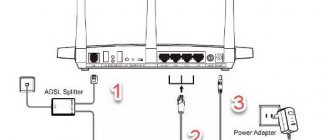
Connect the ADSL cable that comes with one end to the telephone socket, and the other to the ADSL output on the back of the router to the left of the antenna.
Insert the telephone line wire into a separate ADSL input
If you need to disconnect the telephone line and the Internet, use the splitter included. We connect a telephone line to the Line output on the splitter. We insert the cable for the phone into Phone, and the cable for the Internet into Modem. From the Modem socket we stretch the cable to the router (insert it into the ADSL connector).
A splitter allows you to separate the line to the Internet and telephone
Now we connect the laptop or desktop PC to the router: connect the Ethernet cable to the output of the network card on the computer (on the side of the laptop or on the back of the desktop). Insert the other end of the wire into one of the LAN connectors on the router.
The router must be connected to the telephone line, computer and electrical network
Turn on your computer. Connect the power adapter to the router (Power output), and then insert the plug into an electrical outlet. Turn on your router.
Preparing your PC for settings
After connecting, you need to go to the network connection settings on your computer. Let's look at a procedure that is suitable for all versions of Windows:
- Simultaneously press two buttons on the keyboard - Windows (with the OS logo) and R. In the window, enter the word control - click OK.
Execute the control command in the "Open" line
Go to Network and Sharing Center
Click on "Change adapter settings"
Go to local connection properties
Open IPv4 protocol properties
The computer should obtain IP and DNS information automatically
Login to settings
How to get into the web shell of an ADSL router from TP-Link, where all the setup is actually done:
- In a new tab of any browser on your PC, write the address 192.168.1.1. Click on "Enter" to go to the local site.
Go to 192.168.1.1 to get to settings
Log in to your account using the admin key
Enter the same password (new) twice and save changes
Setting up an Internet connection
First, specify in the router settings the type of connection that your provider works with:
- Go to the Interface Setup section - go to the Internet tab. We immediately set Activated for Status.
- We write VPI and VCI - information can be found in the contract, or call the provider’s support. For example, for Megaline it is 0/40, for ByFly it is 0/33. Values for different regions of Rostelecom can be found in the table below.
Specify the VPI and VCI values that your ISP requires
Select connection type from the Encapsulation menu
To connect “Static IP” you need to manually enter the IP address and related data
To use PPPoE you need to enter your network login and password
If you have a static IP service connected, enter the data in the last menu of the page
Table: VCI and VPI values for popular providers
| Region | Branch | VPI/VCI Internet | VPI/VCI TV |
| Southern | Krasnodar region | 0/35 | 2/35 |
| Republic of Adygea | 0/33 | 2/35 | |
| Rostov region | 0/35 | 0/38 | |
| Rostov-on-Don | 0/35 | 0/38 | |
| Volgograd region | 8/35 | 9/99 | |
| Astrakhan region | 0/33 | 0/32 | |
| Republic of Kalmykia | 1/33 | 5/33 | |
| Stavropol region | 0/35 | 8/35 | |
| Republic of Karachay-Cherkessia | 0/33 | 1/35 | |
| Republic of Kabardino-Balkaria | 0/67 | 0/100 | |
| Republic of North Ossetia | 0/35 | 2/35 | |
| The Republic of Dagestan | 0/35 | 0/38 | |
| Central | Tver region | 8/81 | 0/91 |
| Yaroslavl region | 0/35 | 0/91 | |
| Kostroma region | 8/35 | 0/91 | |
| Smolensk region | 0/100 | 0/91 | |
| Moscow region | 0/35 | 0/91 | |
| Vladimir region | 0/35 | 0/91 | |
| Ivanovo region | 0/35 | 0/91 | |
| Bryansk region | 0/35 | 0/91 | |
| Kaluga region | 0/35 | 0/91 | |
| Tula region | 0/35 | 0/91 | |
| Ryazan Oblast | 0/33, 0/35 | 0/91 | |
| Tambov Region | 0/35 | 0/91 | |
| Lipetsk region | 35/33 | 0/91 | |
| Oryol Region | 8/35 | 0/91 | |
| Kursk region | 0/35 | 0/91 | |
| Voronezh region | 10/40 | 0/91 | |
| Belgorod region | 0/35 | 0/91 | |
| Volzhsky | Kirov region | 0/33 | 0/50 |
| Nizhny Novgorod Region | 0/33 | 0/50 | |
| Mari El Republic | 0/33 | 0/50 | |
| Udmurt republic | 0/33 | 0/50 | |
| Chuvash Republic | 0/33 | 0/50 | |
| The Republic of Mordovia | 0/33 | 0/50 | |
| Penza region | 0/33 | 0/50 | |
| Ulyanovsk region | 0/33 | 0/50 | |
| Samara Region | 0/33 | 0/50 | |
| Orenburg region | 0/33 | 0/50 | |
| Northwestern | Pskov region | 0/35 | — |
| Novgorod region | 8/35 | — | |
| Leningrad region | 0/35 | 0/37 | |
| Saint Petersburg | 0/35 | 0/37 | |
| Vologda Region | 8/35 | 0/37 | |
| Republic of Karelia | 0/55 | — | |
| Murmansk region | 0/35 | 0/37 | |
| Arhangelsk region | 8/35 | 0/35, 0/37 | |
| Komi Republic | 0/35 | 0/37 | |
| Nenets Autonomous Okrug | 0/32 | — | |
| Ural | Chelyabinsk region | 8/35 | 1/51, 0/34, 0/35 |
| Kurgan region | 1/500 | 1/501 | |
| Perm region | 8/35 | 0/34, 0/35 | |
| Sverdlovsk region | 8/35, 1/50 | 0/34 | |
| Tyumen region | 8/35 | 8/37 | |
| Khanty-Mansi Autonomous Okrug | 1/50 | 6/34, 6/35, 6/36 | |
| Yamalo-Nenets Autonomous Okrug | 1/50 | — | |
| Siberian | Krasnoyarsk region | 0/35 | 1/35, 1/36 |
| Omsk region | 0/35 | 1/35, 1/36 | |
| Tomsk region | 0/35 | 1/35 | |
| Novosibirsk region | 0/35 | 1/35,1/36 | |
| Altai region | 0/35 | 8/35, 8/36, 8/38 | |
| Kemerovo region | 0/35 | 1/35, 1/36 | |
| The Republic of Khakassia | 0/35 | 1/35, 1/36 | |
| Altai Republic | 0/35 | 1/35, 1/36 | |
| Tyva | 0/35 | 1/35, 1/36 | |
| Irkutsk region | 0/35, 0/100 | 1/35, 1/36, 1/37 | |
| The Republic of Buryatia | 0/35 | 1/35, 1/36 | |
| Transbaikal region | 0/35 | 1/35, 1/36 | |
| Far Eastern | Kamchatka Krai | 0/35 | 0/32 |
| The Republic of Sakha (Yakutia) | 8/35 | 8/36 | |
| Magadan Region | 0/35 | — | |
| Khabarovsk region | 0/35 | 8/35, 8/37 | |
| Amur region | 0/35 | 0/38 | |
| Primorsky Krai | 0/35 | 8/35 |
Wi-Fi setup
After setting up the connection, create an access point and specify a complex password for it:
- In the Interface Setup section, go to the Wireless tab. Turn on the access point.
- We select the transmitter power depending on the area that the router must cover.
- In Wireless Mode we set the value with all network standards.
Select network standard from the menu
IPTV connection
What you need to do before setting up your TV:
- Ask your provider for the VPI and VCI number. If you have Rostelecom, check out the values for different regions in the table above (last column).
- Log into the router's web shell.
In the Status tab, find the PVC number that corresponds to your VPI and VCI
Now let's move on to the setup itself:
- Go to the Interface Setup section - Internet tab. In the Virtual Circuit menu, select a channel with a number different from the one you use for the Internet (which you remembered earlier).
- Set it to Status Activated.
Select virtual channel from the menu
Set bridge mode in settings
Uncheck the port to which you will connect the set-top box
First click on Assign VLAN PVID for each Interface
Specify parameters for virtual channels
Set the required VLAN index and set the value to “Working”
Possible problems with the router and their solutions
We will briefly tell you what to do if you suddenly were unable to log into the router’s web shell or if the Internet did not appear after setting up the router.
If you can't log into the web shell
You may have previously changed the password for the administrator account. If you don't remember it, reset the settings to default using the Reset button (press and hold for 5 seconds). After that, log into the shell using the word admin.
Use the word admin to enter the router settings
If this method does not help, make sure that automatic IP and DNS acquisition is enabled in the settings on your computer for a local connection. How to check this is described in the instructions “Preparing the PC for settings”.
What else can you do? Check your Internet Explorer settings:
- Click on the gear icon in the upper right corner. Select browser properties.
Go to IE Internet Options
Set it to "Never Use" and click on OK
If you can't get online
What can you do if it turns out that after setting up no sites open:
- See if you have connected all the cables correctly - check the instructions in the article again. Make sure that the plugs fit tightly into the connectors (you can hear a click when connecting), and that the wires are not damaged or crushed by furniture.
- Call your provider's support line to see if there are any problems on their side. Also check the configuration parameters - VPI and VCI, connection type, network login and password (if the connection is PPPoE), and then enter the correct values.
- Try resetting the settings to factory defaults and setting up the router again step by step.
- Contact TP-Link support: Go to the official website. Click on the “Technical Support” panel. Select a topic for ADSL routers. Enter the email address to which you should receive a response from the specialist. Describe the essence of your problem and submit a request.
Leave a request on the website describing your problem - you will receive an email with instructions and directions
Kazakhtelecom company personal account: subscriber registration, password recovery methods
28.10.2020
Joint Stock Company Kazakhtelecom is the largest national telecommunications company serving the population of Kazakhstan since 1994. To optimize the process of providing services to its users, a personal account option was created - a section on the official Kazakhtelecom portal where subscribers can remotely manage connected services.
Registration of a personal account
Since the personal account is part of the Kazakhtelecom provider website, to gain access to it the following requirements must be met:
- the user is required to sign an agreement for the provision of services with a company representative;
- you need to register on the site.
After this, you can start using the functionality of your personal account.
If you have already received identification details in your personal account of the Kazakhtelecom provider, you do not need to register.
If the subscriber does not have identification data, then a registration code is required. You can use one of the suggested methods:
- pay a visit to a nearby Kazakhtelecom branch, taking your passport with you to confirm your identity;
- make a call to the short number 160. To receive the codes, you will have to provide the organization employee with the following information: identification document number and code word;
- use the online form to receive the code (this method is available to subscribers who have indicated their TIN information in the user agreement). In this case, you need to click on the “Authorization” button on the official portal telecom.kz, then click on the “Register” link. In the window with the inscription “Registration code” you need to click on the question mark, then on the “Online service” button. A form will appear on the screen that you need to fill out. When the procedure is completed, you will receive an email with a code.
After receiving the code, you need to click on the “Authorization” icon on the company’s official website and select “Register” on the page that opens. A form will appear on the website that you need to fill out. Then you need to confirm the end of the registration procedure. After this, you can start working in your personal account.
Login to your personal account
To enter your personal account, you need to click on the “Personal Account” button on the main page of the company portal. In the login form that opens, you must enter the identification data received when signing the agreement in the appropriate windows. After this, you need to click on the “Login” sign. The system will check that you entered your login and password correctly, after which you will be redirected to your personal section.
Personal account functions
Registered Kazakhtelecom users have the opportunity to perform the following operations using a personal account:
- obtaining detailed information on a personal account for a specific period, viewing the history of transactions, paying for connected services;
- familiarization with materials on the Internet, including statistical data on traffic volumes;
- change passwords yourself;
- setting the amount of limited costs;
- connecting additional services to the Internet service, namely turbo speed or Wi-fi;
- setting up personal and system data;
- viewing the list of subscription fee payments;
- obtaining information on the Megaline service;
- providing access to a personal account for the iDphone service.
Important! You can submit applications to change the current tariff through your personal account.
Restoring access to your account
If you accidentally lose your password, you can use the personal account recovery service. Thanks to this, you will be able to use its functionality again.
You need to click on the authorization page on the inscription “Forgot your login or password?”. A window will open on the site where you need to select the most suitable recovery method:
- via email;
- using a personal account (you must enter the name of the locality);
- using a phone number linked to your personal account.
