Good afternoon friends. It is fully possible to use Android only after authorization of your email. Without Email, you will not be able to install any program. In addition, you will not be able to log in to the resource you need. On modern Android you can quickly and freely create your email. Some people believe that they need a computer to register Email. They are wrong. So, let's start looking at how to create an email on Android step by step?
Gmail
Gmail is one of the most famous electronic mail services. Without it, you will not be able to install more than one program from Google Market. In addition, Google services will not be available to you. To authorize in this mail, we will go through the instructions step by step:
Have you purchased a brand new smartphone? Let's log in to one of the Google services. For example, Google Market, YouTube, Gmail or cloud drive from Google. The OS will advise you to log in or make a new profile.
- If you have a brand new mobile device, then go to any program from Google. For example, Google Play, Gmail, YouTube or Drive. The OS will prompt you to authorize the profile, or create a new one.
- Accordingly, we need to select the 2nd method by tapping on the corresponding button. If your mobile gadget has at least one Google profile, in this case you need to go to “Settings”;
- Next, we will tap on the “Accounts” command and then click “Add account”. You must select Google. However, before this procedure, you must have the Internet turned on. Of course, without a global network, authorization will not work;
- Next, we need to indicate the last name with the first name. The last name will appear in your account. You can insert whatever information you want about yourself, the service does not check it. Then, you need to click on the “Next” button;
- After this, you need to indicate your date of birth, in a new window you need to select your gender. You may not set it for all users. Remember, if you indicate an age of less than 18 years, the profile will be subject to special restrictions. For example, from YouTube you will not be able to watch a clip that is marked 18+;
- In the new window you will need to create a login. Make sure that the login is not occupied by other people. Of course, it is written only in letters from the Latin alphabet or numbers. When the login has already been taken, the OS will show you this by highlighting the window in red;
- Next, we need to come up with a secure password. I advise you to use the Password Generator service. It will create a random password consisting of letters and numbers. We copy this password into a notebook just in case.
We enter it in two windows, then click on the “Next” button; - So, if you wish, you can enter your phone number. Recently, Google began to introduce its own restrictions. Without a phone number, you cannot create an email using them. True, Google does not impose this restriction on everyone;
- This number will receive a code via SMS, which must be inserted into the registration field;
- After this, you need to carefully read the agreement and tap “I Accept”;
- After this, you need to check the accuracy of the entered information and click “Next”;
- It is also possible to add a number from a debit card. Thanks to it, you can buy various applications in Google Market, or pay for goods in online stores.
Now we have our own Gmail address and now we can use it.
How to set up mail on Android
If you already have an account for any service, it will be enough to download and install the client and simply log in after launching it; if not, then you can create a mailbox in a matter of minutes. Setting up email on Android devices is no different; the principle of operation is the same for all email service utilities. To create a mailbox, you will need to select the “Create a new account” option in the menu and enter the appropriate data in the form fields. As a rule, the application independently determines the necessary settings and connects to the service, but if this does not happen, you will need to manually configure the mail transfer settings.
This is easy to do; all input data is provided by the mail service. Using the POP3 protocol to transport mail, the client delivers messages to devices without synchronization with the service; all mail changes will be made only in the application, while on the server the data will remain as is. When installing the IMAP protocol, mail is synchronized, that is, all manipulations with letters in the application are reflected on the server.
Setting up Yandex mail
The Yandex client on Android is convenient, creative in design and easy to navigate. For maximum user comfort, there is a swipe action system. It is also possible to add additional accounts. After installing the client from the Play Market on the device (the process occurs automatically after clicking the corresponding button on the store page), the user needs to log in or register. If the application does not determine the settings on its own, you will have to configure it manually. The procedure may also be necessary if you are using a universal client. You just need to select the installation manually, specify the type of protocol you need and fill in the fields for incoming and outgoing email servers.
Basic settings of Yandex mail on Android using protocols:
- Incoming messages.
- For POP3 protocol:
- We register the address: pop.yandex.ru;
- For the connection security item, select: SSL/TLS;
- Connection port: 995;
- For IMAP protocol:
- In the Address column we write: imap.yandex.ru;
- Connection security: SSL/TLS;
- Connection port: 99
- Outgoing messages (SMTP server).
- We register the address: smtp.yandex.ru;
- Connection security: SSL/TLS;
- Connection port: 46
The login and password fields are filled out individually; this is your Yandex account data. From the moment the setup is completed, the mail will begin to fully function.
Setting up Mail
One of the most popular email services, Mail.ru, is as easy to set up as Yandex. You can use both a native client and a universal one, the user is not limited in this. As in the previous case, install the utility from the store, select manual configuration and enter the necessary data in the fields. Setting up Mail.ru mail on Android devices is done in the same way, only the server addresses will be different, for incoming messages - pop. mail.ru (POP3 protocol) or imap.mail.ru (IMAP protocol), for outgoing – smtp.mail.ru. The remaining settings, port and security type will be the same as in the case of Yandex. Next, you can configure the synchronization parameters with the My.mail.ru service, the frequency of checking letters and other details, and also enter the name in the appropriate field that will appear in the “from whom” column when sending messages.
Setting up Google mail
Google's mail app is almost always already installed on Android, so you're unlikely to need to install it. If you do not yet have an account, you will need to register, where you will be asked to enter your credentials. It is possible to add other accounts, for which you should select the appropriate option in the settings, select the one you need from the list of email clients, and then enter your credentials. After such manipulations, mail from other mailboxes will be available in Gmail.
All email clients perform automatic mail setup from Google. The incoming mail server will be imap.gmail.com, and the outgoing mail server will be smtp.gmail.com. In this case, Gmail settings can be changed. By default, the IMAP protocol is used, but as a result of synchronization, battery costs, traffic consumption increase, and some devices even have heating problems. If you want to switch to POP3, you can do this by going to Mail Settings, where in the “Forwarding and POP/IMAP” section, check the boxes next to the items “Enable POP for emails received from now on” and “Disable IMAP”.
Gmail users can also take advantage of Google's interesting Inbox utility, which includes many useful tools and is equipped with the ability to read and delete messages by swiping right and left. The client has a more original design and a greater number of features, and is available for download from the Play Market.
Mail.ru mail
To register in this search engine, you need a browser on your Android. Which one doesn’t matter, from Chrome to Opera and others. So, we enter the browser:
- In the address bar of the browser, enter mail.ru and tap on the button in the search;
- A new window opens for us, where we need to click on the “Registration” button;
- Then, we need to enter personal information: first and last name, your gender, what date you were born. After this, you need to come up with a login that you like. Please pay attention to the password. It must have both capital letters and simple letters, numbers and special letters. symbols. In this case, it is advisable to use the password generator again by checking the boxes above these commands. The level of security of your address will directly depend on how complex your password is;
- You must enter a valid smartphone number, since we will need it if we decide to recover the password. To complete the process, you need to click on the “Register” button.
As you can see, we have completed registration. We will be informed about this by a message on the phone display. There is one stroke left, you need to enter a captcha, and your email is created!
Android
Method No. 1: Mail clients
Owners of Android devices can find a variety of email clients in the official Google Play application market. Some of them are specialized for one (for example, only for Gmail), while others support any e-mail. In addition, in certain programs you can not only log in to a previously registered account, but also create an email on your phone, as they say, “from scratch.” That is, create a brand new account.
Well, let's get to know them. During the review process, you will figure out “xy from xy” (who is who) of these products and will certainly install the client you like into the device system.
Gmail
A very powerful tool for working with e-mail correspondence and at the same time very easy to use. It provides a quick start for beginners - install, log in, receive/send letters.
Judging by the name, you probably already understand that the client is designed to use a Google mail profile. Yes it is. But along with its main specialization, it also supports working with other e-mails (Outlook, Yandex, etc.).
The Gmail application can sort mail: place letters in special sections depending on the recipient and their content (advertising mailings, notifications, news, etc.). It reliably protects the user from spam and viral messages. Plus, it provides free access to remote file storage. Google generously allocates 15 GB for each account.
To use Gmail, do the following: 1. On the display of your device (mobile), tap the Google Play icon.
2. On the application market website, type gmail in the search bar.
3. In the search results, select panels with the same name.
4. On the client page, tap the “Install” button.
5. Wait a little while the application is downloaded and installed.
6. Allow access to data: in the panel with the list of permissions, select “Accept”.
7. After launch, you can use the previously created and connected Google profile in the device or set up another account.
To do this, tap, respectively, your profile login or the “Add another address” option.
When connecting a new e-mail, you must do the following:
1. Select the service you want to use (Yandex, Yahoo).
Attention! If the list does not contain the name of the service that you need to install, tap “Other” and then specify its name. The client will attempt to automatically create network settings for its connection.
2. Specify the login and password of the account being connected.
The application contains almost the same set of functions as the web version of Yandex mail:
- monitoring of incoming messages;
- opening attachments;
- registration and sending of letters;
- setting up automatic notifications;
- grouping, searching, filtering by correspondence tags;
- the ability to work with the Domain version of Yandex mailboxes.
Installing and launching the client comes down to the following operations:
1. Find the Yandex.Mail application on Google Play.
2. Install it on your device and launch it.
And if you want to create a profile directly in the client, in the login form, tap the “Registration” link. Next, provide the service with all the necessary data (address, password, address, phone number).
A branded client from the creators of the popular web portal of the same name on the Runet. Convenient, quick to use. Able to simultaneously work with several profiles, including third-party services (Rambler, Gmail, Yandex). Performs absolutely all essential functions: sending letters, files. It has notification settings and a scrupulous spam filter.
The client also has many advantages. Here are some of them:
- synchronization of account data on all devices;
- displaying avatars and logos of recipients;
- convenient list of contacts (address hints when typing);
- instant search for a letter in your profile;
- push notifications;
- caching and filtering of messages;
- Protecting access to a folder with letters with a password.
Note. The performance of this application has been tested on Sony Xperia Series, HTC One, Samsung Galaxy devices.
If you want to install Mail.ru: 1. Go to the Android market to the page for downloading the client. Click Install.
2. When you launch it for the first time, the client will ask you to indicate the email (name of the service) that you are going to connect.
You can also activate the Google profile used on your phone in the application panel. To do this, you need to touch the inscription “Click here to sign in,” which is located at the bottom of the window (above the Gmail address).
If you close the panel asking you to connect your Google account, the “Create mail…” link will open at the bottom of the screen. Tap it if you need to register a new account on Mail.ru.
In the form that appears, enter your data (first and last name, gender, date of birth, address and password for the mailbox). Check the box “I accept the terms...” and click “Next”.
An ideal option for those who simultaneously work with a large number of mailboxes that are registered with various services. It will be easier to talk about what this client can’t do and what options it doesn’t have, than to describe its extensive functionality. However, we will reveal its main advantages in this article:
- management of an unlimited number of accounts;
- support for a huge number of services: including popular (Gmail, iCloud, Yandex) and rarely used (Web.de, ymail, Hushmail);
- 100% compatibility with all current protocols (POP3, IMAP, EWS, ActiveSync);
- synchronization of all mailboxes in one interface;
- advanced notification settings (sound selection, quiet hours, vibration, flash);
- a set of tools for designing letters (fonts, signatures, logos);
- “intelligent” sorting of incoming correspondence;
- hack-resistant protection and encryption of user data.
Blue Mail is downloaded and installed in the same way as previous clients.
After launching it, in the panel that opens, select the account type: “Add... Google” or “... another account.”
If you select the second item, an additional service selection menu will open in front of you.
Tap the required option.
Method No. 2: standard device resources
Perhaps, after familiarizing yourself with the software described above, you have doubts about whether clients are worth using. Well, a completely logical question: is it possible to come up with something simpler for using e-mail?
We answer. As an alternative method, you can use the mobile settings and the procedure used to register on a PC. As for the ease of their use, this is certainly a controversial issue. It all depends on the tasks assigned. Perhaps, if you just need one e-mail profile, and even then for the sake of performing some one-time operation, for example, registering on some site, then these instructions will do just fine.
Options
1. Tap the Settings icon (Gear icon) on your home screen.
2. In the Account section, go to the “Add account” subsection.
3. Select the account type (Google, Yandex, Mail.ru).
Browser
- Open any installed browser on your device (for example, Google Chrome).
- Go to the website of the required mail service.
- Register or log in (enter your mailbox address and password).
Yandex Mail
This mail is created quite quickly using a browser. Open the browser, then:
- We enter the yandex.ru resource by entering the Yandex address in the browser address bar;
- We need to tap on the “Mail” shortcut, which is located under the search bar;
- A small window will appear where you need to enter your login and password for your Yandex profile. If you don’t have one, you need to click on the “Create account” button. You will not immediately notice this button; it is located at the bottom of the block;
- After this, you need to enter the information that registration will require. To be more precise, we enter a first name with a last name, a login with a password, and a special question with an answer to it. After the question, enter the captcha;
- It is also recommended to link your mobile device number. Using the number, you can easily recover data from Email if you forget the necessary information.
The display will show that the email has been created.
Conclusion: you now know how to create an email on Android step by step. It became clear to you that this is quite simple, no easier than on a PC. But first, it is best to register with Gmail to use Google Play services. Then, you can register other mail. Good luck!
Sincerely, Andrey Zimin 03/22/2020
Collecting letters
To manage the collection of correspondence, you need to open the settings in the special agent “Mail.Ru” (downloaded from the Playmarket), where in the menu click on the “Add account” line. Then you need to enter the third-party mailbox details (login and password) and connection type (POP3 or IMAP). The agent will do everything else automatically. All you have to do is select the frequency of checking other accounts and select the name of a separate folder for correspondence that came from a particular client.
IMAP/SMTP service is disabled
Users of Gmail and Yandex most often encounter this problem. But it can also be solved. If the IMAP SMTP service is disabled, how to enable it on Android? To activate the feature in Gmail you need:
- Login to your email client;
- Go to “Settings”;
- Find the “Forwarding and POP/IMAP” tab;
- Select the desired action.
The Yandex mailer will have a “Mail Programs” folder in its “Settings”. Developers of other email clients have made protocols active by default.
You can install and configure mail on any smartphone. The process will not take much time and will not require complex preparation, but it will open up a number of new opportunities for users.
Changing settings
The entered email settings can be changed at any time using the SSL protocol by following these steps:
- Open your email client;
- Go to “Settings”;
- Select the “General Settings” tab;
- Identify the account to change and click on it;
- Go to “Server Settings”;
- For outgoing messages, specify port 465 and SSL/TLS security type;
- For incoming calls – port 995 and security type SSL/TLS;
- Finish by clicking “Done”.
How are email clients different?
Before you set up email on Android, you need to decide on the client. If you already have an existing mailbox, then simply install the corresponding application on your smartphone. If you just need to create an email account, then the Internet space offers a wide selection of mailers. List of the most popular:
- Gmail;
- Yandex;
- Mail@Mail.ru;
- Outlook.
How to disable T9 on Android - step-by-step instructions
This is not a complete list of programs designed to perform mail functions. Why do users prefer these applications? What are their amenities and are there any disadvantages?
Gmail email client
Google client author. As a rule, this application is installed on Android smartphones as a standard mail application. It is convenient because you do not need to download the program additionally.
What is the convenience:
- regular updates;
- support for all the most common email protocols and services;
- possibility of connecting several electronic mailboxes.
The disadvantages include:
- instability of operation on weak smartphones;
- Quite heavy (more than 100 MB), especially for a budget gadget.
For information! The overall rating of the Gmail mailer in the Play Market application is 4.4. Users note the convenience of the software and ample opportunities.
Yandex mail client
Yandex.Mail is a universal client that can work uninterruptedly not only with the service of the same name. You can easily connect several email accounts from different platforms to it. The advantages include:
- work offline;
- activation of functions by swipe;
- automatic setting.
The disadvantages are not defined. From which we can conclude that the application is really high quality.
The Yandex.Mail email client is one of the most popular among users
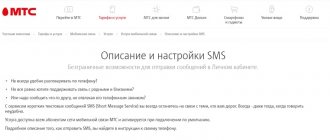
Mail client Pochta@Mail.ru
A domestic product from Mail.ru Group that allows you to receive, store and process information in various file formats. Among the conveniences, users note:
- automatic mail setup on Android;
- opening the function menu for each letter by swiping left;
- the ability to enter a name that will be seen by the recipient upon receipt of the shipment;
- You can add email accounts for other services.
Among the disadvantages is the impossibility of working without the Internet.
Outlook mail client
Outlook is a development for Microsoft mobile phones. This application is chosen primarily by customers for whom Microsoft products are familiar and understandable. However, a beginner will also note the positive aspects:
- simplicity of the interface;
- support for other email services;
- the ability to open files without switching to other applications.
However, this client refuses to work with Russian Yandex and Mail, which is a big drawback.
Just in case! The software of almost every email client provides the ability to save letters in the cloud, which is convenient to use and saves the gadget’s memory.
Developers of email clients make it possible to store letters in cloud storage
In order not to get lost in the variety of email clients, it is worth accepting one fact: email clients are mostly similar and are able to satisfy the basic needs of the user.
Ways to set up email for Android
How to log into Google Play - step-by-step instructions for the user
There are two ways to set up email on a smartphone running on the Android platform:
- automatic setup;
- manual configuration (configure using IMAP and POP3 protocols).
With automatic setup, the user enters an email address and password (if the mailbox is already registered), and the system itself determines the necessary settings. This method is more convenient and priority.
If it happened that the system could not cope with determining the necessary settings, then they can be installed manually. This method is suitable if the IMAP SMTP Android service is disabled - you have to decide how to enable it yourself.
What you need to set up email on Android
Setting up email on Android will not take much time if the user knows:
- email address and password, if one has already been created;
- ways to set up mail;
- differences between different email clients (for those who will be opening an email account for the first time).
No modern field of activity can do without email.
Important! An account and an email are different concepts, although a mailbox address is often used to create an account.