Yota is one of the undisputed leaders in the mobile communications market. If there is no way to connect an Ethernet or ADSL cable at home, then wireless network access via a modem will come to the rescue. It is not only convenient, but also affordable. However, before making a connection, you will have to spend time installing special programs for the Yota modem.
Step-by-step instructions for connecting to a laptop and computer
How to connect a modem to a laptop and personal computer will be discussed below. The connections of all models are almost the same, but there are still differences; we will focus on them in the process of describing the connection instructions.
Both modems are connected to a personal computer via a USB connector. For a modem with wi-fi function, you will need to additionally configure a wireless network.
- And so we turn on the device to which we will connect the modem.
- We find a free USB port on the device.
- We insert the modem into the USB port on the device being configured.
- We install the drivers that are firmware in the modem. The installation starts automatically as soon as you insert the modem into the device.
Connect Yota modem to laptop
And so, if you connect a modem to a device that does not have wi-fi, no additional settings are required. After automatic installation of the software, the active Yota network will appear and you can still use the Internet.
In a modem that supports wireless communication, you will need to additionally configure the settings. Enter names and configure security in the form of a password for connection access.
How to set up a Yota modem with wi-fi? How to access the modem settings?
4 general settings items.
- The mode switch can be used to enable only USB access, or wi-fi and USB at the same time.
- Automated shutdown of devices that are inactive; this feature is useful for saving traffic.
- The name of the network name that will be displayed in the list of users.
- Selecting the type of protection and setting an access password.
Setting a password for the modem.
To set a password, go to the settings, select the protection item, if you leave it open, the network becomes accessible to everyone, to set a password, enter it in the remaining tabs.
We configure the ports to make them open.
Setting up the Yota 4g lte modem
To configure, go to additional settings.
Set up the Yota modem:
- Enter 10.0.0.1/advanced in the address bar
- Next we configure the ports.
- The external port is public.
- The inland port is private.
- Selecting the required protocol (UDP/TCP/UDP,TCP).
- We register the IP address.
Click ready and all settings are registered.
Installing modem charging in a usb port, we disassemble it for different types of usb and wifi modems
Modems from this company, depending on the modification, have different charging and power capabilities.
The USB modem has the ability to supply electricity only when it is connected to a laptop or personal computer via a USB port.
Combination modems have two options for USB charging and direct power supply from a landline network through an adapter that is plugged into an outlet.
The Yoto LTE wi-fi router can only be connected via an adapter in a stationary electrical network.
It is recommended to use adapters with a power of at least 1.5 amperes for normal operation of the modem.
Installing drivers
- All drivers are packaged in the firmware of Yoto modems.
- When you connect the modem to the device, it will be immediately detected by the operating system and a driver installation wizard will appear.
- A window will open with automatic installation of drivers.
- Next, install the drivers according to the prompts indicated in the installation window.
- Reboot the device.
- Launch the Internet connection program shortcut that appeared on your desktop after installation.
- In the program window, click the button to connect to the network.
- We go into the browser and check its functionality.
If everything is done according to the instructions, the Internet network should work.
Settings on PC
How to connect a Yota modem to a computer?
- We insert the modem into the USB port of the personal computer.
- We check what IP address the modem gives us.
- Go to the device settings and open the IP version 4 properties window.
- We find the necessary fields for entering data, fill in the fields IP address, Gateway, DNS server.
- We set the required protocol in the port. Information to fill in IP – 10.0.0.10, gateway – 10.0.0.1, subnet mask – 255.255.255.0, DNS server – 10.0.0.1, alternative DNS server – 8.8.8.8, Yota apn.
- Close the IP version 4 properties window.
- Reboot the modem to update the settings.
- If everything is done according to the instructions, the Internet connection should work.
Application features
People who use this application can use popular instant messengers (Viber, Whatsapp, ICQ and others), as well as Russian social networks for free. The functionality of the program provides the ability to monitor expenses, order various additional services, and quickly change tariff plans. The application also has a separate “Roaming” item, which is sure to be useful for those who often travel abroad.
Other application features:
- Detailed information about the tariff plan.
- Possibility to quickly order additional minutes.
- Detailed information about the current Internet connection.
- Setting up communication in roaming.
- Function for connecting automatic payments from a bank card.
- Feedback button.
Yota Access
Since April 2021, the Yota Access modem application is no longer supported by the company. The operator recommends using your personal account on the company's official website or web interface 10.0.0.1 instead of this program. The software was distributed completely free of charge. Before downloading it, you need to install the drivers; in this case, you can check the functionality of the application immediately after installing it.
Important! The latest versions of Yota Access can also be found online under the name Yota Status, in which the updated menu includes three buttons that allow you to quickly switch to the corresponding operator services
How to install on Windows, Mac, Linux
How to install Access on Windows OS:
- Unpack the archive (if necessary). Open file
- In the window that appears, you can check the box next to the “provide additional install option” field if the user needs to install advanced options. You can begin installing the application after pressing the Install button.
- After the installation is complete, a window with an application menu will appear at the bottom of the screen.
How to install Access on Mac OS:
Run the installation file and double-click on the “Continue” button in the pop-up windows
Next, you should carefully read the “Important Information”, and then click on “Continue” again. Agree with the placement of the program and the type of installation by clicking on the “Install” button
Important! Once the Access application is completed, your computer will need to restart. How to install Access on Linux OS:
How to install Access on Linux OS:
It should be said right away that the developer did not provide a full version of the application for Linux. Yota Status software has the greatest compatibility with this OS. However, in fact, this software has a minimal set of functions that open links to the corresponding operator services.
How to manage
The Yota Access modem program is designed to perform several functions:
- To assess the signal level, obtain information about the data transfer speed and IP, as well as the amount of downloaded and uploaded traffic, you should use the “Network” tab.
- In the “Settings” tab, users will be able to select the interface language, configure autostart of the connection and control the indicator light on the modem.
- The “Information” tab of the program contains information about the software version and Mac address.
Download and install
NOTE! Let me warn you right away that this program is no longer officially supported by the company. All this was done so as not to increase the costs of programmers who regularly had to release updates.
Let's launch the application. After that, I would also advise clicking on the checkbox to the left of the installation button to enable additional functions in the program;
The application installs quite quickly and without any problems. The program can be used on both Windows and MAC OS. On Ubuntu (Linux), there was no such application and there is not yet - so we use a browser for settings.
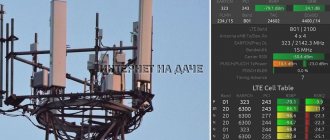
In the first window “Network” or “Network” - you will see the speed of the mobile Internet - both current and average. Below you can see how much information has already been downloaded and sent. In the “Signal” field, you can determine how far away the operator’s tower is. If the signal level is low - for example, you are in a village or outside the city, then you should think about purchasing a powerful antenna for the modem. And at the very bottom your IP address will be displayed.
Simple problem solving
Even such a simple device as a YOTA 4G LTE modem sometimes does not function as expected. It happens that you connect the modem to the computer, but nothing happens. This happens if the USB port is not functioning properly or is simply disabled in the BIOS. If this is the case, then no USB device will be detected in the manager.
Problems also arise when connecting the modem to computers that run older versions of operating systems. For example, Windows XP may not always recognize your modem or may not support certain features. To solve the problem, you should update the system or install a fresh driver package.
Poor connection problems can be solved by improving the signal. To do this, you should get a special USB extension cable and move the modem to a point in the room where the signal level is most stable. You can reset the Yota modem settings, as well as the Wi-Fi network parameters, on the website status.yota. Other problems can be solved individually by contacting Yota technical support. Employees will definitely explain all the setup steps, help with connection and solving all sorts of issues.
The Yota company is one of the largest providers in Russia, providing Internet access using WiMax and 4G/LTE technologies. Gradually, the number of cities covered by the coverage area is becoming larger and larger. Therefore, users also have more and more modems. In principle, there are no particular difficulties in working with them - everything is almost the same as with other mobile operators. Connection and setup are simplified to the maximum so that even a child can handle it.
By the way, on this Yota router model it became possible to quickly “share” the connection with friends using the Yota Share function, just by sliding the switch slider. At the same time, the battery charge lasts for 16 hours of active surfing on the global network.
If you can’t log into the management page of your Yota device, then we will try to figure out what caused this.
Secondly, view your connections by going to Control Panel Network and Internet Network Connections (Windows 7) or by typing the command ncpa.cpl (by clicking on the Start icon in the lower left corner of the screen or by pressing the Win R keys.
If you have selected your network connection, click on its properties. Select Internet Protocol Version 4(TCP/IPv4). Check that it is installed - Obtain DNS server address automatically.
Attention is important. If after these manipulations the Network does not work, you should try to configure it manually. To do this, instead of automatically selecting Yota servers, you need to configure them yourself
To do this, instead of automatically selecting Yota servers, you need to configure them yourself.
The most important
- viewing work data in real time;
- traffic statistics of uploaded and downloaded information;
- self-configuration of the modem after installing the drivers into the system;
- automatic update and installation of Yota modem software;
- nice and simple graphical shell, created in a white and blue color palette;
- installation and operation in the Windows operating system of old and new generation;
- monitoring data on the created network using an additional panel that shows network errors and other connection problems.
Advantages and disadvantages of the Yota application
+ choice of network speed;+ detailed traffic analysis;+ the ability to set a schedule for changing tariffs;+ the ability to purchase a “beautiful number”;+ regular driver updates;+ Russian-language interface and manufacturer support;– Internet settings are entered manually;– paid option Wi-Fi distribution; – complex procedure for establishing a connection.
Key Features
- work with Yota operator communication devices (USB modem and router);
- setting technical parameters of connections;
- access to company tariff packages;
- setting a schedule for changing tariffs;
- exercising control over traffic;
- selecting network connection speed;
- access to on-line operator support;
- automatic update;
- linking the tariff to a payment card (autopayment).
| Developer | Support | Update date | Downloads |
| YOTA | Windows 10, 8, 7 | 02-01-2019 | 29054 |
| WE RECOMMEND! Fast download | Standard installer (for experienced) |
| Official Russian distribution Yota application | |
| Quick installation without unnecessary dialog boxes | |
| Downloading via a free Torrent file (Ubar) |
*Attention! When downloading the standard installer, you will need a pre-installed archiver, you can
Today there are 3 modem models: LU150, LU156 and Swift (WLTUBA-107). There are no fundamental differences between the LU150 and LU156, except that the Swift has a removable SIM card and has grown slightly in size compared to the LU150/LU156.
Exploitation
- When using a USB extension cable, the modem may not have enough power, which may cause the device to disconnect (and not connect until the modem is physically reconnected). If this happens, then you need to use either a shorter extension cord or purchase an extension cord with additional power. I think that if you use an extension cord about 1-2 meters long there should be no problems.
- Despite the operating temperature range, you need to remember that the modem gets quite hot. At high humidity, this can cause condensation to form, which is extremely harmful to the device (like any other moisture).
- When the first signal indicator (SINR) drops to zero (or lower), the device can go into standby mode. If this happens, you need to improve the signal, for example by moving the device to a window. The signal indicators at which the Internet from YOTA works stably must be no lower than 2/-110 (SINR/RSRP).
- The YOTA (Yota Access) application, which we are offered to download on the modem’s WEB interface, is not necessary for it to work. It simply visually displays the modem connection status, current connection conditions, and contains statistics similar to those displayed on https://10.0.0.1/ (https://status.yota.ru/).
- The indicator on the modem (YOTA company logo) glows blue when the modem is connected to the LTE network.
YOTA modem - drivers
- for Windows XP (Win2000/WinNT), ActiveSync is suitable as a driver for the YOTA Modem - this program contains the RNDIS drivers necessary for the modem to operate;
- for Windows Vista/7/8, Windows Mobile Device Center (analogous to ActiveSync) is suitable as a driver for the YOTA modem.
- I have three different versions of drivers pulled from the modem when it was first connected to a computer with WinXP.
On Win XP/Win7, I was never able to overcome the problem that many users had back in 2012: “The Yota LU150 USB Modem does not connect to the Internet in Windows 7 and the icon in the YOTA Access program does not turn blue. The Yota Access program displays the message: “Connect the modem,” although it is already connected and the LED on the modem glows continuously.”
Dancing with tambourines and drivers did not give any real results. The Internet appeared every once in a while when I turned on the computer. It has been experimentally established that if the modem is identified in the device manager as an unidentified USB device, there is no way to get a working Internet (either manually or using the devcon utility) except by “jerking” the modem in the connector. Another assumption arose that the device is initialized at a time when the modem has not yet connected to the network. It was decided to delay the loading of the modem driver according to the following instructions. But this operation was also not crowned with success.
As a result, I was forced to hand over the computer with the recommendation that after loading the operating system, remove the modem and reinsert it into the connector.
Similar apps
- Rostelecom. Application of the most popular Internet provider in Russia. It can be used as a “Personal Account” for the user of this company. This program makes it easy to pay your bill, connect or disconnect services. The Rostelecom application for Android allows you to use it to communicate with the operator’s technical support. If you are a user of this provider, then be sure to install this “Personal Account”. Its functionality is sufficient to resolve all issues that may arise in the process of using Rostelecom services.
- MTS. The “Personal Account from MTS” application is an exact copy of a similar web resource. But unlike it, the application is much easier to use. With it, you can pay your bill, change tariffs and activate additional functions. It is possible to manage your bonus account.
- Tele 2. This inexpensive operator also has an application for easy access to your “Personal Account”. The application does not have much functionality. But with its help you can solve all the problems that periodically arise when using Tele 2. Here you can change the tariff, see the balance of SMS packages, Internet and unused minutes. And if something comes to an end, then through this application you can connect an additional package of options.
How to connect an Iota modem to a laptop
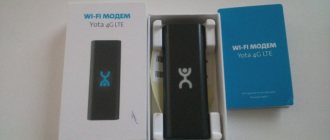
How to connect Iota? The procedure is almost the same for all four types of modem. However, there are a few differences. For example, devices that resemble a USB flash drive can also be connected to a computer; just insert it into a USB port:
- Turn on the device you want to connect to - a personal computer or laptop.
- Insert the modem into any free USB port as a flash drive. A green or blue light should light up on it, which means the device is turned on and ready for use.
- The modem installation window will open. Following the instructions, you need to install the standard drivers for the device specified in its software.
Modem connected to computer
The device is now ready for use. An Internet distribution icon will appear on your personal computer or laptop. The main thing is to remember that the Internet is distributed while the device is in the USB port. As soon as it is removed, the connection is broken.
Note! This type of device is most convenient if there is a need to work or study outside of home. A flash drive modem is convenient to carry with you and use anywhere
Iota modem that works without connecting to a computer
Other types of devices, Yota Wi-Fi modem or 4G modem, require additional configuration of wireless network parameters and password. To do this you need:
Here the user will see four options for different settings:
- switch mode. Allows you to choose how the device will work: via USB, Wi-Fi distribution or simultaneously in two directions;
- automatic shutdown of devices. Here you can set the period of time after which connected devices (personal computer, laptop, tablet, smartphone) will be turned off if they are inactive. This will help save traffic, especially if you choose a tariff with a monthly limit;
- the name of the device that will be visible when connected. The default is “Yota” or the modem serial number. The user can change it to any other;
- password protection. Here you can set a password for connecting to the network.
After familiarizing yourself with all sections of the settings, you can proceed to setting device parameters for convenient operation. First you need to set a password for the “Iota” Wi-Fi router, 4G: go to the appropriate settings item, set a password or leave the network open, accessible to everyone.
The next step is to configure the ports, that is, make them open. For modem Yota 4G LTE, as for other devices, the procedure is as follows:
- Enter “10.0.0.1/advanced” into the address bar of any browser.
- Configure the following parameters for ports: external - public, internal - private.
- Select the data transfer protocol: UDP or TCP or UDP, TCP.
- Enter the device's IP address.
Now all the settings are registered, the device is ready to work with a personal computer, laptop or other devices.
Do I need to install drivers and applications or not?
The drivers required for operation are specified in the software of the modem itself. During the installation process, they are automatically installed on a personal computer or laptop, so the user does not have to do anything additional.
Important! If the modem does not offer automatic installation of drivers, you can download them from the Internet by entering the device name. Next open, follow the installation instructions
Installing drivers
The installation process is completed by rebooting the modem and computer. Now your Internet connection will be stable and work without interruptions or loss of speed.
If unexpected errors occurred during installation or the Internet did not appear after a reboot, it is recommended to write to technical support using the feedback form on the website or call the hotline. There are cases when the reason lies in the modem itself, then it can be replaced under warranty if the case is covered under warranty.
Application functionality
The utility performs the following functions:
Information appeared in the official public pages of the operator that as of April 28, 2017, the campaign will stop supporting this application. Among the formal reasons given were:
Today, managers from the support service do not guarantee the correct operation of the program, but many continue to use it out of habit; some unscrupulous subscribers try to use the utility to avoid operator restrictions on traffic distribution and the use of trackers (file sharing services).
What you need to pay attention to before unlocking Iota
Before you unlock the Iota modem, you need to understand several important points that affect the further update. Let's consider the main nuances of unlocking:
- Before you start updating, you need to make sure that the device is more than half charged - otherwise the device may turn off during installation;
- To download, install and update software, you will need access to high-speed Internet;
- To install, you must use the latest versions of the software downloaded from the official website;
- Installation from suspicious sites is not recommended - such actions may lead to blocking of the device.
Note! It is necessary to start flashing the device after carefully studying the step-by-step instructions. If the user is not confident in his own abilities, it is worth leaving such work to a specialist
In cases of incorrect USB firmware, the modem will not work or various problems will arise with connection and signal transmission.
Activating SIM card Yota on iOS
We offer instructions to activate the Yota SIM card for your tablet. To do this you will need Internet access via Wi-Fi:
- Adjust the size of the SIM card to your device and insert it into the special slot;
- The access point will be registered automatically;
- If a message appears about data usage while roaming, you can safely agree! Iota provides Internet access without being tied to your home region;
- Reboot your device;
- Open Play Market or AppStore on your device;
- Find the Yota application there and install it;
- Once you open the application, you can select the connection conditions. And after paying for the selected package, the card will be activated.
In order to activate a SIM card on your phone, you need to use special commands that do not require installing the application:
- insert the SIM card into the device;
- the access point and other necessary data will be registered automatically;
- after that, enter the command *150*50,400,3000# where 50, 400 or 3000 is the cost of the tariff plan depending on the validity period: day, month or year.
- then you will receive a message about the activation of the selected service package; You can safely turn on data transfer and use it!
That's all you need to know about how to activate the Yota SIM card on your tablet. The remaining settings are made in the operator's official application.
Here's a short video on how to choose the right tariff!
Thus, we see: to understand how to activate a Yota SIM card for a tablet, you do not need to have professional knowledge! If you still have any questions regarding running Iota on this device, you can ask them in the comments to this article!
To register an access point for a given operating system, you must perform the following steps one by one:
- go to the settings of your gadget;
- select “More”, then “Mobile network”;
- Now you need to create a new entry in the “access points” section, specifying the name Yota, and in the APN line enter: internet.yota.
Having done all of the above, you can consider that the process of setting up the Internet on your device is completed, since the remaining fields should remain unchanged.
Go to the Settings category of your phone, then open the More tab. Behind it we find and enter the Mobile network page and then access points (APN). Then click Change/Create access point. Enter the Name YOTA and the APN data internet.yota. We leave the remaining fields empty.
As a result, the path through the tabs looks like this: Settings → More → Mobile network → Access points (APN) → Change/Create access point → Name “YOTA” → APN “internet.yota”.
In order to manually activate a Yota SIM card on a phone or tablet running new versions of this mobile operating system, the setup example will look a little different:
- Open Settings
- Select and open the settings of the desired SIM card
- In the lower half of the screen we see the operator’s network and just below the Access Point we enter.
- At the very bottom of the screen, click on the plus sign - New access point
- Enter the parameters Yota and APN internet.yota
The full path looks like this: Settings → Yota → Mobile network → Access points → New access point → Name “YOTA” → APN “internet.yota”.
To activate a SIM card on devices running the iOS operating system, you need to perform several manipulations. Insert the SIM into the device, turn it on and wait 1-2 minutes. During this time, the card will be activated and an icon will appear at the top of the screen indicating the signal strength and type of data network available.
If for some reason automatic activation on your iPhone or iPad does not work, activate manually by creating a profile for a new mobile operator.
- Go to “Settings”, then “Cellular Communications” and “Cellular Data”.
- Go to the APN tab. Here you enter the following APN: internet.yota. Leave all other columns empty and save the data.
Activating a Yota SIM card on Android devices is almost the same as on any other smartphone. Insert a new SIM card into your tablet or phone (note that this operator has its own cards for each type of device), turn on the device and wait until the activation notification appears and a bar with the signal strength appears at the top of the screen.
If it is not possible to automatically activate the SIM card, use the following instructions:
- Find the "Settings" menu item.
- Go to the “More” tab, then “Mobile network” - “APN access points” - “Change/Create a new access point”.
- Enter the Name - “Yota”, APN address - “internet.yota”.
- Save all changes and wait for your device to detect the new network. A network signal bar will appear at the top of the screen.
In fact, everything is not as complicated as it might seem at first glance. After purchasing a card, you need to insert it into your device and restart it. Activation occurs automatically immediately after it is recognized by your device.
Next, you need to install the official application of the yota operator, in which you should log in, as I wrote earlier in the news - Yota personal account. After successfully logging into your registered profile, activation is completed.
Insert the SIM card of the Yota operator into your device (phone, modem or tablet) and wait until a message about successful activation appears, after which the network signal strength indicator should be activated.
- In the smartphone menu, go to the settings section.
- At the top, click on the more tab (about 3-4 lines), then go to the section - mobile network, look for the item - APN access points, then click - change / Create a new access point.
- The next step is to indicate in the column - Name - “Yota”, and in the column - APN address - “internet.yota”
Read about operators: How much does an MTS SIM card cost and where can you buy it?
After you have done everything, you should save all changes, then the SIM card should be activated. If everything is done correctly, the network signal reception level indicator should light up in the top menu of the display.
Firmware for different modems for Yota
All the necessary information regarding the firmware is on the company’s official website. To update the firmware you need to go online on your computer. Re-flashing can be quite expensive, make sure you have a stable internet connection.
Huawei e173 modem firmware
Huawei e173 is a modern model, for the firmware of which it is better to contact a specialist, since it is unlikely that you will be able to do anything on your own. And there is no software for this process to be found.
Yota Voice is a regular SIM card from this operator. The communication standard is similar to Megafon, MTS, and Beeline. Firmware for a Huawei modem requires certain skills. To avoid speed restrictions, you need to change TTL and IMEI.
Firmware for modem e352 for iota
The E352 device uses a different block removal algorithm. There is no program yet for obtaining a code for flashing firmware without payment.
To receive the code, you will need a free Google account. Next, you should go to https://huaweicodecalculator.com/new-algo/index.php, where you can get the unlock code. Before the operation, you need to look at your data on the Huawei E586 modem.
Beeline modem firmware for Yota
Beeline modem firmware is performed using the free dccrap program. Drivers for the modem must be installed on the PC. Next, the settings are reset to the default ones.
Next, you need to insert a third-party SIM card into the device, connect it to the PC, launch the program and click “Unlock”. After the unlocking process is completed, you need to reboot the modem and you can use it.
Megafon modem firmware
The Megafon device is flashed with a program from the developer DC-Unlocker. The program is purchased on the official resource. When it is installed, you need to open DC-Unlocker, turn on the Megafon device and click on the magnifying glass. Then the program itself will check all the data on the connected device and will be able to flash it automatically.
The advantages of the program include its ability to work with various device models from a variety of operators, including Yota 4g lte.
Disadvantages of the program - paid services for unlocking modems. To make a payment, you need to buy certain “credits” on the “DC-Unlocker” resource. Each version of the modem has its own number. The price in euros is indicated in a specific tab on the site.
When payment is made, the user receives a login and password, which is entered into the program. After confirmation, the person must click on the “Unblock” sign. No further action needs to be taken. The device will be flashed and ready to work with SIM cards from mobile operators.
Megafon also uses the HUAWEI Unlock code calculator program. The driver for Yota modems unlocks the device, working with any HUAWEI model.
The program is downloaded from the official resource https://huaweicodecalculator.com/new-algo/, then launched, after which 2 codes are provided. Next, the mobile device is connected and each code is entered in turn. In general, updating the firmware using this method is always quick and without problems.
MTS modem firmware for Yota
The MTS modem does not require firmware; just unlocking it is enough. To do this, you need to install certain programs, for example, DC-Unlocker.
One program can do the unlocking on its own, the other generates a code that is inserted into a specific column.
https://youtube.com/watch?v=cUcZGkiE4Tc
How to install yota on a PC or laptop
Despite the fact that the program requires you to specify your device when starting, there is no separate version of the program for PC. Therefore, to download to your computer, you will need a Bluestacks emulator that can simulate the Android environment.
After downloading the emulator using your Google account, you will be taken to the application store, where you can easily find the necessary utility. All you have to do is click on “Install” and wait until this process is completed.
Installation instructions are here.
Where to get drivers and what to do if the device is not recognized by the PC?
The driver for yota 4g lte for xp will be suitable from the list of basic drivers already present in the system immediately after installation. This only applies to SP3 and newer versions of Windows.
If the modem was connected, but does not work, you need to look at how the operating system detected it. This is done in Device Manager. Modem yota 4g lte xp driver is displayed in “Network Cards”, and on newer versions of the operating system – in “Network Cards”. There should not be an exclamation mark next to the name - this indicates that the modem itself is not working or the drivers are installed incorrectly.
If the modem does not appear in the desired section:
- Download ActiveSync - the application contains a list of necessary drivers for full operation of the device on XP.
- For versions of Windows after XP, you can install Windows Mobile Device Center.
For other operating systems (if you have the latest, current version), there is no need to install drivers - they must be in the basic package.
How to activate Yota SIM card on Android
Unlike other Russian providers, Yota does not have an impressive list of individual packages that combine profitable traffic with more expensive calls or vice versa. Yota clients use a single tariff with the ability to personally determine the required limits of minutes or gigabytes. At the same time, there is a clear gradation in tariffs for smartphones, tablets and PCs.
To understand the possibilities of regulated tariff plans for each type of device, it is important to first familiarize yourself with the basic terms of their provision.
For smartphones
The standard setup of a new SIM for a tablet PC involves automatic installation of the internet.yota access point, followed by installation of the proprietary Yota application into the device’s memory, which is available on the App Store, Google Play and Windows Phone Store. It is thanks to the utility interface that the user can conveniently select a tariff plan, change the number, top up the balance, receive consulting support, etc.
If Internet access is not automatically configured, you will need to manually activate the APN access point. Due to the identical interface and architecture of operating systems for tablets and smartphones, you can use one of the instructions described above, focusing on the OS of your device.
Many devices run on the Windows Phone operating system, and some of them are already using yota. As a rule, activation occurs automatically immediately after installing the SIM in the mobile phone. If this does not happen, then activate it manually.
- Go to the “Settings” tab - “Access point” - “Add access point”.
- Enter the new APN address: internet.yota. Save your data. And wait until the device detects the new network and updates the information.
The process of activating SIM cards from the yota mobile operator on a personal computer differs slightly. Typically, the SIM must first be inserted into the USB modem and connected through one of the USB ports. If you have USB 3.0, turn it on there. The system will automatically detect new equipment and install drivers (they are located in the modem itself).
Settings → Cellular → Cellular data → APN “internet.yota”. We leave the remaining fields empty.
When you just bought a Yota SIM card, you first need to activate it, after which you will receive a special text message from Yota with auto settings for the Internet and MMS messages. Most devices today quickly recognize information from SMS and automatically adapt to all its parameters, providing its owner with a minimum of problems and torment with connecting to the World Wide Web.
If you mistakenly deleted a message with settings or simply cannot find it in the piles of spam, you can always ask the operator to send such an SMS an infinite number of times. To do this, call the service number 8-800-550-00-07 or use an online chat with one of the call center operators, available on the company’s official website.
When you realize that the gadget cannot configure the parameters automatically, you will have to enter them manually. It is not as difficult and scary as it might seem to you initially. All you need to do is enter information in several fields, creating a new access point in APN format.
It’s worth noting right away that this service is not very popular among subscribers, because what’s the point of paying for messages, the content of which can be easily transmitted using dozens of absolutely free popular instant messengers that use Internet traffic.
However, some clients still prefer using MMS and there are reasons for this. If you desperately need this type of message, but the automatic settings that came in the letter did not have any effect, study the information below on how to configure them manually.
Android: select “settings” - “more” - “mobile network” - “APN access point”, then feel free to add a new point, not forgetting to fill out the basic parameters
Name: whatever you want
APN: mms.yotaMMSC: https://mmsc:8002MMS Proxy: 10.10.10.10Port: 8080APN Type: mms
APN: mms.yotaMMSC: https://mmsc:8002Proxy MMS: 10.10.10.10:8080
Name: any Access point: mms.yota WAP gateway: 10.10.10.10 Its port: 8080 MMS center: https://mmsc/ Its port: 8002
We kindly ask you not to forget to save all APN MMS parameters before exiting!
In order for the settings you entered to be activated, it is critical to restart the gadget.
The setup process is quite simple. The main thing is to correctly indicate all the above data. This will once and for all solve the problem of lack of Internet on your device and help you send dozens of SMS without lags. We also note that when flashing the device, you may need to re-enter the parameters manually, and perhaps after changing the version, SMS with automatic configuration will begin to work correctly for you.
For your convenience, I decided to write in more detail about how to activate the Yota SIM card on phones running different OSes. We all know very well that each developer tries to stand out with his own style, which in some way creates a certain inconvenience. So that you don’t have any questions, we’ll talk to the three largest suppliers, such giants as Android, iOS and, of course, Windows Phone.
Activating a SIM card on devices running iOS is much simpler than on Android. You just need to do a few steps and you're done.
Read about operators: How to find out the balance, remaining minutes and Internet on Sbermobile?
In the first point, everything is the same as its predecessor, insert the SIM card into your smartphone or any other device, after installation, turn it on. Activation should take place automatically; if this does not happen, follow the steps below.
- Go to the section - Settings, then click on the subsection - Cellular communications, and another click on the link - Cellular data.
- Next in the field you need to go to the APN folder. In the APN column, enter “internet.yota” (without quotes).
This completes the process, wait 1 minute, after which the network reception signal indicator and the network availability icon should be activated.
Yota 4G (LTE) modem settings
Let's start from the very beginning - directly from installing and configuring the modem. First, you can try reading the instructions - sometimes this point helps. If it doesn't work, try checking the instructions below to see if you did everything correctly.
On Win XP/Win7 back in 2012, there was a problem that when connected to the computer, the modem LED was continuously lit, demonstrating the connection, and the YotaAccess program wrote “Connect the modem.” In this case, nothing will help you except, after loading the operating system, remove and reinsert the modem.
Step-by-step setup:
- Insert a SIM card into the modem (sometimes the store will do this for you);
- Insert the modem into the computer;
- Wait for the device drivers to be searched and installed;
- After loading the drivers, the software will be loaded from the modem memory. Select the language, region, location of shortcuts, installation location;
- Open YotaAccess. This is a utility program for connecting to a network and managing communications;
- Register on the Yota website - this is necessary to activate the device connection.
What you can do in the application
The functionality of the utility is small but important:
- Two main features - controlling expenses and changing tariff settings - are implemented on the main screen of the program. In the center of the working window there are buttons with tariffs (speed slider for modems). The remaining balance is visible in the upper right corner, next to the plus icon, which will allow you to top up your balance from a bank card.
- The question mark in the top right corner will open a menu with frequently asked questions and a chat window with support.
How to activate Yota SIM on Windows Phone
Settings → Access point → Add access point ( ) → internet.yota. After saving, you need to select an access point and wait for the “Active” status.
In order to independently register the settings for the yota Internet in this case, you need to:
- From the gadget settings, go to “Access points”;
- click on the “ ” icon, thereby creating a new entry;
- now you need to set a name for the point and write it in the line with the address: internet.yota;
- click “save”.
After saving the new entry, you must select it again and wait for the “Active” status to appear. Now we can assume that setting up yota on your phone is completely completed. Other fields also do not require filling out.
As with many smartphones, activation of yota SIM cards on devices running Windows Phone occurs completely automatically, but there are situations in which the process does not start automatically. To force activation of a SIM card, you must enter all the data manually. In order for you to do everything correctly, I’ll break it down point by point, follow these steps:
- Insert the SIM card into the device, turn it on and go to the “Access points” menu section.
- Go to the menu section - “Access points” and enter in the APN field - internet.yota.
- Next, you need to save the entered data and reboot your device.
At this point, the activation of the SIM card on Windows Phone has been successfully completed. After all the manipulations, you will be able to access the Internet for the first time from your gadget.
Application Features
Using the application, you can personally verify that your number is not connected to imposed services, and get instant access to all information on tariffs. This operator offers affordable communication without roaming throughout the Russian Federation with no restrictions on call duration. And thanks to the use of Megafon’s power, Yota provides a good signal and better coverage throughout the country. All this can be learned from the described application for mobile devices.
This application differs from many others in its user-friendly interface, compactness and high level of ease of use. This manifests itself immediately during installation: you don’t need to sit for a long time thinking about the settings, you can simply install it and use it. Only the Yota application for PC, you can immediately launch it and get to work. Fortunately, you don’t need to get used to the interface - it’s intuitive even for a child. You can immediately start changing your tariff plan or link your bank card, as mentioned above.
Program functionality
This application will be needed by all users of the Yota operator. A person who knows the value of money and time can create an individual tariff plan here with maximum convenience, adapting the terms of use to their needs. This approach will save a lot of time and money while providing a truly convenient solution. In addition, the account of your number will always be kept in check, preventing the user from ending up in an unpleasant situation without money and the ability to call somewhere. Using the advantages of the application, the client can top up his account almost instantly, so as not to lose precious minutes of his time.
It is important to know!
This application has more features than the web version of the Yota personal account provides.
This application will be useful for those who are on a business trip and are unable to quickly top up their account through the terminal. It will also be convenient for people with disabilities and the elderly who cannot get to the refill point on their own. Of course, it is more difficult for an old person to get used to innovations, but the intuitive interface will allow them to quickly get used to the system with minimal outside help.
The Yota program for Windows 7 was created to centralize all controls for managing your account. Using this utility, based on the above, will help you to always be in touch, and in case of a problem situation, you can always contact the support service. In general, Yota currently has a very centralized way of working productively with clients.
The specialists of this company developed this application for the convenience of users, of whom they are also. These are the best ideas, united by a common desire to create a better way to work with the Yota network, which will help not only the financial condition of the creators, but the entire society as a whole.
An ideological approach is the key to success in any endeavor, because mutual assistance and optimization of social processes make everyone better at once. On the one hand, the authors have an increased turnover of conditional goods, and on the other hand, there are happy customers who are willing to pay for a high-quality product.
How to activate a Yota SIM card on a phone or tablet
After receiving the card from the courier or purchasing it at official sales offices, you need to open the back cover of the phone, insert the SIM card into the device and turn it on. Within a minute, the SIM card will be activated automatically.
If you want to change your tariff plan, go to the application installed on your smartphone. Be sure to check that your phone is connected to a 2G, 3G, and, of course, 4G network. The corresponding icons will appear on the screen at the top of the screen.
Sometimes automatic activation does not work. For example, this may be the case if you are in an area where there are no cell phone towers nearby or your phone is faulty, various interference may occur in the operation of yota. In any case, there is a way out of this situation. You need to manually create a profile and enter the name of the point – internet.yota.
For smartphones
Before starting to use Yota tariff plans, it is advisable to install a proprietary mobile application in the main memory of the device, which is available in versions for Android, iOS, Windows Phone and allows you to order a card, as well as configure, control and change the conditions for the provision of the package.
To do this, you can use a free Wi-Fi channel or Internet access through a SIM from another provider.
To activate the Yota SIM card on your phone, you need to install the SIM in a free slot and reboot the device. Next, the SIM should be automatically identified in the Iota network and access to the Internet should open. After this, all that remains is to open any web page, wait for redirection to the provider’s website and create your unique subscriber profile by going through a short registration procedure.
If this does not happen, you will need to manually configure network access. The exact procedure depends on the type of operating system installed on the smartphone.
If the Iota web network is not automatically detected on an Android phone, you need to correctly follow a fairly simple procedure for manual activation:
- select “Settings” in the main menu of your smartphone;
- go to the “More...” tab;
- activate the “Mobile network” or “Mobile communications” section (depending on the Android version);
- select “Access points (APN)”;
- depending on the actual presence or absence of the “Change/Create a new access point” entry;
- enter Yota in the “Name” field;
- in the “APN” column set internet.yota;
- save the changes made;
- wait for the system to update and the network signal indicator to appear at the top of the display;
- reboot the device if a wireless data transmission channel is not detected.
Sometimes you may need to remove and insert the SIM card into the slot again. There is also a risk of SIM technical defects, which can be eliminated at the service office by replacing the faulty chip with a new one.
This operating system is significantly inferior in popularity to Android and iOS. However, the number of smartphones with management software from Microsoft is constantly growing due to its excellent interaction with 2G/3G/4G networks. To manually activate Yota SIM for Windows, you must:
- open the “Settings” section in the menu;
- select the “Network and wireless communications” tab;
- sequentially go to the “Cellular network and SIM card” and “SIM card settings” items;
- activate the “Internet access point” section;
- create a new connection via “Add Internet access point”;
- enter “APN address” – internet.yota.
If the Yota SIM card for iPhone does not support automated setup and preparation algorithms, you will also need to manually create an APN access point with the internet.yota address. To do this, just follow a few steps:
- select the “Settings” section in the main menu;
- sequentially open the “Cellular Communications” and “Cellular Data” items;
- activate the “Data parameters” tab;
- go to the “Cellular Data Network” section and create a connection point with already familiar parameters.
Let us remind you once again that the changes made and saved will probably take effect only after the device is rebooted.
SIM card identification on the network occurs automatically or by manually setting up an access point with the internet.yota address. But until the subscriber gives a positive response to the operator’s request to agree to the Yota terms of service, he will not be able to use the Internet and voice communications.
We will also describe other useful USSD commands for managing, monitoring and changing SIM card parameters (see table).
The process of starting SIM from Yota on a computer has its own algorithm of actions that are not technically complex:
- insert the SIM card into the slot of the modem (router);
- connect the device to the USB port of the computer (preferably version 3.0) and wait for the equipment to be identified, which will be signaled by a glowing operator logo;
- Make sure the required software is automatically downloaded. If the software does not install, you need to launch “My Computer”, open the “Yota” disk and activate the installation file;
- after installing the software, launch any page in your browser (Google Chrome, Yandex, UC Browser, Firefox Quantum, Opera, etc.) and wait for redirection to the operator’s website;
- read the provider’s greeting and click the “Continue” button;
- connect the device in your Personal Account or, following detailed instructions, create a new user profile.
Read about operators: How to find out the pin code of a Beeline SIM card, Beeline code via the Internet
Volume - 1.31 MB
Supported OS-Windows Phone 10Windows Phone 8.1Windows Phone 8Windows Phone 7
Supported languages - Russian
Requirements: Internet access
If you are faced with the task of activating Yota SIM cards on your computer to work with the modem, take the following steps:
- Install the modem with the SIM card from the Yota provider connected to it into a free USB port.
- Next, the automatic driver installation process should begin. Please note that on different operating systems this takes different periods of time. If you update in a timely manner, there should usually be no unplanned problems.
- The next step is to activate and register your profile. To do this, you need to open any Internet page in a web browser. You will automatically be redirected to the official Yota website where step-by-step actions for registering a Profile and how to fill out all the necessary Personal Account data will be described.
- After all the steps have been completed, you will receive an activated Yota SIM card, as well as logs and a password to enter your Personal Account.
The drivers have been installed and your modem should register with the operating system - a corresponding notification will appear in the lower right corner.
- If you just couldn’t go this route, we described the finer points of setup and activation in the articles -
Alas, not all tablets have a built-in slot for a SIM card, but even here there is a universal solution - modems. Yes, perhaps this is already a dying technology, but as long as there are tablets that only support Wi-Fi out of the box, modems will be popular.
How to setup?
Android is a very specific operating system and, as practice shows, connecting a modem to it is not an easy task. But the Yota operator and the skilled developers made sure that the user interferes with the setup procedure as little as possible.
Appearance
The owner will need:
- Buy a modem like this;
- Insert a SIM card with connected tariffs;
- OTG cable;
And then everything is simple: connect the accessory to the tablet via a cord and the built-in software will automatically configure it.
Web interface
You, as a user, will only have to check the connection, that is, type the internal address of the modem in the device browser - this is 10.0.0.1. If unsuccessful, you will need to diagnose the problem, which will be described in the next paragraph.
There are only a few reasons why this problem may occur:
- Your tablet does not support OTG mode;
- The modem operates in flash card mode;
- Problems on the operator's server;
- The DHCP service is not working correctly.
Manual setting
In the latter case, you should go to the settings and the more option. Activate Ethernet mode as shown above and go to Other Settings. Setting the DHCP parameters yourself and saving them, 99% of the time, this solves the problem.
Data input
OTG mode, alas, is not supported by all tablets and this cannot be fixed in any way. If the modem works as an external drive, then in this case you need to contact a representative of the Yota operator and solve the problem with technical support. And malfunctions are a normal occurrence for absolutely all operators.
Set up your tariff plan!
Operators are constantly striving to expand the scope of their capabilities by providing subscribers with additional functions. Thus, YOTA network users can install another useful program on their mobile device. And using all kinds of emulators that are found on the Internet, there is always a way to download YOTA to your computer. The utility is absolutely free and can be found in the Google Play store.