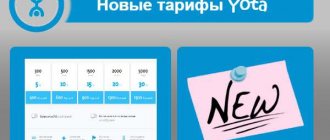
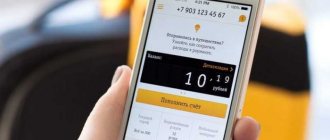
The young provider Yota is confidently expanding into the regions of Russia and recruiting subscribers who actively use the Internet. For new clients, Yota offers unlimited access to the mobile Internet, an unlimited number of SMS and 2000 minutes for an affordable price of 300 rubles per month.
Installing a SIM card from the Eta operator and starting network connections usually takes place automatically when you start the mobile phone for the first time. But if this does not happen, then you will have to set up the Internet and enter operator data manually.
To activate a SIM card, smartphone users need to remove the cover of the gadget manually and insert the card into the slot. When you turn on the phone, the SIM card will be activated.
About company
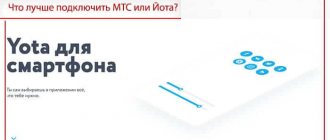
Yota is a major mobile operator. It offers a number of services:
- Internet for modem.
- For tablet.
- Services for smartphone owners.
Advantages of Iota:
- Simple and fair rates.
- Lots of options to choose from.
- Optimal prices.
- High quality communication.
- Availability of stable Internet access.
- Subscribers do not have problems using the services.
- No national roaming. This operator is well suited for people who travel frequently.
Possible access problems
It is not always necessary to configure Yota APN to solve a connection problem. The network on the modem, smartphone and tablet may not connect for a number of reasons:
- Low network signal. The modem and smartphone cannot connect to the Internet because the signal is poor. In this case, it is recommended to change your location. Special antennas will also help enhance reception.
- There is a problem with the parameters. Even after entering all the data, the network may not work, the reason is a settings failure. Also, the user might have forgotten to save the new settings. Then you will have to provide the data again.
- Data transfer is disabled. This is a common user mistake. If you do not enable data transfer, the Internet will not work.
It is not difficult to prepare a new access point on the Yota operator by following the instructions. If the problem is not resolved, it is recommended to contact the company office or call technical support.
APN Settings
To connect to the Internet via a mobile network, APN data is used. Through them, the client is given access to the operator’s resources. It is important that these parameters are present in the device settings; without them, the Internet will not work.
There are two types of settings:
- Automatic. It can be performed when you first log into the network, or the operator sends a special message with parameters.
- Manual. The data is entered directly by the user.
We do everything ourselves
If after connecting the SIM card and rebooting the device nothing happens and the Internet does not work, then you will have to perform a few simple steps to configure it. It should be borne in mind that regardless of the brand of phone, smartphone or tablet on which the software is installed, the setup process will not be different. Also, the software version doesn’t really matter, because you can set up Iota on Android in almost every case.
First of all, you need to do the following manipulations:
- Open the “Settings” menu on your smartphone or tablet.
- Then select “Wireless Networks” and in the new menu click on “More”.
- Next, you need to select the “Mobile network” item, where the Yota access point for Android will be configured.
- In the new menu you need to find the “Access Points (APN)” item.
- There you need to select the “New access point” item.
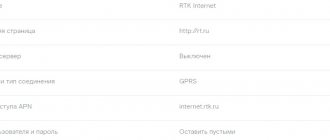
- After this, to configure you will need to fill in the field with the name of the access point and its APN. In the “Access point name” field you need to write the name of the telecom operator in English without quotes, and in the “APN” field - yota.ru or internet.yota.
If you do not fill in the “APN” column, then you will not have access to the World Wide Web, since setting up the Internet on Iota for Android without this will not work. The most interesting thing is that even after performing all the actions, the network may not appear. For this to happen, after setting it up, you need to check the box “Only 2G networks”, and after a minute remove it.
At the same time, it is not at all necessary to do all the settings yourself, since you can set up and connect Yota Internet on an Android phone at any branch and representative office of the telecom operator (or at a third-party service center, but for an additional fee).
Automatic setup
The operator is trying to improve the comfort of using mobile communication services for subscribers. To do this, the company has created a special configuration algorithm in which all parameters are registered automatically.
How the procedure is performed:
- The client buys a SIM card.
- Inserts it into the device and turns on the phone.
- The SIM card is registered on the network.
- It receives automatic settings.
- The subscriber can fully use the Internet in the future.
If automatic configuration of the Yota access point was not performed when entering the network, then you should contact the operator. Ask the specialist to send the parameters to your number again. You will need to confirm their saving in the system and reboot the device.
SIM card activation scheme
Once connected in the office, the Yota SIM card is activated automatically as follows:
- Installed into the device.
- The smartphone or tablet is rebooting.
- After the network icon appears, the Yota application launches (installation required).
- A new profile is registered and authorized.
In the following video, see the capabilities of the Yota application:
If there is no Internet connection, the reason must be determined.
Yota hotspot on Android
How to configure on an Android device? We provide short instructions for users:
- To create an Eta access point, you need to open the settings section.
- In networks, click on the “More” tab.
- Select a mobile network from the available options.
- Go to access points.
- Select the option to create a new entry.
- Specify the name yota.
- APN – internet.yota.
- There is no need to fill in any other fields.
- Click the button to save.
- Turn off the device and turn it on.
- Try going to the World Wide Web.
How to get the settings of the Yota mobile operator access point?
When the Iota SIM card is activated, the subscriber receives a message that contains additional parameters that provide access to unlimited mobile Internet access. It is enough to accept it and save it.
The system will make the necessary settings on any gadget automatically, including setting up APN and registering MMS Yota. However, in some cases (for example, when deleting a service SMS), you will have to enter Eta access parameters to APN and MMS manually.
It is also convenient to activate Yota SIM cards by downloading a mobile application for Android or iOS from any website. Usually this happens automatically through the official application. The first step is to install the Yota application. To do this, you need to access the Internet through another cellular operator or via Wi-Fi. After the first login, the SIM card is assigned a phone number.
To obtain help information about additional settings, how to independently configure APN access with MMS settings and how to manually connect the Internet on your phone, use any available method:
- Call the ETA hotline at 8-800-550-00-07;
- Visit your nearest cell phone point;
- Go to the operator’s official website in the “Support” section;
- Send SMS to 0999 via mobile messaging. The mobile helpline service is provided free of charge.
Setting up high-speed Internet on iPhone
You can manually configure Yota on Apple gadgets as follows:
- Open the menu yourself.
- Find the “Settings” section in the menu items, and in it – “Cellular communications”.
- Then Cellular Data → Settings → Voice & Data.
- Select the channel available in your city - Yota 4G/LTE/3G. The speed of Yota depends on this.
The mobile operator recommends using mobile data distribution in 4G and 5G networks.
Next, you will need to provide information about the Internet APN. This data is entered using manual settings also in the “Settings” menu.
Go sequentially: “Mobile communications” → “Data transfer”. In the “Iota access point” line, enter the name internet.yota . The remaining fields do not need to be filled in.
Reboot the device to save the new machine data on the network.
Iota has released an iOS version of the application for smartphones. After installing it, customers receive information about tariffs, coverage area, can read instructions for use, and also order a Yota SIM card. After connecting to the provider, information about the balance and remainder of the package will already be available.
How to set up mobile Internet on Windows?
Data transmission is distributed by a Wi-Fi network that needs to be turned on. This can be done in the “Communication” section. To enable the option, move the slider to the right.
Then create a wireless network access point for Wi-Fi distribution using the following steps: “Network and wireless communications” → “SIM card” → “APN” → “Add”. In the “Profile name” line, enter Internet Yota , in the “Access point” column – internet.yota .
To save these settings, you need to turn off and turn on the Windows Phone gadget.
Yota network settings on Android
Correct settings for the Iota Internet on an Android smartphone are carried out in the same way as on other phones. The step-by-step procedure is as follows:
- Enable GPRS channel. “Settings” → “More” → “Mobile network” → “Preferred network type”. Select the "WCDMA (preferred)/GSM" option.
- Create an APN point. In the Cellular Networks menu, click Access Points, then Create. In the “Name” line indicate Internet Yota , in the APN - yota and then “Save”.
For the installation to be successful, make sure that the Type APN column is set to supl or default. Restart your smartphone.
Possible problems and solutions
Judging by numerous discussions on the Internet, the only problem with using a SIM card from Yota is that the operator blocks the ability to turn a smartphone or tablet into an access point. There are many solution options, depending on the device model, but the most important condition is to obtain root access to OS elements. Instructions can be found on the website https://4pda.ru. When performing this operation, remember the following:
- The procedure for obtaining superuser rights is not simple on all smartphones;
- in some cases, you can get a critical error that will make further work with the mobile device impossible (the so-called brick), which can only be eliminated through a test point (for this you need to disassemble the phone, and it is advisable to be aware of the order of the actions performed);
- Rutting usually takes a lot of time, up to several hours, and the result is not always positive.
APN Yota for modem
When you connect the modem to a computer or netbook, all settings for gaining access to the global network will be activated automatically. The modem already contains the necessary access point and will allow you to connect immediately after synchronizing with the software.
If for any reason the network settings have been lost, they can be set in the program for monitoring the operation of the modem. The necessary information for high-speed Internet operation will be the same as in the case of connecting on Android.
Setting up a Wi-Fi hotspot for Android
Many users ask how to set up a Yota Wi-Fi access point on Android. This is quite simple to do; the instructions will look like this:
- Open "Settings".
- Go to “Wireless Networks”.
- In the section, select the “Modem Mode” tab.
- Go to “Wi-Fi hotspot”.
- Next, open “Wi-Fi access point settings”.
- Select the “Name” tab and specify the name of the network.
- “Encryption type” set to “WPA-2 PSK”.
- In the “Password” column, enter the access key. The password must be set using upper and lower case letters. The key must also contain numbers, punctuation marks and special characters. This is necessary to prevent third-party users from connecting to the network and stealing traffic.
- O and set the operating range to 2.4 GHz.
- Activate the “Enable wireless network” slider to switch the device to modem mode.
Instructions for setting up the Internet Yota
Let's look in detail at how to connect the Internet in the Moscow region on Iota on different devices.
To achieve this, a number of rules have been developed that will reduce the risk of problems with connecting to the global network:
- You need to register a new SIM card in the region where you bought it.
- Before setting up, you need to check which protocols and communication standards your device supports.
- Before purchasing a tariff package, you should find out the coverage area of the 3rd and 4th generation network. This can be done on the official website of the company.
- When purchasing a separate tariff for a tablet computer, you should register on the company’s official portal, as well as fill out a personal subscriber profile.
- Before you start manually setting up the Iota Internet on any mobile device, you should wait 15-20 minutes after turning on the device. During this time, the device system can independently accept automatic settings.
Before activating the SIM and setting up the Internet, you need to change the Wi-Fi mode to Cellular data.