Specialists from the world-famous company Apple decided that in order to provide users with convenience when using an iPad or iPhone, a specially developed program is simply necessary. This is approximately how the well-known iTunes appeared. This multimedia software is used to synchronize information between PCs and tablet devices. How to do this and what needs to be done? You can find out this information by reading the materials in this review.
How to set up synchronization via iCloud?
iCloud is the name of the original, pre-installed cloud in Apple systems. The cloud is available to all owners of Apple equipment. Each user is given access to the cloud using their Apple ID. In free mode, you can upload up to 5 GB of data to the service. At the same time, the company periodically holds promotions during which it expands the storage for free. Still, more often promotions imply a discount on the purchase of additional space. Cloud capacity can be increased up to 1 TB at discounts.
Through iCloud, all data from your smartphone (music, photos, videos, etc.) can be synchronized with your PC. To activate the function, you will first have to change several settings of the cloud service. But in the future, it will be easier to transfer files both from a smartphone to a PC and in the opposite direction.
Using iCloud is the fastest and fairly simple way to transfer files between devices. During the procedure, the user does not have to set any complex settings. There is no need to even establish a wired connection. With all the advantages of this method, it has one drawback - the space on the cloud is limited. When you actively use your smartphone, the free space is not enough.
Important! To synchronize, your computer and smartphone must have access to the Internet. When the connection is established, you need to first configure the smartphone and then the PC. The methods on Mac OS X and Windows are slightly different, they are both described below.
Setting up iCloud on a smartphone
First, you should pick up your smartphone and do the following:
- Go to the "Settings" section.
- Scroll through the settings page until you find the “iCloud” element. You need to go here by tapping on the tab.
- In the section that appears, you need to select a selection next to the applications from which information should be synchronized.
It is possible to transfer all the data, but you need to take into account the amount of storage on the cloud.
Sync with OS X via iCloud
Now you need to continue setting up synchronization, but on a computer running the OS X operating system. By default, Apple ships the PC with the necessary software.
The user needs:
- Open the Apple menu.
- Go to the "System Settings" section.
- Click on the “iCloud” element.
- In the window that opens, you must provide your account login information.
As soon as you can authorize the service, you will have access to the shared cloud storage. All data from synchronized programs will be displayed here. Already, files are automatically downloaded to your computer. They can be found in the iCloud Drive section - this is a built-in item on the left of the Explorer window. Now you can transfer files in both directions. All data downloaded to the folder will soon appear on the synced iPhone. You can also use the pre-installed iCloud Drive program.
Sync iPhone with Windows
On Windows OS, you can similarly configure synchronization with the iCloud cloud. Moreover, synchronization can be implemented in two ways:
- Via the website. It is enough to open any browser in the system, go to and log in to the site. All files in the web version of the site are available for downloading and uploading, but this will have to be done manually.
- Using the application. The main advantage of this method is that synchronization occurs automatically. The desktop version of iCloud allows you to track free space on the cloud. Directly in the program there is a function for viewing data from downloaded programs. All necessary data is located in the “Storage” section.
How to disable synchronization between iPhones
If calls and other data are automatically synchronized between two iPhones, you can disable the option through the iCloud settings. Procedure:
- Using a browser on a computer or other mobile device, log in to the official iCloud website. To do this, enter your Apple ID account information and password.
- Go to the Contacts tab and remove duplicate data. After this, calls will not be synchronized.
- To stop backing up and transferring other data, turn off automatic synchronization in your device settings.
If necessary, use different Apple ID accounts on two iPhones. After these steps, user data will not be synchronized.
How to set up synchronization via iTunes?
iTunes is often used to connect a smartphone to a computer. The method differs in implementation - both devices are connected via cable. This means that the method does not impose restrictions on the weight of transmitted data, as is the case with the cloud. Files are transferred directly from your computer to your iPhone, and not through a third-party service.
The key disadvantage of this method is that it is only possible to synchronize data from a PC to a phone. Reverse synchronization does not work in this case.
Through iTunes you can stream:
- Application and game data;
- Information from your notebook and calendar;
- Photos, music and videos;
- Tutorials sourced from iTunes U;
- Any text files;
- Favorites from the browser.
Important! An iPhone can only sync with one PC and iTunes on it. If you try to connect to another computer, the procedure will end in failure. The data is erased.
iTunes Instructions:
- Connect your computer to your smartphone via cable.
- Install the application on your PC (relevant for Windows, OS X already has it).
- Go through the application installation process and launch it.
- After a short time, the application will detect the device. You need to select it in the left menu.
- By switching through the thematic tabs on the left, you can add the corresponding files to your smartphone.
- To display the transferred data in the smartphone’s memory, click on the “Synchronize” button.
Why won't my iPhone, iPad or iPod sync with iTunes?
Reason 1: Device malfunctions
First of all, when faced with the problem of synchronizing iTunes and a gadget, you should think about a possible system failure that a regular reboot can fix.
Restart your computer in normal mode, and on your iPhone, hold down the power button until the window shown in the screenshot below appears on the screen, after which you will need to swipe to the right on the “Power Off” item.
Once your device is fully turned on, start it, wait until it boots up completely, and try syncing again.
Reason 2: Outdated version of iTunes
If you think that once you install iTunes on your computer, it will not need updating, then you are mistaken. An outdated version of iTunes is the second most common reason for not being able to sync iPhone iTunes.
All you need to do is check iTunes for updates. And if available updates are detected, you will need to be sure to install them and then restart your computer.
Reason 3: iTunes crashes
You should not exclude the possibility that a serious failure could have occurred on your computer, as a result of which the iTunes program began to work incorrectly.
To fix the problem in this case, you will need to uninstall iTunes, but by doing this completely: uninstall not only the program itself, but also other Apple products installed on your computer.
After completing the removal of iTunes, restart your computer, and then download the iTunes distribution from the official developer website and install it on your computer.
Reason 4: Authorization failure
If the synchronization button is not available to you at all, for example, it is gray, then you can try to re-authorize the computer on which iTunes is used.
To do this, in the top area of iTunes, click on the “Account” tab, and then go to “Authorization” - “Deauthorize this computer”.
After completing this procedure, you can authorize your computer again. To do this, go to the menu item “Account” – “Authorization” – “Authorize this computer”.
In the window that opens, enter the password for your Apple ID. Having entered the password correctly, the system will notify you that the computer has been successfully authorized, after which you should try to synchronize the device again.
Reason 5: Problematic USB cable
If you are trying to synchronize by connecting the device to a computer via a USB cable, then you should suspect that the cord is not working.
Using a non-original cable, you shouldn’t even be surprised that synchronization is not available to you - Apple devices are very sensitive in this regard, and therefore many non-original cables are simply not perceived by gadgets, at best allowing them to charge the battery.
If you are using an original cable, carefully inspect it for any types of damage, both along the entire length of the wire and on the connector itself. If you suspect that a faulty cable is causing the problem, it is better to replace it, for example, by borrowing a whole cable from another Apple device user.
Reason 6: USB port is not working correctly
Although this type of problem is quite rare, it won't cost you anything if you simply reconnect the cable to a different USB port on your computer.
For example, if you are using a desktop computer, connect the cable to the port on the back of the system unit. Also, the device must be connected to the computer directly, without using any intermediaries, for example, USB hubs or ports built into the keyboard.
Reason 7: Serious malfunction of the Apple device
And finally, if you find it difficult to solve the problem of synchronizing your device with your computer, you should try resetting the settings on your gadget.
To do this, open the Settings app and then go to the General section.
Go to the very bottom of the page and open the “Reset” section.
Select "Reset all settings" and then confirm to begin the procedure. If after completing the reset, the situation has not changed, you can try selecting the “Erase content and settings” option in the same menu, which will return the operation of your gadget to the state it was after purchase.
Describe what didn't work for you. Our specialists will try to answer as quickly as possible.
Synchronization with PC via Wi-Fi
Most likely, an active user of the function will soon get tired of connecting a smartphone via cable. There is a way out of this problem - over-the-air synchronization.
How to enable Wi-Fi synchronization:
- Launch the iTunes client on your PC.
- To configure the function, you will have to connect the devices via cable one last time.
- Click on the image of your own iPhone and go to the “Settings” section.
- Select the “Browse” element.
- Browse the page and find the Settings section (located at the bottom of the page).
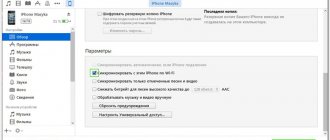
- Make a selection next to “Sync with this iPhone over WiFi.”
- Confirm the action with the “Synchronize” button.
- Now you can disconnect your smartphone from your PC. For synchronization to work, it must be enabled again. The required item is located in the “Settings” section on the “Basic” tab. Here you need to enable the “Synchronization via WiFi” item.
Now you can quickly move data from your computer to your smartphone without connecting it.
How to sync iPhone with computer: all methods
The main feature of iOS is that we are forced to interact with the iTunes program, which is not so easy to love the first time. With the advent of the eleventh version, interaction has become more conceptual. Now, even for a person encountering this application for the first time, it will be much easier to understand the principle of operation. In this article we will look at how to synchronize an iPhone with a computer via i 11.0.2.
When you connect the cable to a device, be it an iPhone, iPad or iPod, iTunes launches on your computer. Which can be used to record data, music, movies, programs onto the device, or to create a backup copy on a PC (saving settings and data on the device).
The first one that opens is the standard tab, which presents all the information about your device. Starting from the firmware that is installed on it, and ending with the date of the last backup.
If we go a little lower, we will see extremely useful settings. Opposite each of the six points there is a place for a tick. I will try to explain which items should be included, which not, and why.
Point 1. “Sync automatically if iPhone is connected”
iTunes automatically starts transferring data from your PC as soon as your iPhone connects to iTunes. The problem may be that with such automatic interaction there is a risk of losing data previously recorded on the device. This can happen if the device was previously synchronized with another PC. Therefore, I would advise not to take risks.
Step 2. “Sync with this iPhone via Wi-Fi”
A convenient feature for those who have Wi-Fi connected and configured on their iPhone, and who do not want to use a USB cable. Although the speed of such synchronization and data transfer is much lower. More details about this here.
In addition to the fact that you need to check the box here, this function also needs to be confirmed on the iPhone. In the “Settings” application - “General” - “Sync.” from iTunes over Wi-Fi" .
Point 3. “Sync only tagged songs and videos”
This means that only the music or video you mark to move will move to your device.
Point 4. “Give preference to standard definition video”
This point needs no comment.
Point 5. “Reduce the bitrate of high-quality songs to...”
This means that you can set the music quality for all the songs that you have in your library, thereby you can save space on your device, but the quality of the songs will deteriorate.
Point 6. “Process music and videos manually”
The latest versions of iTunes have made the process of downloading music and videos to iPhone much easier. You can download music and videos directly to your device, bypassing the iTunes library. Previously, in order to upload videos or music, you had to set the path from the video or music files in iTunes, and then synchronize with the device. Now with this function the process has become easier.
Before you start filling your device with content, we recommend that you first go to Settings (the tab is in the upper left corner) of iTunes and go to the “Store” section.
In this section there are buttons with check marks that are worth paying attention to:
- “Show iTunes in the Cloud purchases.”
- “Sync playback information between devices.”
Both items are responsible for the instant transfer of information purchased from iTunes to the “cloud” (Internet), which can significantly increase the time it takes to synchronize the iPhone with the computer. Therefore, it is up to you to decide whether to tick these boxes or not.
In order to upload a video to an iPhone using the standard Video application, the video format must be mp4 . The standard player does not read other formats. But this only applies to the standard player. There are many video player apps in the Apple Store that support just as many video codec formats. You can download music to your iPhone in the standard application in mp3 format.
Synchronization (setting the path to iTunes on your PC) works like this. You should move the desired folder with music or video to the media library area.
interesting
iOS 15 will monitor your diet
iPad is officially obsolete worldwide
This is the area:
After this, the program communicates with the content you are transferring. And when it ends in the media library tab, the music or video you added will appear in the sections of the same name with a brief description of what you added.
After we have linked the folders with music or video from iTunes, we will move on to synchronizing directly with the device (in this case, the iPhone). To do this, go to the device tab,
where this panel will be visible:
Next, go to the “Movies” or “Music” tab and select what you want to synchronize.
We can directly synchronize everything we have by clicking one checkbox, or we can select individually what we want to transfer. After we have decided what we want to transfer, click the “Apply” button.
Synchronization of the iPhone with the computer via iTunes will begin, and what you noted will be transferred to the device. You can repeat the same thing with music separately, or all in one place, and then synchronize once.
The situation is similar with uploading photos to iPhone. You need to indicate in iTunes the folder where the photos are located, and do all the same steps as described earlier.
Important! If, after synchronizing your iPhone with your computer, you deleted this information on your PC, be it movies, music or photos, then when you resynchronize with the media library on the device, this information will also be lost.
Also, you should not change the location of this information after the initial synchronization of your iPhone with your computer. That is, you should not move a movie from folder to folder. During synchronization, the device will not find the path to the previously selected file and will delete it from the iPhone. Another feature is that if you previously checked the synchronization (checkbox), for example, for music, and later removed it for some reason, when you resynchronize with the device, this music will be deleted.
iTunes Store
By going to the iTunes Store tab, you will find yourself in a store where you can download paid and free games and applications.
The top of the program will display tabs for Music, Movies, Books, etc.
In order to purchase and download all this, you will need an Apple ID. What it is and what it is eaten with is written in previous reviews at this link.
Before purchasing music (it may not be a whole album, but a separate song), you can listen to it. About a minute or so.
App Store
After going to the “App Store” tab, a huge application store will open in front of you. In order to navigate the proposed content, there are the headings “Top Paid Applications” and “Top Free Applications”. There is also a separate list with application topics, ranging from the sections “Business”, “Catalogues”, “Education”, “Games” and ending with utilities and weather. How to install applications from the App Store is described here.
Sync one Apple ID with multiple devices
An important feature of iOS is that if you have more than one device, but let’s say an iPhone and iPad and they are connected to the same Apple ID, then at the time of purchasing a particular program or music, all purchases can be automatically downloaded and be installed on all devices. To enable this feature on iPhone, open “Settings” - “General” - iTunes - and Apple Store .
iTunes Match is a paid music cloud service from Apple that allows you to store your entire music library in iCloud. Plus, iTunes Match lets you access all your music from any device you have with internet access.
Automatic downloads is a feature of the iOS system that allows you to simultaneously download programs and music on several devices where this function is enabled.
How to synchronize data through a third-party program?
There is a way to synchronize not through the original iTunes application, but using a program from a third-party developer. Most often, the popular iFunBox application is used for synchronization. It has gained popularity due to the absence of various restrictions; in particular, iFunBox supports two-way synchronization.
to download iFunBox. The application is easy to work with different systems of different operating systems. It even supports data transfer in any direction from a flash drive. Another useful feature of the program is that you can initiate the installation of applications from the App Store on the iPhone from a PC.
Using an FTP server
You can create an FTP server on your smartphone yourself. With its help, you can manage your files without any problems. Many applications can be connected to such a server. Don’t think that creating a server is something beyond science fiction; it’s quite simple to do:
- First you need to run a special utility.
- Next, you need to click on the red button, this will start the server. As a result, the start button should turn green.
- On your computer you need to select “Client”. Your login and password will be displayed on the screen.
- To disable the server, just click on the green button.
Note! In the settings you can change the directory
How to sync via iTunes with another PC without erasing data?
The standard behavior of a smartphone when connecting it to a new PC is to delete all information. To avoid losing valuable information, you should create a backup before connecting.
Instructions:
- Without connecting your smartphone to iTunes, you should open the Music-iTunes directory on iOS. Now you need to transfer all the content to the new PC. The easiest way to do this is through cloud storage or email.
- Connect your iPhone to a computer with which synchronization has already been established and make a backup. You should launch the iTunes application and click on the “Create a copy now” button.
- Using Explorer on your PC, go to the iTunes-Backups section and make a copy of the backup you just created.
- Via a flash drive, over a local network or the Internet, you should transfer the backup files to the same folder on the new computer.
- You can also copy and transfer iTunes settings from your previous PC to your new one. Settings contains the file com.apple.iTunes.plist.
- When the listed files are copied and placed in similar directories, you can synchronize your iPhone. The new PC will recognize the smartphone as an authorized gadget, and the storage will not be cleared.
To summarize, there are four ways to sync iPhone with PC: iTunes, iCloud, Wi-Fi and iFunBox.
All methods have their pros and cons, so each user should choose the appropriate method for themselves. Found a typo? Select the text and press Ctrl + Enter
What to do if synchronization with your computer fails
You can resolve the problem yourself. Let's look at the most common cases:
- Disconnect the iPhone from the computer and reboot it. After this, you need to connect again and repeat the synchronization process. If this does not help, then you should move on to the next point.
- Check your installed version of iTunes; if it is not the latest, update it. For this:
- Open this program by clicking on its icon
- In the top menu, go to “Help” and find the line “Updates”. In earlier versions of iTunes, "Updates" is located under the "Add-ons" menu item;
- Click on the “Updates” line and then follow the instructions to install the latest version of iTunes on your operating system.
- If this point does not help, then your computer’s anti-virus protection may be blocking the synchronization process. Try disabling your anti-virus protection settings and repeat the data exchange process.
If all of the above options failed to help resolve this failure, then pay attention to the iTunes program itself, it may have frozen or some processes in it have been disrupted. To do this, you need to force it to restart.
If you have problems at this stage, simply restart your computer.
Conditions
Using iTunes wireless synchronization over Wi-Fi, it is convenient to send any movies and programs, and make settings from both devices without any problems. True, the quality of data transmission will be slightly worse than that of a cable connection.
However, ensuring full data exchange between digital devices is possible only if three mandatory conditions are met:
- Connection to one WI FI network;
- Updating the iPhone operating system to at least version 5;
- Availability of a proprietary iTunes application on the PC 6.
Attention: Many gadget owners may have outdated iPhone models (2 or 3G). Firmware upgrade to the specified OS version cannot be performed in them for technical reasons. That is, official WI-FI synchronization will not take place. But as an alternative, it is permissible to use a third-party Wi-Fi Sync application.
How to connect your iPhone to your computer and use iTunes, see the following video:
