How to disassemble a Yota router
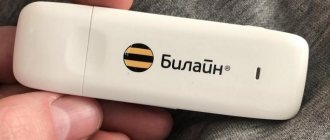
Everyone should know how to disassemble a Yota router. The process does not show any difficulties. Everything will depend on the technical knowledge that the user has. There are a sufficient number of reasons for the event in question, such as preparing a device to connect an external antenna to it to enhance the signal level in the room. The main thing is to strictly follow the sequence of actions, both during disassembly and assembly. Otherwise, you will have to contact specialists and repair the modem.
Authorization in your personal account
The next action that must be performed after connecting the router to the computer is authorization in the user’s personal account. The Yota website is available even when the funds in the account have already run out - open it, go to your profile and connect the tariff if this was not done when concluding an agreement with the provider or the payment period has already expired.
- Go to the official website yota.ru and expand the “Personal Account” list.
- Select the “Modem/Router” authorization option.
- Enter the telephone number, email or account number specified when signing the contract. The password is assigned by the provider, so it must also be specified in the documentation or it can be clarified when contacting technical support.
- If you have not yet registered your device, click the appropriate button to proceed to the next step.
- Click Register New Device for your modem or router.
- Follow the instructions displayed on the screen, entering information about the purchased equipment model, and after logging into your account, check your account and, if necessary, top it up to activate the tariff plan.
Disassembly instructions
In order to disassemble a Yota router, instructions have been created that are followed not only by experts, but also by beginners who want to independently improve the device or otherwise make it.
- Initially, the corresponding USB port is opened from the modem.
- Hold the body of the device with one hand, and carefully push the port itself inward with the other.
- The end part of the router case is connected to the base with special latches. They should be folded carefully to avoid damage. If the fastening elements are damaged, the equipment is replaced for further use for its intended purpose.
- The cover located at the bottom is detached. It is separated from the modem base to access the Internet. There is also a latch at the bottom that is pressed gently. All elements of the router are connected to each other with an additional adhesive mass, which will also have to be disposed of during disassembly.
- When all steps are completed, the board will become available. It is connected to the body using a screwed bolt. It will be enough to unscrew it and bend the latch fragments.
It will not be difficult to separate the board from all other parts of the modem. All further manipulations can be easily performed if you also have certain knowledge.
How to disassemble the Yota 4g lte modem: step-by-step instructions
To disassemble the Iota modem, you will need to perform a series of steps sequentially. A beginner or a specialist who wants to make changes to the device needs to read the instructions:
- First, the user must open the USB port of the modem. To do this, hold the device body with one hand, and gently push the port itself inward with the other.
- The main and end parts are connected using latches, which are carefully folded back. They are fragile, so a person must be as careful as possible. If the fastening elements are damaged, the equipment will become unsuitable for further use.
- After this, you need to disconnect the cover, which is located at the bottom. It is separated from the base of the modem to provide access to the Internet. There is a latch here that you need to press. To connect equipment elements, an adhesive mass is used, which will need to be removed during disassembly. Actions must be careful so that there are no scratches or other damage on the parts.
- In the future, the board will be opened, which is connected to the case with a bolt. You need to unscrew it and also bend the latch parts. After these steps, the board will be separated from all fragments of the modem. It can be easily pulled out.
When the Eta modem is disassembled, you can begin to repair it using the instructions. You can repair the Yota modem yourself using various sources of information.
Do-it-yourself Yota signal amplification
External antennas for the modem aimed at strengthening the LTE signal from Yota are quite expensive, and not everyone can afford the purchase of such a device. Therefore, the antenna for Yota can be made by hand. First of all, you need to determine the location of the nearest base station, as well as the presence or absence of objects along the way that could become an obstacle to the signal.
How to install a Yota 4G LTE modem on a computer: step-by-step instructions
Intensive loading within a populated area reduces the efficiency of the installed antenna several times. Signal amplification at a distance in a densely populated area of a large city can be comparable to the effect observed at a distance of tens of kilometers from the tower for a small village.
Required material and tools
To design a signal amplifier for LTE Internet, you will need the following set of tools:
- soldering iron;
- Screwdriver Set;
- knife;
- glue gun;
- pliers;
- round nose pliers.
As for the necessary materials, the amplifier is made from improvised materials. You will need:
- pot;
- aluminum can;
- antenna cable;
- cardboard, foil;
- copper wire;
- plastic tube;
- plastic bag.
Important! If this is a remote structure that is mounted outdoors, then care must be taken to protect it from adverse weather influences.
Antenna for Eta using an aluminum can
A signal amplifier for Yota 4G can be very simply made from an aluminum can. True, it will be completely useless in conditions of too weak a signal, but for stabilizing the stability of the connection it is an excellent option. This homemade internal antenna for Yota 4G is not suitable for outdoor installation. To make such a design, you need to cut a hole in the side of the drinks can to the size of the modem. The distance from the center of the recess to the bottom of the vessel is 38-40 mm. The exact figure can be calculated using a special calculator, which can be easily found in a search engine. The modem is inserted into the hole and secured with a glue gun.
Reception of the signal from the transmitting center to the amplifier should be carried out with a minimum amount of interference. When setting it up, it is necessary to change the depth of placement of the device in the bank and turn the improvised antenna towards the tower in order to achieve the optimal result. You can check the results by taking speed and ping measurements on the official Iota website or special resources like speedtest.net. The design is connected to a computer or router using a USB extension cable.
Pseudosatellite
The design of the pseudosatellite is very similar to the can design, but its advantage is a larger reflective surface area; in addition, it is used both indoors and outdoors. The best alternative is a cardboard box, stainless steel pan, aluminum bowl or metal grate.
The signal amplifier for the Yota 4G modem is mounted using screws that are inserted into drilled holes. The modem is placed perpendicular to the ground, as well as parallel to the side parts of the reflector. If the structure is mounted outdoors, the modem should be protected with polyethylene or a plastic tube. A correctly directed pseudosatellite significantly enhances 4G communication.
Antenna Kharchenko
The Kharchenko antenna is reliable and at the same time very easy to manufacture. In essence, it is a thick copper wire bent into a figure eight. Such a blank is placed on top of a reflector with a metallized surface. During manufacturing, it is very important to strictly maintain the dimensions of the figure eight and set the broadcast frequency in order to reduce possible interference to a minimum. The cable is connected to the modem through a connector. If such a device is not available, then you need to disassemble the modem and then solder the cable to the board.
Using a reflector
To amplify the signal, you can use special devices - reflectors. To connect such devices, you must: install a modem into the USB connector that is not designed to connect an external antenna; connect the USB cable to your laptop or computer. The principle of operation of the reflector is that the modem installed at the focus of the device receives the reflected signals. The amplification effect will be very significant, but the signal will stabilize and then become a little more powerful.
How to disassemble a Yota many wi-fi router
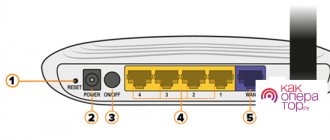
To troubleshoot this operator's equipment, you need to disassemble the router. To do this, separate the part of the case where the power button is located. The actions are carried out carefully, since the latches can be damaged by sudden movements. In addition, the user must ensure that the button does not move out of place. This may result in the device not turning on.
Therefore, when closing this part, you will need to monitor the location of the element. The button must be in its place. The latch is installed in the middle of the end part, which is attached back by carefully pressing and holding the power button.
When the end area is accessible, you need to open the USB port and carefully pull it to the side. After this, the internal components of the equipment, which include the battery, will become visible. Further actions depend on the degree of damage, which you can fix yourself using the instructions.
To ensure that the device components do not fail, you must carefully study the sequence of actions. If the user has doubts about his own abilities, then he needs to contact specialists who will repair the device quickly and without causing damage.
Source


