The number of base stations of cellular operators is constantly expanding. In accordance with this, the coverage area expands, communication penetrates even the most remote corners. However, there are places where the level of coverage remains weak - in such conditions, voice communication is difficult and access to the Internet is almost impossible. The same applies to the new operator Yota, which provides high-speed Internet Yota using LTE technology. In some areas remote from the city limits, the access speed drops to zero - subscribers have to somehow solve the problem of disgusting coverage. In this review we will try to solve this problem using homemade antennas for Yota.
Why do you need an external antenna?
An external antenna for Yota allows you to strengthen a weak signal coming from a nearby base station and increase the speed of network access. The use of these antennas is relevant for those who live in remote areas. We can distinguish two types of antennas :
- Factory made;
- Hand made.
The first are good because they are manufactured using precision equipment and can provide a good gain, reaching up to 15-20 dB. But the cost of such antennas sometimes exceeds all reasonable limits, although they are not anything complicated - a banal array and a receiving part in focus. In this regard, many technically advanced subscribers prefer to make Yota antennas with their own hands.
A self-made antenna will be able to strengthen the signal from the base station and make reception more stable. In some cases, modems begin to work even in places where Yota reception was not observed without the use of antennas. But in the process of creating an antenna, one small difficulty will lie in wait for us - most modems do not have connectors for external antennas. Therefore, you will have to solder directly to the printed circuit board.
What is an amplifier for?
If the Yota signal level is low, you need to use an external antenna, which will help increase the modem signal and make it more stable. To increase the Yota signal level, the use of antennas is considered an effective way. But there are situations when it is enough to place the connected Yota modem on the street.
You can buy an amplifier at a communication store. Branded equipment for these purposes costs a lot of money and subscribers do not always have this amount available. If it is not possible to purchase an amplifier, you can make it yourself. Moreover, this can be done using improvised means. Do-it-yourself Yota signal amplification is much more effective than something purchased in a store.
Required material and tools
When designing antennas for LTE from Yota, you need to arm yourself with tools. Here we will need a soldering iron, a set of screwdrivers, pliers and round nose pliers, a sharp knife and a glue gun. We take out the remaining tools as needed.
From the materials needed to make the antennas for Yota described in our review, we will need a high-frequency antenna cable, a beer can (you can drink the contents, dreaming of a good reception), copper wire, a plastic tube (the diameter of the modem itself), a plastic bag, a ready-made parabolic satellite dish (without receiving converter), cardboard, foil and an old pan (colander, basin).
A good antenna for a 4G LTE modem from Yota is the Kharchenko antenna . It is a “figure eight” of copper wire placed inside a small metal or metallized reflector (for example, made of foil PCB). When making such an antenna, you need to accurately maintain the dimensions of the figure eight, using reference information from the Internet. You also need to find out what frequency the broadcast is on (LTE has many channels).
The disadvantage of the Kharchenko antenna is that it requires connecting a cable to a connector on the modem case, which may not be there - you will have to solder directly to the printed circuit board, disassembling its case. The same applies to all other antennas located outdoors, separate from the modems.
But there are also advantages - antennas of this type can easily be raised to great heights, where the signal level is much better.
fairly effective antenna can be assembled from an old 2-3 liter saucepan, an aluminum basin or from a cardboard box covered with foil. Having chosen a suitable design, we place the modem inside it and try to orient the antenna towards the nearest base station.
If necessary, you can change the orientation of the modem inside our makeshift reflector - closer or further from its back wall. We make fasteners using scrap materials and a glue gun. The main advantage of an antenna made from a pan or a box covered with foil is that we do not need to mock the modem itself by soldering the antenna cable to it. You just need to make sure that the USB cable you use is not too long to avoid losses.
If the antenna will be mounted outdoors, the modem can be wrapped in plastic. A regular satellite dish will also help us catch and amplify the signal from the nearest base station. The design is simple - we place the LTE modem from Yota in a plastic tube and attach it to the antenna focus (where the converter is located). After this, we point the antenna towards the base station and observe the gain. If necessary, we move the modem with the reflector in one direction or another, achieving the maximum signal level.
Is it possible to build an antenna for Yota with an amplifier ? It will be very difficult to do this at home, since we need to not only receive, but also transmit the signal - two-way amplification is required. Therefore, the vast majority of antennas for Yota operate on the principle of passive signal amplification.
How to strengthen the signal of a Yota modem if the Internet does not work well
Strengthening the 4G LTE is not a difficult task, and you can cope with this by installing an additional antenna that will work as an amplifier. After all, the power of the ETA antenna built into the router or modem may not be enough due to various conditions that adversely affect the quality of communication.
To improve the quality of the Internet on Yota you can:
- Buy an Eta amplifier.
- Make an antenna to boost the signal with your own hands.
- Read our review of Yota routers and purchase a new, more powerful device.
The first option does not cause any difficulties, except for material costs, so we will dwell in more detail on the second method.
External antenna for Yota made of aluminum can
An aluminum beer can makes a decent antenna. The contents can be poured into a glass and used for its intended purpose, while simultaneously doing development work. Next, we cut off the top part of the can, place it horizontally on the table and make a cut in the side wall - 38-40 mm from the bottom of the can. We insert the modem there and secure it with a glue gun. We connect to the computer and monitor the signal strength and connection speed.
In addition to beer cans, you can use cans from any canned food. The recommended jar depth is 15-18 cm.
How to see Iota signal level
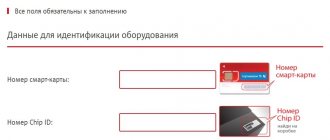
Checking the modem signal is carried out by visiting the device’s service page, which can be found at 10.0.0.1 . On this page you can view the Yota signal level, monitor changes in connection speed and the efficiency of your homemade amplifier.
By going to the specified address, you can see a plate with various characteristics of the modem. Particular attention should be paid to two indicators RSPR and SINR . The first signifies the signal strength level. The closer this indicator is to zero, the stronger and more powerful the signal is picked up by the device.
The second means the ratio of the signal level to the noise level. At zero, these levels will be equal, a positive value of the parameter will indicate that the signal level exceeds the noise level, and a negative value will indicate exactly the opposite.
Thus, it turns out that the higher the value of these indicators, the better the signal will be.
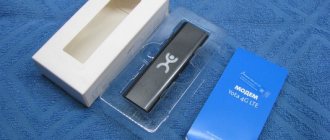
Antenna made by Yota LTE 7m
This device is universal. This external Yota antenna can work with almost any modern cellular network. The modem is integrated into it. A SIM card from the operator of the same name is initially installed in its slot, but if you wish, you can install a SIM card from any other company specializing in providing wireless communication services.
So, this communication solution supports 2G/GSM, 3G/HSPA and 4G/LTE standards. Accordingly, the transmission speed can be a “modest” 500 kbit/s in the first case, 42 Mbit/s in the second and a “fantastic” 150 Mbit/s in the third.
The type of connection to a PC or router is wired USB. To implement communication, this solution is equipped with a special interface cable 7 m long.
This antenna model supports MIMO technology. That is, essentially this device consists of two separate and independent components. One of them maximizes the received signal along the vertical plane, and the second - along the horizontal plane. As a result, the maximum quality of connection to the World Wide Web is ensured with minimal investment.
Self-amplification of the signal
The initial steps for making a device with your own hands are aimed at establishing the most advantageous position of the modem used to access the Internet. Here everything is achieved experimentally.
After turning on the modem and placing it in a certain place, a program is launched that allows you to determine the dynamic speed of the Internet. In this design, one moves around the apartment to find the most advantageous space. This may be a separate room with no furniture or other obstacles. In certain situations, the device must be installed outside the room - balcony, outside the window, etc. This is where the quality of the wireless network reaches its maximum limit. The last manipulations are carried out only when the desired result cannot be achieved inside the apartment.
If the modem is installed outside a window, additional protection is created for it. After all, work can be negatively affected by weather conditions, strong winds and all that. In addition, there is a situation where the modem quickly fails.
According to experts, nothing better is achieved from such actions. Only the device itself fails and malfunctions over a short period of time. In practical use, the modem begins to function better and provide excellent qualities.
Characteristics of a good antenna
A good external antenna is the key to a high-quality and stable signal. It is also desirable that it does not take up much space; it does not need to be constantly moved around the apartment and adjusted. All parts must be manufactured in accordance with specifications and standards, as some parts have a limited service life.
Experts advise purchasing an antenna from the Yota operator in branded showrooms in order to receive a guarantee, and if necessary, you have the opportunity to call the support service or call a technician to your home.
DIY antenna assembly for a 4G modem
You must first determine how the antenna will be connected to the WiFi modem. There are many types of this device available in the market. It is recommended to choose a device with antenna connectors, which are present in most models. The most popular connectors are TS9 or CRC9. They differ in diameter, the larger of which is the TS9.
An SMA series connector is installed at the end of the coaxial cable. The middle contact is soldered, the outer braid must be fixed with a metal tube. Then the modem, pigtail and wire are connected. Some people solder the antenna directly to the connector, but this method is unreliable.
There are modems that do not have connectors on the outside. In this case, carefully pry up the top cover with a knife and remove it. The most important thing is not to damage the internal antenna located underneath. Next, having secured the USB connector with one hand, remove the modem case with the other.
Another way to connect an antenna to a connectorless modem is to create a wireless channel by amplifying an electromagnetic wave. Electrodes are soldered onto the output ends of the cable, which are two copper foil plates 7.5 cm long and 4.5 and 2.7 cm wide. The wide plate is bent to the shape of the modem and soldered to the central core of the wire, and a smaller plate is made into radar shape and connected to the braid. Contact of plates is not allowed. The electrodes must be directed to the built-in antennas of the modem.
How to choose and not be deceived
The main parameter for antennas is gain. There is a special unit of measurement - isotropic decibel (dBi). So, if someone is trying to sell an antenna for Yota in the form of a small box and at the same time guarantees a gain of almost 80 dBi, then this is a clear deception. As an example, let's imagine an antenna with a small gain of 25-30 dBi with an operating range of 2500-2700 MHz, so its size will be almost 2x2 meters. The laws of physics are difficult to ignore.
Without going into details, we can say with confidence that among the available products there are no antennas that amplify the signal by more than 20-25 dBi. All proposals from “storytellers”-sellers about special signal amplification technologies are pure bluff. After all, the buyer will not be able to verify the veracity of these assurances, especially within the street market or online. Especially if he doesn’t understand the technical features of the amplification process well.
If you spend some time online, you can choose Chinese models. In some cases, factory-made devices may turn out to be of quite decent quality. However, you should carefully study the reviews of specific users of these models (owners of Yota modems), but not on sites with recommendations, where you can stumble upon purchased (fake) reviews, but on thematic forums dedicated specifically to antennas for Yota.
It’s also worth mentioning the warranty period. When purchasing products on the market or on little-known store sites, the guarantee is very conditional. Problems may arise when purchasing online and on foreign Internet portals. It can be extremely difficult to prove anything. In the case when a product is purchased in a normal store, it is necessary to ensure that all documents are prepared properly: with dates, the signature of the sales consultant and the company’s seal.
Application of panel antennas for operation in 4G networks
Today the market offers many antennas, the design of which varies significantly depending on parameters such as radiation pattern and operating frequency range. Regarding the first: the opening angle of the main lobe varies from 30 to 90 degrees, for cellular antennas - usually from 60 to 75 degrees. The tilt angle also contributes to the directivity, which can be either mechanically adjustable (vertical plane) or stationary, set by the manufacturer (horizontal plane).
The second parameter just determines the frequency selectivity of the antenna (as mentioned earlier) and for 4G networks the range can be very different (from 800 MHz and above), some cell towers operate at several values at once, for example, for LTE it can be 700 MHz lines , 800 MHz, 2600 MHz. If 3G is required, the 2100 MHz band is additionally used. Naturally, this requires separation both in the planes of polarization and spatial, as well as different directions. This will inevitably lead to a huge variety of devices, which can be observed on the market.
DIY Kharchenko antenna for 4g modem
The Kharchenko antenna, or horizontal figure eight, is the easiest to manufacture, and is also quite effective in increasing the power of the received signal.
Kharchenko's design
For self-production, the following basic materials are required:
- A piece of copper wire with a diameter of 2-2.5 mm;
- A sheet of thin metal or foil-coated PCB measuring 120x120 mm;
- A piece of thin coaxial cable with a characteristic impedance of 50-75 Ohms.
Kharchenko’s homemade antenna consists of two elements:
- Vibrator;
- Reflector.
Making a vibrator
The vibrator is the main element for receiving and transmitting electromagnetic waves. Its dimensions must exactly match the operating frequency.
The reflector (reflector) shapes the directional properties of the antenna, increasing the gain in the receiving direction and reducing the level of interference from other directions.
The dimensions of the antenna elements for 4G Internet depend on the signal frequency. As an example, we can consider a device operating at an average frequency of 2600 Hz. The wavelength is 115 mm. Thus, the side of the square, taking into account the thickness of the wire, should be 28.9 mm. The inner sides are made somewhat shorter so that the corners of the squares do not touch and form a gap for connecting the cable.
Making a reflector
For the reflector, a sheet of conductive material is taken (this is steel or one-sided foil-coated PCB) measuring 120x120 mm. It is preferable to take foil material, since copper has lower resistivity, and a DIY antenna for a modem will have better performance characteristics.
A hole is drilled strictly in the middle of the reflector according to the diameter of the coaxial cable (usually 4-6 mm). Holes are drilled in the corners closer to the edges for fastening the assembled structure to a mast or surface.
A plastic sleeve for attaching the vibrator is attached coaxially to the hole using hot glue or another method. The height of the sleeve should be 13 mm.
4G antenna assembly
A coaxial cable is soldered to the middle part of the vibrator, the central core to one side, the braid to the other. The second end of the cable is threaded into the hole in the sleeve and reflector. Next, the vibrator is glued with the middle part to the sleeve.
The length of the cable depends on the expected distance between the antenna and the modem. At the second end of the cable, you need to solder a connector corresponding to the mating part of the USB modem. For example, a Megafon or Beeline USB modem uses MS156 type connectors. Router or router connectors are usually made using the SMA standard.
SMA and MS156 connectors
Even the most powerful antenna will not improve the quality of reception or provide a stable connection if it is not directed exactly towards the transmitting equipment.
Device creation process
First you need to create a vibrator. Size and symmetry are of paramount importance. To give maximum symmetry to the installation, it is necessary to make all the edges of the squares absolutely identical. This can be achieved in two ways:
- Be sure to pre-mark the wire with a marker;
- apply a control template of a certain length.
In the first method, pliers are placed on the wire marking and the latter is bent at an angle of 90 degrees to control the bend along the square.
In the second case, it is necessary to separate a part of the wire on a scale slightly larger in size than the sides of the square, and then sharpen it with a file or coarse sandpaper to the control size. The completed template, together with the wire, is placed in the jaws of the pliers so that one end, simultaneously with the wire, rests against a solid plane, and the other converges with the output plane of the pliers. Also, to guarantee the evenness of the surfaces, you can make calculations online using the Kharchenko antenna calculator specially designed for such purposes.
After this, the vibrator is bent with manual effort, using a control template for each edge of the square. After the wire is completely bent, the remaining part is removed with side cutters. A verification measurement of the faces takes place, which ensures symmetry in the position of each side in the same plane.
Connection and signal transmission options
In the middle of the bottle cap, a hole is drilled with a drill or cut with a knife, slightly smaller than the diameter of the cable (to make the structure more stable). The end of the wire is inserted. After this, it is disassembled so that the central core with a place for tinning and soldering is exposed.
The wires are connected with any soldering iron (you can even use a homemade one). When soldering is completed, the cover is pulled onto the vibrator, moving along the cable.
The reliability of the connection can be increased by using glue and making small cuts in the plastic plug.
The DVD disc is inserted into the cable through the central hole and glued to the end of the plug. In this installation, the reflector and vibrator do not make electrical contact with each other.
The antenna vibrator assembled in this way, together with the reflector, guarantees good reception of the electromagnetic signal wave without contact from the transmitter and redirects it along the coaxial wire. Now all that remains is to redirect it to the modem.
Redirecting the 4G signal to the modem can be resolved in two ways:
- make a direct connection of the coaxial wire cables directly to the modem board;
- use the antenna made by Kharchenko as an intermediate amplification link and use it to transmit the received signal to the integrated antenna of the receiving device.
The first method, in turn, involves two solutions depending on whether the modem has a special connector for connecting to an external antenna or whether it is missing.
If there is a connector, this will save the amateur craftsman from solving additional problems. Then you only need to solder the ends of the coaxial wire to the second part of the connector and connect the antenna through it.
If there is no connector, then to organize a direct connection to the modem board you will need not only disassembling the coaxial cable, but also soldering the core conductor with the screen layer to the microcircuit tracks. This is a very complex and delicate technical work that must be performed accurately, safely and in full compliance with technology. Otherwise, the modem will fail, and then you will have to buy it again.
We advise you to study Phase imbalance
Send data wirelessly
Anyone can cope with this task. It will be necessary to solder electrodes to the output points of the coaxial wire - they will become a generator unit and will emit a generally accepted and intense magnetoelectric wave directly to the modem antenna. You need to make one turn with any thread along the outer contour of the modem body and measure its size with a ruler. After this, you need to add 5 mm and cut a couple of strips of 75 mm in length and 45 and 27 in width from foil or a tin can.
The wide part for the core core needs to be bent according to the configuration of the modem, and for the screen - in a semicircle, and then soldered to the Kharchenko antenna.
The electrodes need to be separated a short distance and directed in such a way that they produce and address the received magnetoelectric signal to the integrated antenna of the modem. Their best location can be found experimentally.
Now everything is ready. All that remains is to insert the 4G modem into the laptop connector, and then check the quality of the network.
Pseudosatellite
This design is made in rural areas, villages from household materials:
- colander, metal and aluminum bowls, pans, lids;
- foil paper (attached to a piece of cardboard);
- metal things (umbrella, grille);
- USB extension cable;
- fastening.
2 holes are drilled in the wall, lined with foil material, secured using a USB cord socket so that the modem is located in the center of the workpiece. Attached to the selected location.
Reasons for a weak signal
A low Internet connection speed causes certain difficulties - large files cannot be sent quickly, movies and games cannot be downloaded properly, and there is no way to quickly find the necessary information. There can be many reasons why your network speed is low and you need to purchase an amplifier for the Yota modem. Experts highlight the main ones:
- Your network is under heavy load.
- There is a long distance from the modem to the transmitter.
- There is no coverage area for this operator in your region.
- There is an obstacle inside the room that blocks the normal signal.
- A large number of devices are simultaneously connected in an apartment or house.
- Your modem does not have the required power.
Tips for speed
While using the Yota modem to access the Internet, paying attention to external interference, you can come up with certain tips to get the maximum speed of the wireless network:
- The device may be affected by third-party equipment, which you should get rid of.
- All devices not currently in use are disconnected from the modem.
- Parallel connection of identical router models.
- The room contains a minimum amount of furniture and obstacles.
- Entering a password to access the wireless network. Then third parties will not be able to “get in” and could degrade the quality of communication.
All these points will allow users, if the signal level is disrupted in the direction of its reduction, to achieve better results for surfing the Internet on their own.
Checking signal strength
The efficiency of a purchased or home-made signal amplifier can only be measured using a special test. It is recommended to use at least two speed checking services:
- Third party resource. It could be, for example, the site www.2ip.ru. The speed in this case will be measured taking into account the selected tariff;
- Metrica The official website of the Internet provider Yota has its own metric service. Its main feature is that the absolute speed of the device is measured without taking into account tariff restrictions.
By comparing the test results before and after connecting the amplifier, you can determine the effectiveness of the equipment.
Internet signal booster for Yota modem - how to strengthen the Yota 4G Internet signal
Yota is a cellular and mobile communications operator that is actively developing in the domestic market. Many users have long traded their usual communication providers for this company: it offers the most favorable tariffs. Subscribers also note that the company’s service method suits them better. Sometimes they have problems due to low connection speed. If you don’t know how to boost the signal of a yota 4g lte modem with your own hands, be sure to read the article. You can easily do this yourself.
Common Causes of a Weak Eta Signal
Low Internet speed is a problem that can ruin anyone’s mood. This is especially difficult for those who are used to watching films in high quality. If you feel that you need an Internet signal booster for the Iota modem, you need to determine the causes of this problem. They may be in:
- High network load.
- Presence of obstacles inside the apartment.
- Long distance to the transmitter.
- Features of the local terrain.
- Lack of coverage in the region.
- Lots of connected devices.
There are many reasons why data transfer speeds are low at home. To establish it, you need to determine the exact factor. Be sure to look through the apartment; you may be able to easily determine what is causing the discomfort. If necessary, purchase a more powerful modem.
The simplest and most accessible methods to increase signal strength
If you don’t know how to improve the signal of a yota modem, be sure to read the thematic forums. They usually describe a lot of tips to increase the speed of data reception. To improve this setting, it is recommended:
- Remove electronics near the modem.
- Place the device on a high free place, equally distant from all corners of the apartment.
- Disconnect all devices from the network.
- Set a password for the Internet.
- Connect additional routers.
How to strengthen the signal of a Yota 4G LTE modem with your own hands?
You can create stronger communication power with your own hands. To do this, just use an antenna that you can assemble at home. In turn, the LTE amplifier will increase the signal even far from the broadcaster. You can purchase a ready-made device, which is sold on the Internet and specialized stores. However, a homemade one will not cost very much, and it works the same. Place the modem under the antenna and enjoy a faster connection. Experiment to find the most convenient and advantageous location.
You can create an antenna yourself from an ordinary aluminum tin can. It must be thoroughly cleaned, and then carefully attached to a wooden or metal pole. Place it as high above the house as possible. Attach the device to the modem so it receives amplified data.
How to connect and configure?
Instructions for Zyxel routers can be viewed in the following video:
So, the router has been selected, now you need to connect the Iota modem to it. Plug it into a free USB port and you can proceed to the settings.
Log in to the router's web panel. To do this, enter the IP of the device in the address bar (this is 192.168.0.1 or 192.168.1.1) and log in (if you have not changed your login and password, most likely it is admin/admin).
Next we will look at the models. The main thing we need to know:
- APN – yota.ru;
- Number – *99#;
- Login and password are missing.
TP-Link
On the “Advanced Settings” tab, go to the “Network” section, then to “3G/4G Settings”. Enter connection information, click “Connect” and “Save”.
D-Link
These models automatically configure the connection. We only need to find the “3G/LTE modem” section and in the “Options” item, check the box for automatic connection.
Zyxel
It’s even simpler here - just insert the wireless device into a free port, and it will work. But if necessary, there is a “3G/4G” section in the web interface.
ASUS
Go to settings and move to the “USB application” section. On the right we look for the item “3G/4G.
At the line “Enable USB modem” o. Fill in the connection information and click “Apply”.
WiFi
In addition, you need to configure an access point. This is also done in the router's web interface. Each manufacturer has different names for the sections responsible for setting up Wi-Fi: Wireless Mode, Access Point Settings, Wireless Setting.
There you need to set the network name (SSID), set a password for it, and select an operating mode. If you already used a router before connecting the modem, then the access point is already configured on it.
Receiving and sending information in wireless communication lines
In a radio channel, useful information travels from the transmitter to the receiver in the form of electromagnetic waves. In this case, the main parameters of the signal, on which the quality of communication directly depends, will be:
- power;
- frequency (closely related to channel capacity);
- type of modulation used.
In order to ensure good communication quality, it is not enough to simply increase the value of one or all of the above indicators. This is due to the fact that there are certain standards for electromagnetic safety. Therefore, to increase the speed of transmission of data packets within a wireless communication line, various optimizing approaches are used. One of them is a technology that uses a MIMO 3G/4G LTE antenna with resonators that have a low correlation coefficient with each other.
Important! Correlation in its simplest sense is the degree of connection between two quantities under consideration. For example, the amplitude of a local radio signal will correlate with the amount of moisture in the air along its path, but not with the water level in the ocean
Passing through space, an electromagnetic wave will certainly encounter obstacles made of various materials along its path, experiencing partial or complete reflection and absorption. In this case, the following effects begin to be observed in the channel:
- Intersymbol interference is the superposition of one or more symbols on each other due to multipath propagation of a signal.
- Frequency selectivity. In the simplest case, the selectivity of the receiver at a given frequency (frequencies).
Thanks to modern and efficient signal processing methods embedded in the mathematical model, using MIMO technology, you can easily separate useful information from emerging artifacts (including noise).
MIMO technology
As mentioned above, the main issues when receiving and transmitting data via a radio channel are ensuring noise immunity and high quality of final processing. To do this, cellular operators use technology in which it is believed that the 4G LTE MIMO antenna is the best available implementation (Multiple Input Multiple Output). Its essence lies in the fact that the exchange of information in the form of electromagnetic waves is carried out not by one pair of transceivers, but by a whole set
At the same time, it is important to ensure a low correlation coefficient between them, as well as double (so-called 2x2) polarization
Healthy! In the simplest case, wave polarization is a characteristic that describes the behavior of the amplitude vector (including its direction); it can be longitudinal, transverse or circular.
From a mathematical point of view, the essence of 4G MIMO technology can be revealed as follows. Let there be N transmitting and M receiving antenna devices, then the properties of each channel (dependence on the features of multipath signal propagation) can be described by specifying a non-stationary (time-varying) complex coefficient hnm, which, when combined, form the so-called channel matrix H. Then, if you have a wave vector of useful data s and wave vector of noise n, then the direction from which the received signal r came can be expressed through the simple formula r = H*s + n.
Healthy! Wave vector is a quantity that determines the direction of wave propagation.